What is social engineering?
The term “social engineering” refers to a wide range of malicious activities carried out through human interactions.
It employs psychological manipulation to dupe users into making security errors or disclosing sensitive information.
Social engineering attacks are carried out in a series of steps. To carry out the attack, a perpetrator first investigates the intended victim to gather necessary background information, such as potential points of entry and weak security protocols.
The attacker then attempts to gain the victim’s trust and provide stimuli for subsequent actions that violate security protocols, such as disclosing sensitive information or granting access to critical resources.

Building the infrastructure
To build an easy infrastructure we’d need the following:
- Domain registrar account (GoDaddy, Namecheap, etc)
- Cloudflare account
- AWS, Digital Ocean or other VPS provider
- Mailgun account
Tools to be used:
Why were these tools picked?
- FiercePhish was picked as it’s easy to deploy and automates installation of Postfix, SMTP and generates the DNS records (the DNS records are not needed in this case as Mailgun is going to be used).
- EvilGinx2 was picked as it can be used to bypass Two Factor Authentication (2FA) by capturing the authentication tokens.
- Mailgun was picked as it can be integrated with Fiercephish and can be used not to disclose the VPS IP (in Cloudflare you’d have to point your domain to Fiercephish server to the VPS and in case of lookups the real IP would be disclosed.). Mailgun has a free tier of 5000 emails for 3 months, afterwards a charge of 35$ per month is made.
Setting up Cloudflare, Mailgun and DNS records
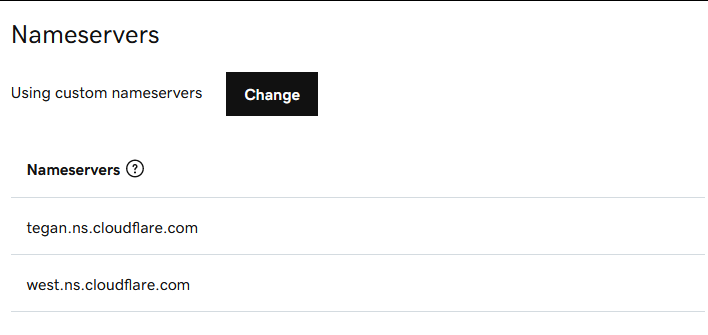
After buying the domain and creating the Cloudflare account, add the newly bought domain to Cloudflare. To do so edit the DNS settings of your domain to point to Cloudflare’s DNS.

Log in to Mailgun and go to Sending → Domains and add a new domain. Mailgun will generate a few DNS records you’ll have to add to Cloudflare.

To add the records to Cloudflare click on your domain and go to DNS → Add Record. Additionally, create two A records for www and for your domain pointing to your VPS.

Installing Fierce Phish – VPS 1
Installing FiercePhish is straightforward. It’s needed just to follow the instructions from the Github page.
curl https://raw.githubusercontent.com/Raikia/FiercePhish/master/install.sh | bashThe above command will pull a config file. Edit the file to suit your needs.

Save the config file, re-run the CURL command and wait for 5 to 10 minutes for FiercePhish to be installed.

Note that Fierce Phish also generates DNS records, but since we’ll be using Mailgun there is no need to add them.
An extra option needs to be set so we can start sending emails. First, login into Fierce Phish and go to Settings → Configuration and choose Mailgun instead of SMTP in the Email Settings field and fill in the information required (you can grab the API key from Mailgun by going to Dashboard → Choose your domain → click on API and then choose an option from there. You should then see the API Key.). Don’t forget to save the settings.

Installing EvilGinx2 – VPS 2
SSH into your VPS. The first thing to edit is the resolv.conf file.
We’ll edit the nameserver to one of our choice (i used 8.8.8.8 – google).

The next step is stopping systemd-resolved service.

The above two steps are mandatory as EvilGinx has its own built-in DNS server and it would be in conflict with systemd if not stopped. Resolv.conf file needs to be changed in order to switch the DNS resolver, as systemd would be stopped.
Update the repositories and install git, make and golang.
apt-get update && apt-get install git make golang -yGo to Cloudflare, choose your domain and go to SSL/TLS section and enable either Full or Full (strict) encryption.
Clone the Github repository and install it.
git clone https://github.com/kgretzky/evilginx2.git
cd evilginx2
make
make install
Execute EvilGinx. If everything is properly configured there shouldn’t be any errors.

Configure the IP and domain.
config domain <domain>
config ip <ip of VPS>
Choose a phishlet of your liking (i chose Linkedin).
phishlets hostname linkedin <domain>
Enable the phishlet.

Let’s create and configure the lures. These are extra options that help us in making the attack seem more legit (Ex: Setting /login as a prefix instead of a randomly generated string).

By visiting the generated URL we’ll be presented the LinkedIn login page.

If a valid email is inserted, a 2FA page would be presented requesting a PIN.

To view credentials use the sessions command.

Even though it might seem complicated at first sight, deploying the infrastructure shouldn’t take more than 1 hour.
如有侵权请联系:admin#unsafe.sh