环境准备
安装Docke
curl -fsSL https://get.docker.com | bash -s docker --mirror Aliyun安装DIVE
wget https://github.com/wagoodman/dive/releases/download/v0.9.2/dive_0.9.2_linux_amd64.debsudo apt install ./dive_0.9.2_linux_amd64.deb
镜像分析
sudo docker pull ubuntusudo docker save -o ubuntu.tar ubuntu
Config 的值为镜像配置文件的json文件,对应825d55fb6340083b06e69e02e823a02918f3ffb575ed2a87026d4645a7fd9e1b.json;
RepoTages 为镜像的名称和标签;
Layers 包含了镜像的有哪些层,每一个元素代表一个层目录,由此可见ubuntu只含有一个层,对应
8f7ee37aa1d53dcded9b5c22b0a57d8bb8d35d9f42273651668e7aca23bd7581/layer.tar
[{"Config": "825d55fb6340083b06e69e02e823a02918f3ffb575ed2a87026d4645a7fd9e1b.json","RepoTags": ["ubuntu:latest"],"Layers": ["8f7ee37aa1d53dcded9b5c22b0a57d8bb8d35d9f42273651668e7aca23bd7581/layer.tar"]}]
接着查看
825d55fb6340083b06e69e02e823a02918f3ffb575ed2a87026d4645a7fd9e1b.json的内容,该文件记录了镜像的关键信息,
https://github.com/moby/moby/blob/master/image/spec/v1.2.md上述链接简述了每一个字段的意义,如config包含了镜像生成容器时基础的执行参数,Cmd为容器入口点的默认参数 等。
我们主要关注的是 history 列表,它列出了镜像中的每一层,Docker 镜像由这些层堆叠而成。Dockerfile 中几乎每条命令都会变成一个层,描述该命令对镜像所做的更改。在ubuntu镜像中,可以看到history列表实际上有两层, 但是其中一层的empty_layer 标记为 true,这代表着本次操作不改变文件系统镜像,不额外生成新的层,所以ubuntu镜像实际上只有一层。
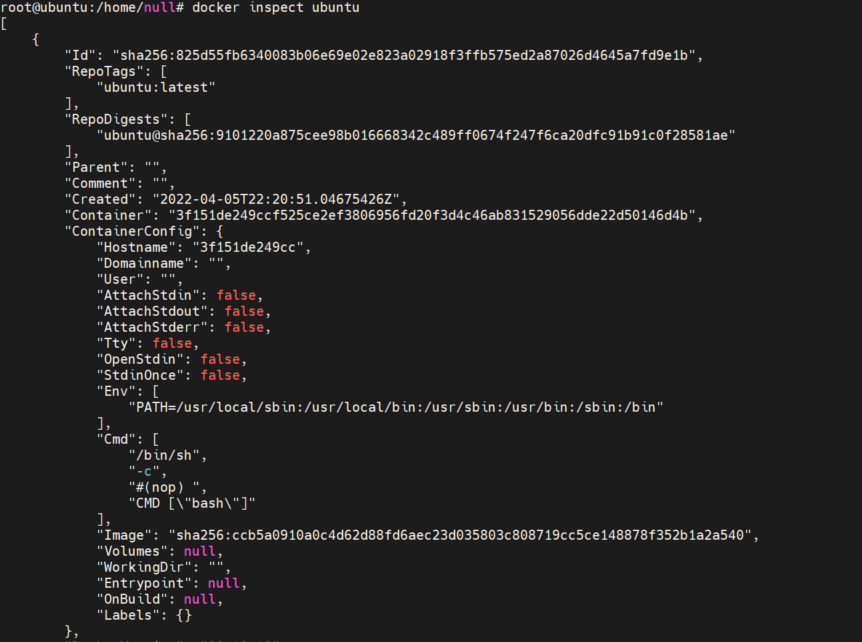
{"architecture": "amd64","config": {"Hostname": "","Domainname": "","User": "","AttachStdin": false,"AttachStdout": false,"AttachStderr": false,"Tty": false,"OpenStdin": false,"StdinOnce": false,"Env": ["PATH=/usr/local/sbin:/usr/local/bin:/usr/sbin:/usr/bin:/sbin:/bin"],"Cmd": ["bash"],"Image": "sha256:ccb5a0910a0c4d62d88fd6aec23d035803c808719cc5ce148878f352b1a2a540","Volumes": null,"WorkingDir": "","Entrypoint": null,"OnBuild": null,"Labels": null},"container": "3f151de249ccf525ce2ef3806956fd20f3d4c46ab831529056dde22d50146d4b","container_config": {"Hostname": "3f151de249cc","Domainname": "","User": "","AttachStdin": false,"AttachStdout": false,"AttachStderr": false,"Tty": false,"OpenStdin": false,"StdinOnce": false,"Env": ["PATH=/usr/local/sbin:/usr/local/bin:/usr/sbin:/usr/bin:/sbin:/bin"],"Cmd": ["/bin/sh","-c","#(nop) ","CMD [\"bash\"]"],"Image": "sha256:ccb5a0910a0c4d62d88fd6aec23d035803c808719cc5ce148878f352b1a2a540","Volumes": null,"WorkingDir": "","Entrypoint": null,"OnBuild": null,"Labels": {}},"created": "2022-04-05T22:20:51.04675426Z","docker_version": "20.10.12","history": [{"created": "2022-04-05T22:20:50.696744314Z","created_by": "/bin/sh -c #(nop) ADD file:b83df51ab7caf8a4dc35f730f5a18a59403300c59eecae4cf5779cba0f6fda6e in / "},{"created": "2022-04-05T22:20:51.04675426Z","created_by": "/bin/sh -c #(nop) CMD [\"bash\"]","empty_layer": true}],"os": "linux","rootfs": {"type": "layers","diff_ids": ["sha256:c5ec52c98b3193052e15d783aca2bef10d8d829fa0d58fedfede511920b8f997"]}}
在docker中使用docker inspect 和docker history 命令也能查看镜像或容器的相关信息,该信息与上诉是一一对应的。
docker history ubuntu
命令对应上诉
825d55fb6340083b06e69e02e823a02918f3ffb575ed2a87026d4645a7fd9e1b.json 的history字段。
[email protected]:/home/null# docker history ubuntuIMAGE CREATED CREATED BY SIZE COMMENT825d55fb6340 2 weeks ago /bin/sh -c #(nop) CMD ["bash"] 0B<missing> 2 weeks ago /bin/sh -c #(nop) ADD file:b83df51ab7caf8a4d… 72.8MB
接下来打开
8f7ee37aa1d53dcded9b5c22b0a57d8bb8d35d9f42273651668e7aca23bd7581文件夹,该文件夹包含三个文件。
VERSIONjsonlayer.tar
其中VERSION代表ubuntu的版本,值为1.0;json文件的很多内容是与上面是重合的。镜像的核心内容在layer.tar里,将该文件解压,可以发现该文件夹的内容就是对应linux文件系统。在ubuntu的镜像中,大部分文件存在于usr/bin目录,对应了ubuntu系统的 一些常见的命令,如ls、apt-get等。
使用DIVE能够更好的查看镜像每一层的内容,和各层比上一层做出的改变,下图为dive分析ubuntu的界面。DIVE主要具有以下主要功能:
屏幕左上角提供镜像层列表以及与每个镜像层的大小。
提供有关镜像的效率(百分比值)、潜在浪费的空间以及镜像的总大小的一般统计信息。
对于每个选定的镜像层,右边会显示出该层对应的文件系统视图,其中包含每个文件夹大小的数据。
DIVE使用的一些快捷键:
Ctrl+Spacebar - 左右面板切换Spacebar - 打开/关闭目录树,Ctrl+A - 显示/关闭添加的文件,Ctrl+R - 显示/关闭移除的文件,Ctrl+M - 显示/关闭修改的文件,Ctrl+U - 显示/关闭未修改的文件,Ctrl+ L - 显示镜像层变动,Ctrl+/ - 过滤文件,Ctrl+C - 退出.
由于ubuntu镜像只有一层,所以看不出层与层之间内容的变化,所以这里启动ubuntu容器,并像容器中写入一些内容来观察在容器中进行操作对于容器镜像的改变。
[email protected]:/home/null# docker run -it --name ubuntu_test ubuntu[email protected]:/# echo hello > hello.txt[email protected]:/# echo world > world.txt[email protected]:/# exitexit
接着将容器打包成镜像并导出,以便进一步分析
docker commit ubuntu_test ubuntu_testdocker save -o ubuntu_test.tar ubuntu_test
将ubuntu_test.tar解压,发现相比于原来的ubuntu.tar解压后的文件,多了一个文件夹,也就意味着多了一层。
查看manifest.json查看变化,发现Layers中也已经多了一层
"804da1860ebbda2e61e48e68b0fd1c7f2ddebfcfbc18dbb5c865d2b76d01cc29/layer.tar"
查看
05feb719705701fda9a39795e16f245df59db1c26261112f88d81131511e6111.json文件的history字段,同样的多出了一层: created表示创建的时间,created_by表示创建的命令。
"history": [{"created": "2022-04-05T22:20:50.696744314Z","created_by": "/bin/sh -c #(nop) ADD file:b83df51ab7caf8a4dc35f730f5a18a59403300c59eecae4cf5779cba0f6fda6e in / "},{"created": "2022-04-05T22:20:51.04675426Z","created_by": "/bin/sh -c #(nop) CMD [\"bash\"]","empty_layer": true},{"created": "2022-04-22T02:20:20.681237703Z","created_by": "bash"}],
打开新文件夹,解压layer.tar里面的内容便为我们对容器的操作添加更改的内容,一共更改了三处,其中hello.txt和world.txt是我们手动添加的文件,root文件夹下的.bash_history是记录执行过命令。
sudo dive ubuntu_testtap键可以切换左右视图,上下键进行切换条目,在右边可以很明显的表示第二层相比于第一层改变的地方,黄色表示改变的目录,绿色代表改变的文件,刚好对应新生成文件夹的内容。
其他工具
1.contains,一个支持在线分析容器镜像的网站。
https://contains.dev/2.trivy,镜像扫描工具,可以检测镜像、文件系统、git存储库的漏洞以及配置问题
https://github.com/aquasecurity/trivy3.Clair,静态分析容器镜像中的漏洞
https://github.com/quay/clair4.Anchore,用于深度分析docker镜像,扫描容器镜像和文件系统中的漏洞。
https://anchore.com/opensource/5.Dagda,用于对 docker 镜像和容器中的木马、恶意软件、病毒等已知漏洞进行静态分析
https://github.com/eliasgranderubio/dagda/6.Aqua Security,保护使用容器等云原生技术构建的应用程序。
https://www.aquasec.com/products/container-vulnerability-scanning/参考链接
Docker 镜像规范 :https://github.com/moby/moby/blob/master/image/spec/v1.2.mdDIVE:https://github.com/wagoodman/divedocker 命令文档https://docs.docker.com/engine/reference/commandline/image_inspect/如何分析和改变镜像的大小https://blog.devgenius.io/how-to-analyze-and-improve-the-size-of-your-docker-images-54effa56f488Docker安全的开源软件https://techbeacon.com/security/10-top-open-source-tools-docker-securityhttps://geekflare.com/container-security-scanners/
作者:ZxyNull ,文章转载于先知社区。
侵权请私聊公众号删文
热文推荐
欢迎关注LemonSec
觉得不错点个“赞”、“在看”
如有侵权请联系:admin#unsafe.sh