Hello, in this blog, I will talk about the activities and custom scripts for the use of API in a Process Automation Project. I hope it will be an example for you to create a process automation project. Before start, we need an API and in this example we will use an API that send mail with Excel Document as an attachment.
First of all we need an BTP account and SAP Build Process Automation Subaccount. After than we will create Project.

We will chose build an Automated Process and Task Automation.


Then we write our project name and description. Now our environment is ready.
We need to configure environment before start coding. First we can choose last version of agent. Note that if last version is not registered, you should update your agent. Then you give a name to automation.
Now we will need only Core SDK. You can use Excel SDK’s for editing excel document that we use attachment for our mail.

Now we can use activities that are provided from Core SDK’s. I will show all activities part by part.

1 – Read File
We can use Read File activity for attachment. For this project we will use Excel document.
First we write document path, after than choose encoding as Binary. Encoding is imported because we have use binary encoding for using document with API.

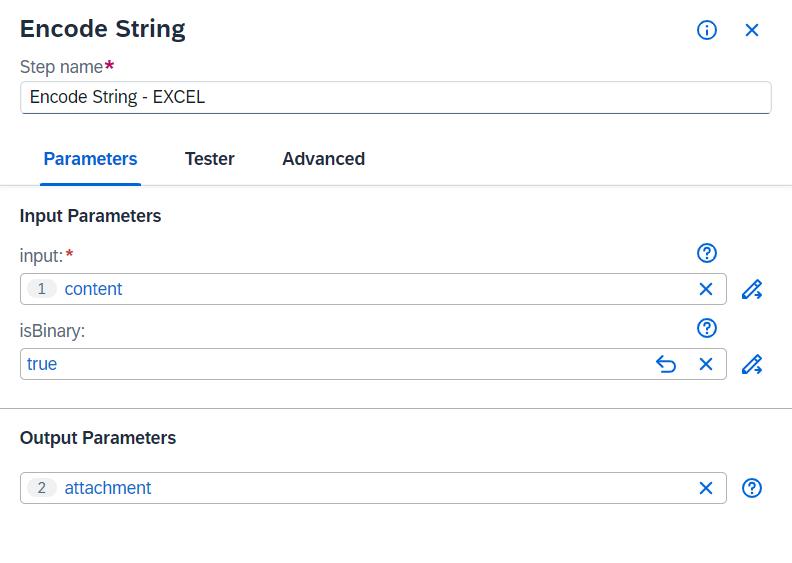
2 – Encode String – Excel
Second step is encode output of binary excel document. We use base64 encoding because our API convert back base64 to excel file.

3 – Encode String – API Auth
If your API do not need Authorization, you can pass this step.
Again we use base64 encoding and we give id and password as input. You can see that how you can give inputs below.
'id' + ':' + 'password'
4 – Custom Script
We give our encoding Excel document as attachment and Authorization info as clientInfo to Custom script activity. You can give string type both of input.
You can see below, template of POST method for our API. Template could change according to API. For example API that we use, we will add URL of API. Then we can change subject, receivers and body of mail. Please note that you should give mail body as HTML.
return {
    method: 'POST',
    url:'',
    responseType: 'json',
    resolveBodyOnly: true,
    headers:{
        Authorization: 'Basic ' + clientInfo
    },
    body: JSON.stringify({
        'subject': 'test mail',
        'receiver': '',
        'htmlBody': '<p>Hi<p>',
        'attach': attachment
    } )
};
We will select output type as Any.

5 – Call Web Service
Last step is Call Web Service activity. We can give our custom script output as options and take response of API from output parameter. That’s it, all coding parts that we need are done!

To summarize, we created an automation to use an API. We got an Excel document and add to our custom script. Then by using API we send our mail with attachment.
With this blog you can create your own automated project. You can write your thoughts and questions in the comment section. If you think this blog is helpful please do not forget to like and share 🙂 .
如有侵权请联系:admin#unsafe.sh