本文将详细介绍使用 AMD CPU 的电脑如何利用 VMware Workstation 搭建 Hyper-V 的调试环境。
上一篇文章《Hyper-V on Windows 10 Notes 》提到了 Hyper-V 暂时不支持 AMD CPU 的嵌套虚拟化,所以就无法使用文章《First Steps in Hyper-V Research 》中介绍的 Hyper-V 嵌套虚拟化来搭建 Hyper-V 的调试环境,本文参考文章《Hyper-V #0x0 - Research setup 》中介绍的方法利用 VMware Workstation 来搭建 Hyper-V 的调试环境。
物理机不需要安装 Hyper-V 组件,否则 VMware Workstation 将无法运行;如果物理机安装了 Hyper-V,可以参考文章《VMware Workstation Incompatible with Device/Credential Guard 》临时禁用 Hyper-V。
物理机安装好 VMware Workstation 之后,可以新建一个虚拟机并安装好最新的 64 位 Windows 10 操作系统。
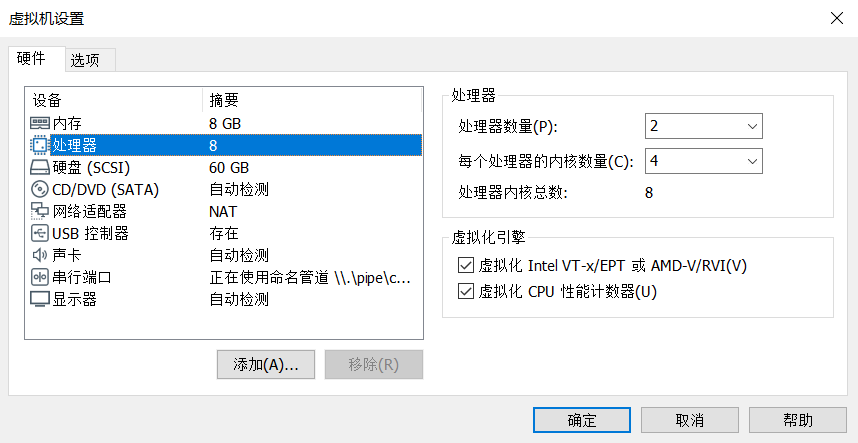
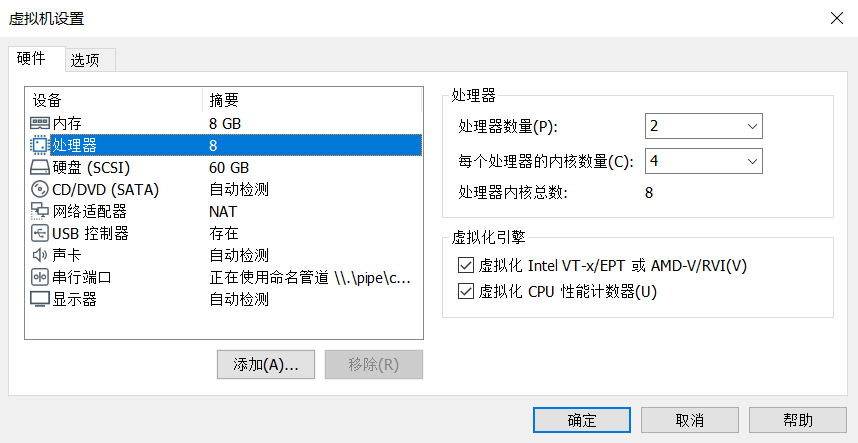
这里需要在 VMware Workstation 中为虚拟机的 CPU 开启虚拟化引擎:
虚拟化 Intel VT-x/EPT 或 AMD-V/RVI(V)
虚拟化 CPU 性能计数器(U)
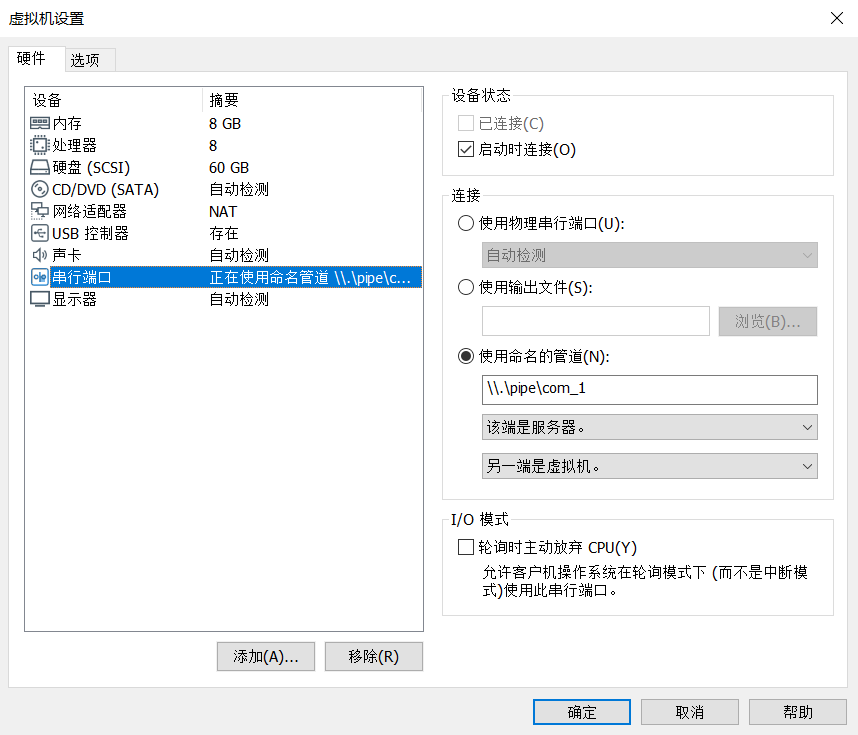
同时,需要为虚拟机增加一个串口用于 Windows 内核调试(虚拟机默认有一个打印机,需要先把打印机删掉):
使用命名管道 \\.\pipe\com_1
该端是服务器
另一端是虚拟机
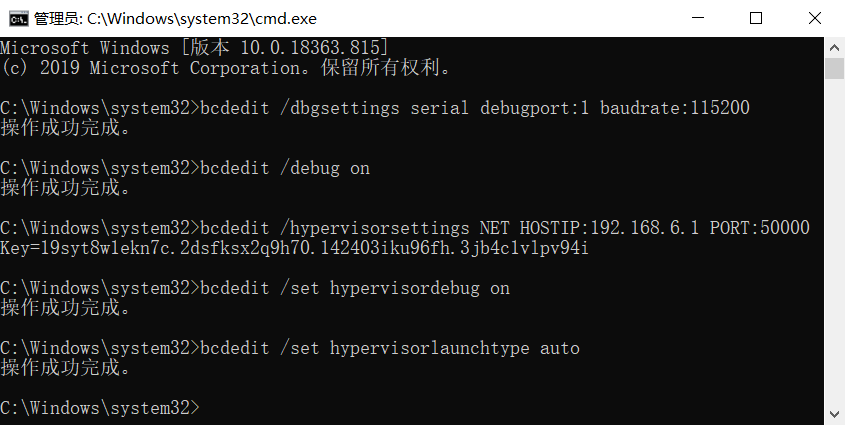
这里需要在安装好的虚拟机中安装并启用 Hyper-V 组件,同时通过 bcdedit 设置相关的调试选项。
1
2
bcdedit /dbgsettings serial debugport:1 baudrate:115200 bcdedit /debug on
1
2
3
bcdedit /hypervisorsettings NET HOSTIP:192.168 .6.1 PORT:50000 bcdedit /set hypervisordebug on bcdedit /set hypervisorlaunchtype auto
注意这里的 IP 地址是物理机中网卡 VMware Network Adapter VMnet8 的 IP 地址,端口设置为 50000 。这条命令执行完毕之后产生的一个 Key 需要记下来,后面 WinDbg 设置将会用到。
复制两个 64 位 WinDbg 的快捷方式,其中一个附加如下参数用于调试 Windows 内核:
1 -k com:port=\\.\pipe\com_1,baud=115200,pipe,reconnect
另一个附加如下参数用于调试 Hyper-V:
1 -k net:port=50000,key=前面生成的Key字符串
一切准备就绪之后,先打开两个 WinDbg,然后开启虚拟机,就可以开始调试了。
在调试 Hyper-V 的 WinDbg 中,可以查看 hv 模块的相关信息:
1
2
3
4
5
6
7
8
9
10
11
12
13
14
15
16
17
0: kd> lmvm hv Browse full module list start end module name fffffb6a`57000000 fffffb6a`58800000 hv (no symbols) Loaded symbol image file: hvax64.exe Image path: hvax64.exe Image name: hvax64.exe Browse all global symbols functions data Image was built with /Brepro flag. Timestamp: DBBF3B47 CheckSum: 00110BD8 ImageSize: 01800000 Translations: 0000.04b0 0000.04e4 0409.04b0 0409.04e4 Information from resource tables: 0: kd> ?hv Evaluate expression: -5040831987712 = fffffb6a`57000000
因为这里物理机使用的是 AMD 的 CPU,所以 hv 模块实际上是 hvax64.exe ;如果是 Intel 的 CPU,那么会是 hvix64.exe 。
在调试 Windows 内核的 WinDbg 中,可以查看 hypercall 对应的指令:
1
2
3
4
5
6
7
8
9
10
11
12
13
14
15
16
17
18
19
3: kd> u poi(nt!HvcallCodeVa) fffff804`4cbe0000 0f01d9 vmmcall fffff804`4cbe0003 c3 ret fffff804`4cbe0004 8bc8 mov ecx,eax fffff804`4cbe0006 b811000000 mov eax,11h fffff804`4cbe000b 0f01d9 vmmcall fffff804`4cbe000e c3 ret fffff804`4cbe000f 488bc1 mov rax,rcx fffff804`4cbe0012 48c7c111000000 mov rcx,11h fffff804`4cbe0019 0f01d9 vmmcall fffff804`4cbe001c c3 ret fffff804`4cbe001d 8bc8 mov ecx,eax fffff804`4cbe001f b812000000 mov eax,12h fffff804`4cbe0024 0f01d9 vmmcall fffff804`4cbe0027 c3 ret fffff804`4cbe0028 488bc1 mov rax,rcx fffff804`4cbe002b 48c7c112000000 mov rcx,12h fffff804`4cbe0032 0f01d9 vmmcall fffff804`4cbe0035 c3 ret
因为这里物理机使用的是 AMD 的 CPU,所以 hypercall 对应的指令为 vmmcall ;如果是 Intel 的 CPU,那么 hypercall 对应的指令为 vmcall 。
对 vmmcall 所在的位置下断点,需要使用硬件执行断点:
1
2
3
4
5
6
7
8
9
10
11
12
13
14
15
16
17
18
19
20
21
3: kd> ba e1 poi(nt!HvcallCodeVa) 3: kd> g Breakpoint 0 hit fffff804`4cbe0000 0f01d9 vmmcall 1: kd> k # Child-SP RetAddr Call Site 00 ffffbe0b`d64532c8 fffff804`4d9cc124 0xfffff804`4cbe0000 01 ffffbe0b`d64532d0 fffff804`4da8e91c nt!HvcallpExtendedFastHypercall+0x54 02 ffffbe0b`d64532e0 fffff804`4da8eb10 nt!HvlpFastFlushListTb+0xac 03 ffffbe0b`d64533a0 fffff804`4da8e5f3 nt!HvlpFlushRangeListTb+0x88 04 ffffbe0b`d6453400 fffff804`4da52642 nt!HvlFlushRangeListTb+0x63 05 ffffbe0b`d6453450 fffff804`4d8f3e71 nt!MiFlushTbList+0x167fe2 06 ffffbe0b`d64535a0 fffff804`4d8f5305 nt!MiCopyOnWrite+0x761 07 ffffbe0b`d6453840 fffff804`4d8c986f nt!MiValidFault+0x295 08 ffffbe0b`d64538b0 fffff804`4d8c8fae nt!MiUserFault+0x3cf 09 ffffbe0b`d6453960 fffff804`4d9d041e nt!MmAccessFault+0x14e 0a ffffbe0b`d6453b00 00007ff8`107805d3 nt!KiPageFault+0x35e 0b 0000002e`3b4fb030 00000003`22e0813e 0x00007ff8`107805d3 0c 0000002e`3b4fb038 000001b8`adbe82f0 0x00000003`22e0813e 0d 0000002e`3b4fb040 00000000`00000000 0x000001b8`adbe82f0
和系统调用一样,不同的 hypercall 对应不同的编号,编号可以用于定位对应的 Handler 函数。在地址 hv+0xC00000 处,每一个 hypercall 有一个 0x18 字节的结构体,其中结构体最前面的 8 字节便是对应的 Handler 函数的起始地址。
1
2
3
4
5
6
7
8
9
10
11
12
13
14
15
4: kd> dq hv+0xC00000 fffffb6a`57c00000 fffffb6a`572321e0 00000000`00000000 fffffb6a`57c00010 00000041`00000000 fffffb6a`5729ae90 fffffb6a`57c00020 00000008`00000001 00000044`00000000 fffffb6a`57c00030 fffffb6a`5722dcc0 00000018`00000002 fffffb6a`57c00040 00000044`00000000 fffffb6a`57215e40 fffffb6a`57c00050 00080018`00010003 00000044`00000000 fffffb6a`57c00060 fffffb6a`5729b230 00000008`00000004 fffffb6a`57c00070 0000003f`00000020 fffffb6a`57244200 4: kd> u fffffb6a`572321e0 hv+0x2321e0: fffffb6a`572321e0 b802000000 mov eax,2 fffffb6a`572321e5 c3 ret fffffb6a`572321e6 cc int 3
微软已经逐步开放了 Hyper-V 相关组件的调试符号,但是 hv 模块(即 hvax64.exe / hvix64.exe )的调试符号暂时不对吃瓜群众开放。
微软还为 WinDbg 开发了一个调试 Hyper-V 的插件 hvexts.dll ,但目前也没有对外开放。
文章来源: https://programlife.net/2020/05/16/hyper-v-debugging/


