
2024-3-26 23:54:44 Author: derflounder.wordpress.com(查看原文) 阅读量:14 收藏
I recently needed to migrate a Jamf Cloud-hosted Jamf Pro instance from using an AWS-hosted cloud distribution point to using a Jamf-hosted JCDS2 cloud distribution point. For those looking at a similar migration, please see below the jump for more details.
Advisory: I strongly advise having Jamf’s Professional Services folks involved if you’re planning a migration like this. The reason is that, as of the current Jamf Pro 11.3.2 release, you can only have one cloud distribution point at a time. A migration like the one I performed will involve a cut-over process which includes having to re-upload your current distribution point’s installer packages to the new JCDS2 distribution point. This process also necessitates having good recent backups for the Jamf Pro instance in question.
With the assistance of Jamf’s Professional Services (particular thanks to Sepie Moinipanah, Leslie Helou and David Raabe for their support), the migration in my case went smoothly. Please see below for the process I followed to migrate from an AWS-hosted cloud distribution point to using a Jamf-hosted JCDS2 cloud distribution point:
Pre-requisites:
- A copy of all of the installers in the current AWS-hosted cloud distribution point
- The Cloud Services connection enabled in your Jamf Pro server’s settings
- jamfCPR
- API Client Role and API Client with the correct permissions
- A very recent backup of your Jamf Cloud-hosted Jamf Pro server
Getting the installers from your current distribution point:
There are several ways to get the installers from an AWS-hosted cloud distribution point. The method I chose was to use AWS’s command line tool to sync the contents of the S3 bucket used by the cloud distribution point to a local directory on my workstation:
API Client Role and API Client:
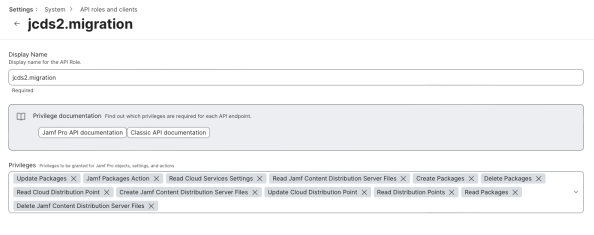
The jamfCPR wiki describes the necessary permissions needed to sync installer packages to a JCDS2 cloud distribution point, in the context of an API Client Role. As a result, I used an API Client Role and API Client in this case because the API Client Role permissions don’t always map one-to-one to the permissions available to Jamf Pro accounts and groups. Please see below for the permissions I set for my API Client Role:
- Read Cloud Services Settings
- Read Distribution Points
- Create Packages
- Read Packages
- Update Packages
- Delete Packages
- Read Cloud Distribution Point
- Update Cloud Distribution Point
- Create Jamf Content Distribution Server Files
- Read Jamf Content Distribution Server Files
- Delete Jamf Content Distribution Server Files
- Jamf Packages Action
Preparing for the distribution point migration:
1. Verify that you have the latest version of jamfCPR available.
Note: If the JCDS2 cloud distribution point you’re migrating to is located outside of the United States, make sure you’re using jamfCPR 5.x or later. jamfCPR 4.12 and earlier is not able to work with JCDS2 cloud distribution points which are hosted in AWS regions outside of the United States.
2. Verify that you have an API Client Role and API Client on the Jamf Pro server which has the correct permissions assigned.
3. Verify that you have a copy of all installers on your current AWS-hosted cloud distribution point stored on the same Mac that you have the jamfCPR app installed on.
4. Work with Jamf to make sure that a backup of your Jamf Pro service is made just prior to doing the migration.
Advisory about the Jamf Pro backup:
At this point, I want to stop for a moment and discuss why that backup of your Jamf Pro service is so important. The reason has to do with how AWS-hosted cloud distribution points are created. When you set one up, Jamf Pro will do the following:
- Create an S3 bucket with a randomly-generated name in the US-East-1 AWS region.
- Create an associated CloudFront distribution which connects to the S3 bucket created in Step 1.
As the Jamf Pro admin, you don’t get to choose anything in this process and you can’t select an existing S3 bucket. What this means is that the migration goes wrong and you need to revert back to your AWS-hosted cloud distribution point, the only way to do so is to roll back your Jamf Pro service to a point in time before the migration started. You will not be able to go back to using your existing AWS-hosted cloud distribution point without restoring from that backup because there is no way otherwise to have Jamf Pro use that existing AWS-hosted cloud distribution point.
If you try to go back otherwise, Jamf Pro will not use the existing AWS-hosted cloud distribution point. Instead, Jamf Pro will set up a new S3 bucket and CloudFront distribution and you will now have a brand-new and completely empty AWS-hosted cloud distribution point.
Running the migration:
1. Log into your Jamf Pro server as an admin user with all needed rights.
2. Verify that the Cloud Services connection is logged in and appears to be working properly.

3. Go to Settings: Server: Cloud distribution point.
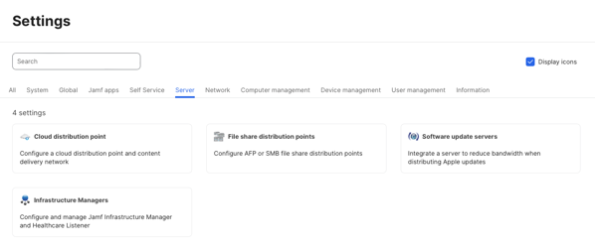
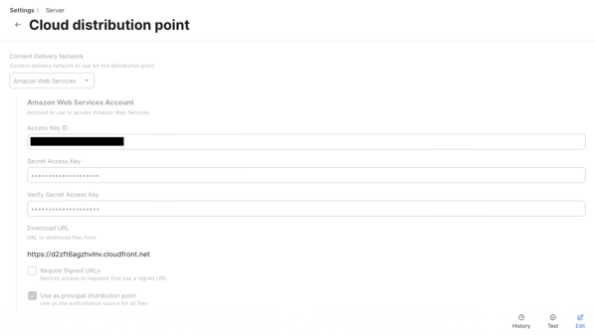
4. Click the Test button and verify that your connection to the cloud distribution point is working correctly.
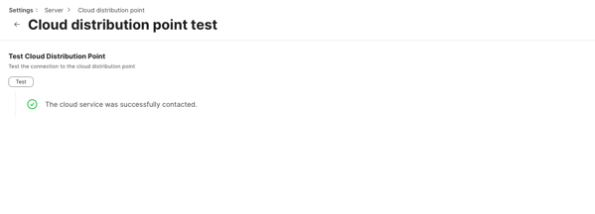
5. Install something from your Jamf Pro server and verify that installation is working correctly.
6. Verify in your policy logs that the installer is coming from an address which matches something similar to what’s shown below:
https://d2zft6agzhvlnv.cloudfront.net
7. In your Jamf Pro server, go to Settings: Server: Cloud distribution point.
Note: The next step is a point of no return, for reasons described above in the Advisory about the Jamf Pro backup section. Make sure a very recent Jamf Pro backup is available.

8. Select Jamf Cloud and click the Save icon.
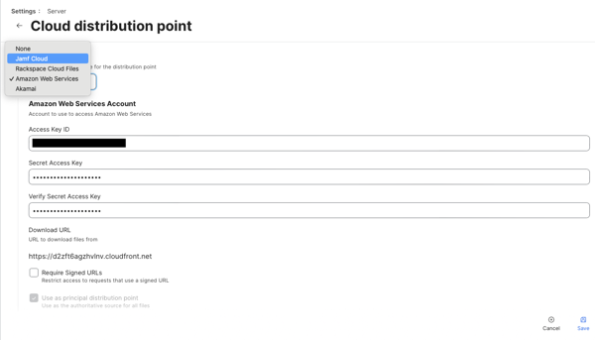
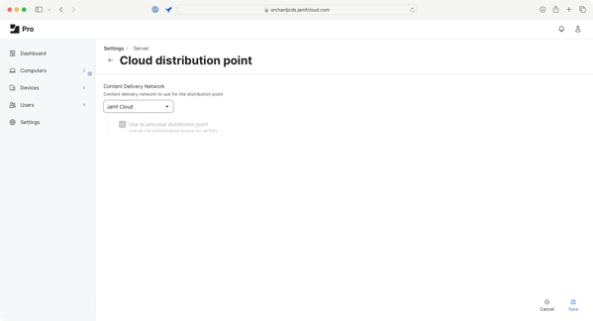
9. Click the Test button and verify that your connection to the cloud distribution point is working correctly.

10. Open the jamfCPR app on your Mac.
11. Select the directory containing the downloaded copy of the installers from the existing AWS-hosted cloud distribution point.
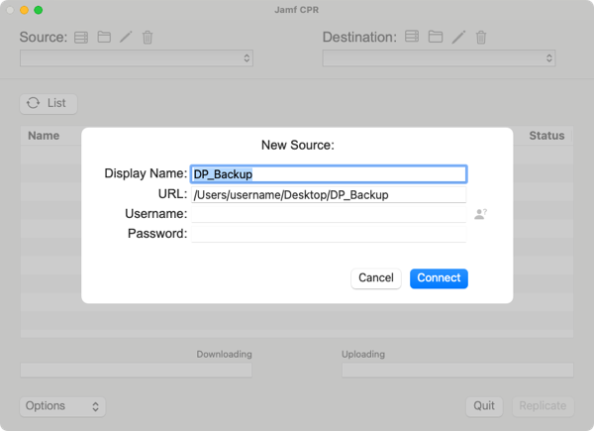
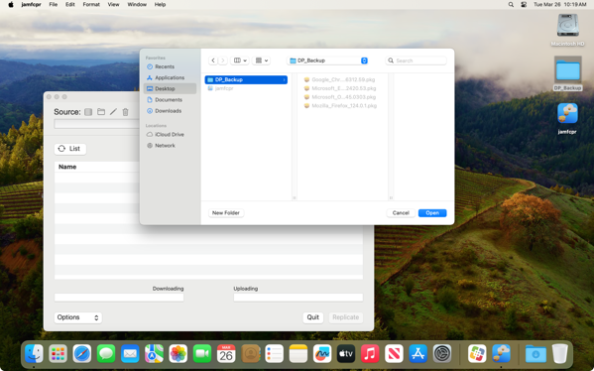
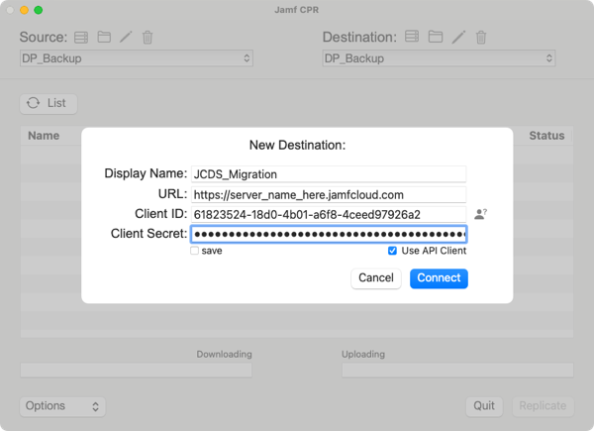
12. Set up the connection to your Jamf Pro service, using the API Client ID and its associated Client ID Secret.
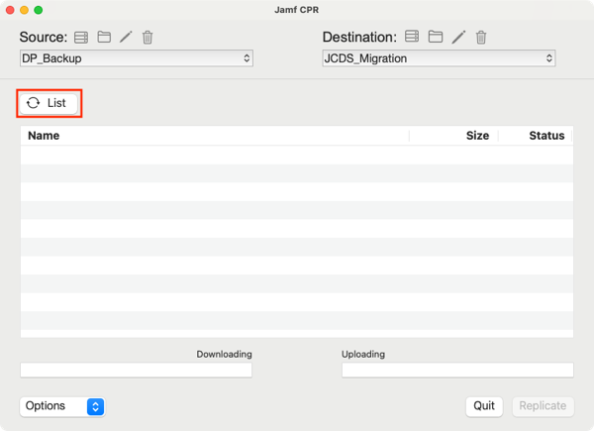
13. Click the List button in the jamfCPR app. You should now see a list of packages that your Jamf Pro service has, showing a status of different.
Note: To allow the migration process to go quickly for this blog post, I’m using dummy installer packages with a size of one kilobyte. The jamfCPR app should display the actual size of the installer packages in its application window when the installers are listed.
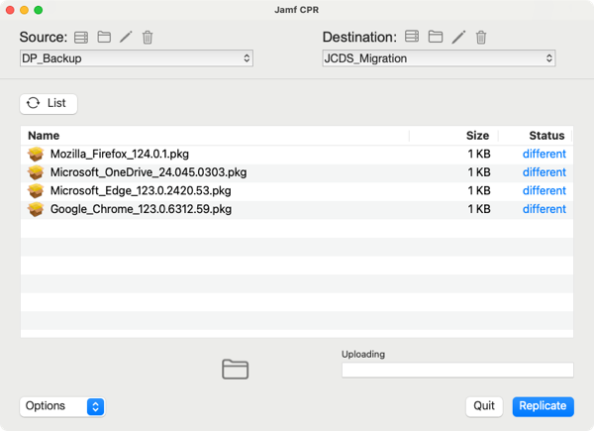
14. Select the packages you want to copy back from the downloaded copy of the installers to your Jamf Pro service.
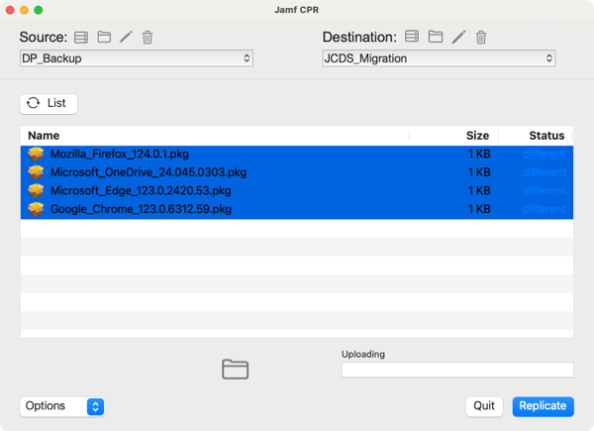
15. Click the Replicate button.
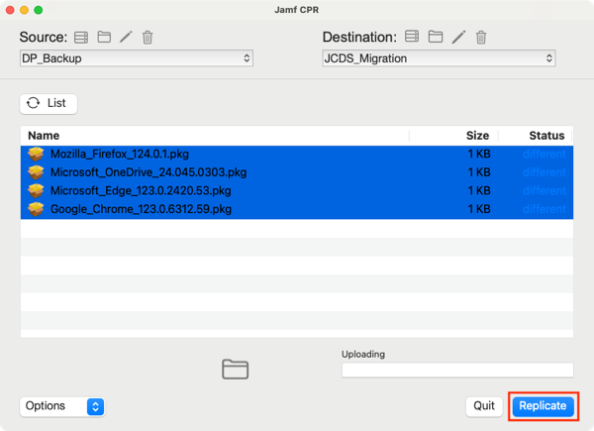
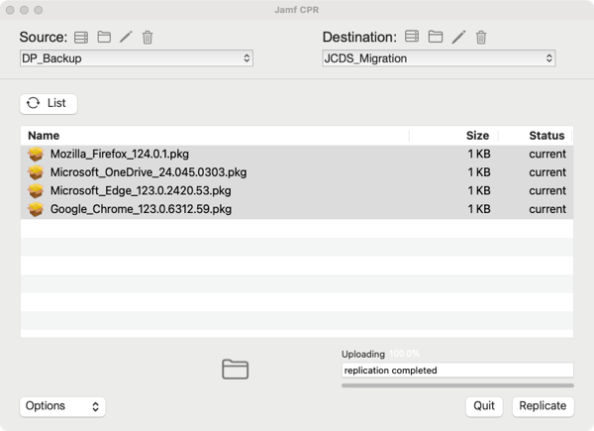
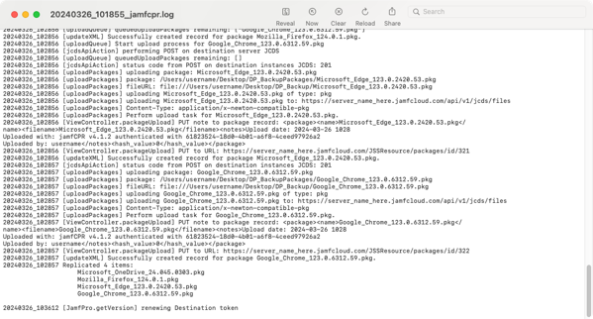
You can monitor the replication process using the jamfCPR logs, which are available under the View menu using the Show Logs command.
16. Once replication is completed, the packages should appear as Availability Pending when you bring up information on the package in the Jamf Pro admin console.
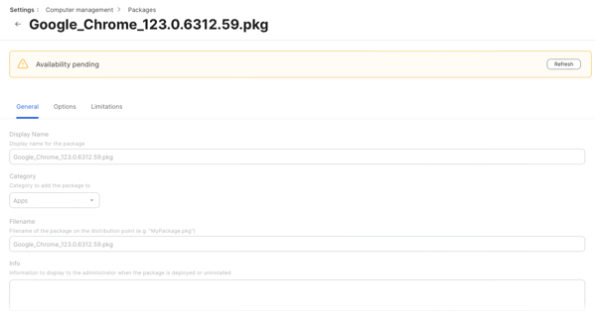
You also won’t see any packages listed in the Cloud distribution point screen available via Settings: Server: Cloud distribution point.
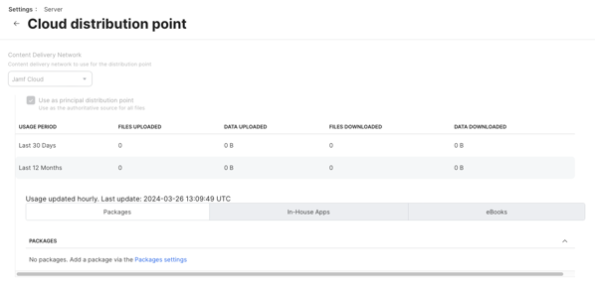
This is normal and the package should already be available for installation. One way to verify that the packages are present in the JCDS2 distribution point is by downloading them from the JCDS2 distribution point. I have a post on how to do this available via the link below:
17. Install something from your Jamf Pro server and verify that installation is working correctly.
18. Verify in your policy logs that the installer is coming from an address which matches something similar to what’s shown below:
https://server_name_here.jamfcloud.com/jcds
Note: If you’re using a custom DNS name for your Jamf Cloud instance, it would appear similar to what’s shown below:
https://server_name_here.custom_domain.here/jcds
Post-migration:
After about an hour, the packages should appear listed in the Cloud distribution point screen available via Settings: Server: Cloud distribution point:
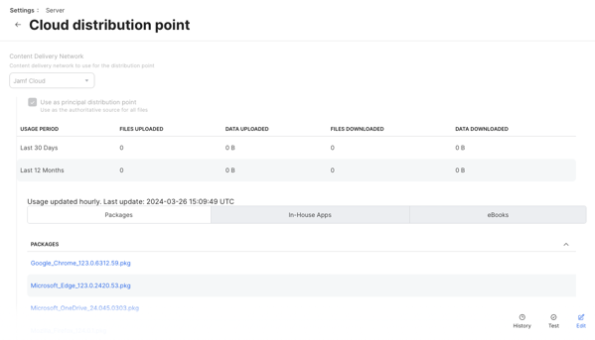
The Availability Pending message should also disappear when you view information about the installer package.
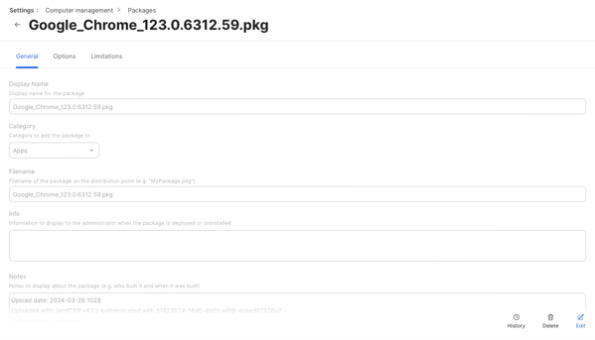
如有侵权请联系:admin#unsafe.sh