Published: 22 May 2024 at 12:37 UTC 2024-5-22 20:37:0 Author: portswigger.net(查看原文) 阅读量:29 收藏

-
Published: 22 May 2024 at 12:37 UTC
-
Updated: 28 May 2024 at 13:34 UTC
 Signed web tokens are widely used for stateless authentication and authorization
throughout the web. The most popular format is JSON Web Tokens (JWT) which we've already covered in depth, but beyond that a diverse ecosystem of
standards thrives, each with its own implementation of data storage and security.
Signed web tokens are widely used for stateless authentication and authorization
throughout the web. The most popular format is JSON Web Tokens (JWT) which we've already covered in depth, but beyond that a diverse ecosystem of
standards thrives, each with its own implementation of data storage and security.
To help assess these, we've released a new open source extension for Burp Suite called SignSaboteur. This tool is designed to automate the attacks discussed here, ensuring that you no longer overlook any insecure configurations.
Brief overview
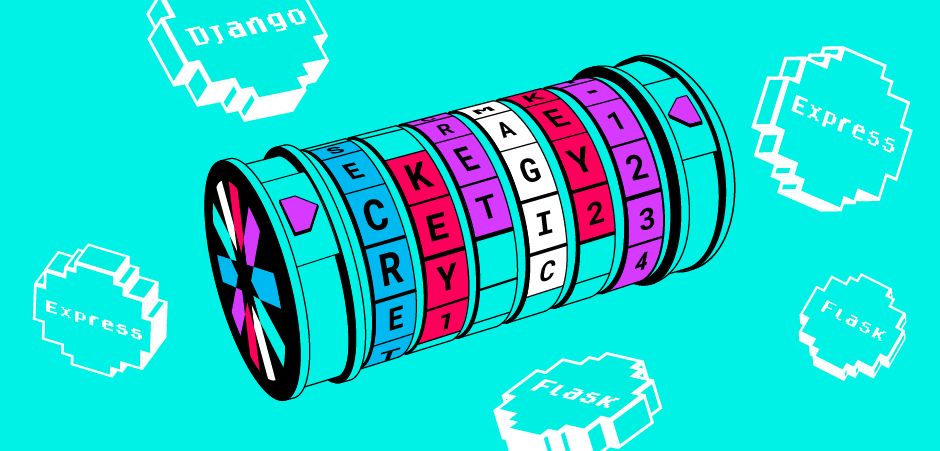
SignSaboteur is a Burp Suite extension for editing, signing, verifying, and attacking signed tokens. It supports different types of tokens, including Django, Flask, and Express.
The extension provides automatic detection and in-line editing of tokens within HTTP request / response pairs and WebSocket messages, signing of tokens and automation of brute force attacks.
SignSaboteur includes its own prebuilt word lists for known default secret keys and salts. You can extend them with your dictionary. JSON encoded strings are supported too, so you can include even non ASCII secrets keys. You can also save known keys for future brute force attacks.
You can modify the signed tokens in the Proxy and Repeater message editors. There are a number of built-in handy editors for JSON, timestamps and HEX strings.
But the true power of the tool is the unknown signed strings mode - more on that later.
Methodology
To exploit a signed token, you usually need to discover the secret key. These may be disclosed in source code, configuration files, documentation pages, and error messages.
These papers provide a good overview of the different attacks:
- Authentication Bypass in Apache Airflow CVE-2020-17526
- Baking Flask cookies with your secrets
- Redash Insecure default configuration
- Remote Code Execution on a Facebook server
To detect and exploit signed web tokens, we recommend the following methodology:
- Observe request/response cookie, url, body parameters for potential signed tokens: base64 encoded or hex strings of known length common for HMAC
- If a signed web token contains a timestamp, observe whether the signature changes when the token expires
- Try to identify any frameworks the target is using
- If the framework was identified, search for common secret keys and salts, for example hardcoded values or configuration files, including docker environment variables
- Update your wordlists with found information
- Try to brute force the token with different derivation techniques
- If you discover the secret key try the following attacks:
- If the token structure is known, change id to high privilege account, usually 1
- If the token structure is unknown, brute force parameters names with a commonly used list: id, user_id, username, etc. Note, that SignSaboteur extension supports some of the mentioned techniques
- If you couldn't find the secret key, try to re-sign a message with a default key and send it to the application. If the server accepts your forged message that means that a vulnerability exists. Follow the steps mentioned for a known secret key.
- If the server accepts your forged message, visit all pages with a new token and also try to get access to administrative functionality.
Configuring brute force attacks
Brute force attacks are configured for each type of signed token. SignSaboteur enables you to use different strategies to find the secret key and salt:
- Known keys - SignSaboteur uses previously found secret keys only.
- Fast - SignSaboteur uses the default hashing algorithm and key derivation.
- Balanced - SignSaboteur uses all known key derivation techniques, except slow PBKDF2 Hmac with a big number of iterations.
- Deep - SignSaboteur uses all key derivation techniques, including different types supported by Ruby on Rails framework.
Configuring authorization bypass attacks
As soon as you've identified the secret key, you can use the extension to run a number of authorization bypass attacks. All of these attacks can be used together:
- User claims - A set of OpenID Connect Standard Claims. SignSaboteur tries to inject a collaborator payload for different potential SSRF vulnerable claims, like the user's picture. For more information please see the Portswigger Web Security Academy OpenID Connect labs.
- Wrapped user claims - This is similar to the user claims attack but SignSaboteur injects the collaborator payload into the user JSON attribute.
- Username and password claims - Another common way to store user details is using username and password JSON attributes. SignSaboteur generates a placeholder for the admin user.
- Flask claims - Flask authenticated user session information if stored at client side should include id and _id and user_id or _user_id JSON attribute. SignSaboteur generates a session for the first user, usually admin.
- Express claims - The Express framework uses the passport JSON attribute to store user details. SignSaboteur generates a placeholder for the admin user.
- Account user claims - Some frameworks use account wrapper to store information about authenticated users. For exploitation, it might be required to use authenticated claims too.
- Authenticated claims - Most known authenticated flags.
- User access_token - SignSaboteur generates JWT OpenID connect ID token signed with the same key and same hashing algorithm without any key derivation performed.
Getting started
First you need to install SignSaboteur in Burp Suite. Do this from the BApp Store under the Extensions tab. Of course you can also build the extension from source code.
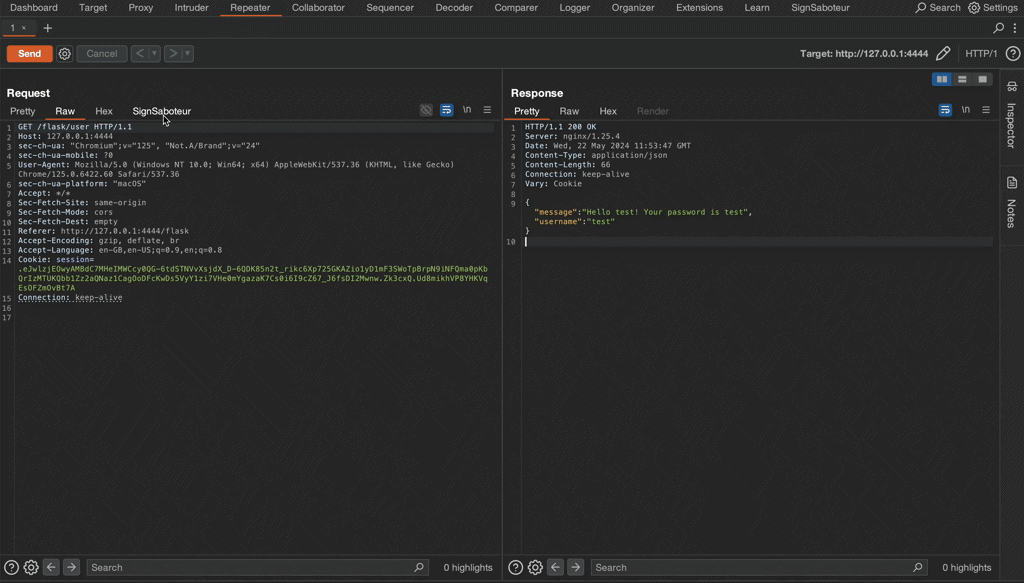
To use the extension, open any HTTP request / response pair with a signed web token, then go to the SignSaboteur tab. Messages that include signed web tokens are automatically highlighted in the Proxy > HTTP history tab.
Basic use case
In the SignSaboteur tab, you can view all signed web tokens that are identified by the extension. These appear in the Token dropdown. Each web signed token’s type supports the fast brute force attack mode. That mode uses known message and derivation methods only.
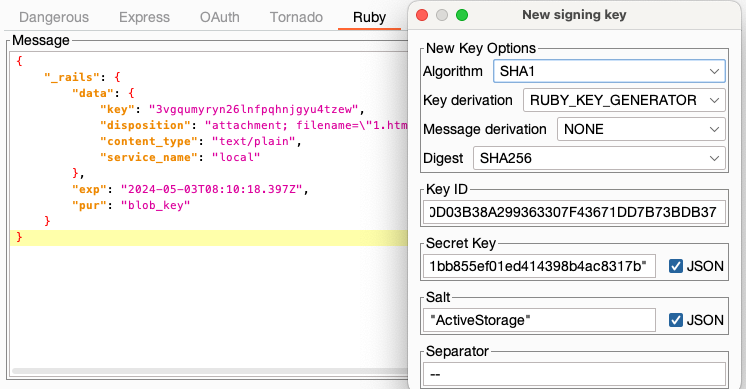
If the extension finds a secret key and salt, you'll see a new secret key dialog. You can use known keys for future attacks. To do so, click Brute Force > Known keys or click Attack and select the key from the Signing keys dropdown.
To change keys, go to the SignSaboteur > Wordlist tab.
Settings
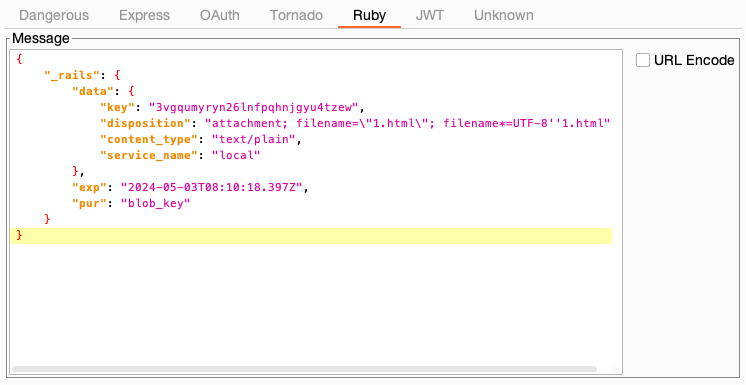
You can configure the search strategy to suit your preferences in the SignSaboteur > Settings tab. A list of all supported tokens is available for your reference. Please note that some tokens are disabled by default to help reduce noise.
Unknown signed web tokens use case
When you select Unknown in the Enabled signers menu, the extension looks for patterns that match the size of common hashing functions. Some message payloads might be incorrectly identified by the SignSaboteur. You can manually change message and separator values to solve the issue. The extension supports different message and key derivation techniques with Brute Force attacks, so you don’t have to manually change them.
To find the secret key of an unknown signed token, go to the Unknown tab, click Brute force and choose from Balanced or Deep mode.
A word of caution, the deep brute force mode supports slow hashing functions like Password-Based Key Derivation Function 2. Use it with small wordlists only, otherwise the task will take too long.
Small demo
This short GIF demonstrates how to find the unknown secret key of a Flask test application, modify the session token, and re-sign it.

Final note
You can try the extension in action on a self hosted lab available at Github repository. Good luck and have fun!
如有侵权请联系:admin#unsafe.sh