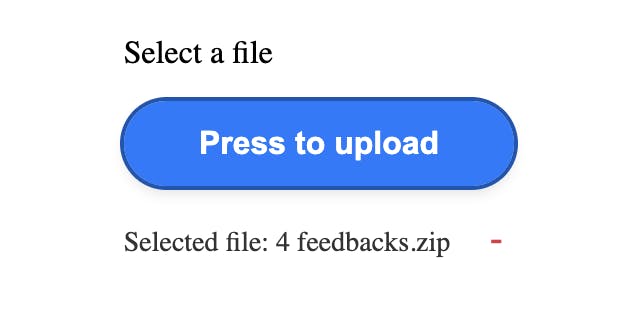
The motivation for writing this article is to provide clear instructions on how to create a file upload that looks attractive. The native button looks very minimalistic, but it can be improved.

Unfortunately, there is no browser API that allows you to open the upload dialog without the input tag, so let's clarify how to do this.
- Pure JS - so it can be adapted to any framework;
- No native upload button - we want custom button instead
- Accessibility - strong trend of last several years
Let’s Make a Pretty Button
As I mentioned earlier, we still need to render an input with type="file" to support the browser API. Since we don’t want it to be visible, let’s hide it.
Here’s a code example in pure HTML/CSS/JS:
<body>
    <style>
        main {
            width: 100%;
            height: 800px;
            display: flex;
            justify-content: center;
            align-items: center;
        }
        .file-upload {
            display: flex;
            flex-direction: column;
            gap: 15px;
        }
        input.file-upload__input[type="file"] {
            display: none;
        }

        /* custom styles to make button pretty */
        .file-upload__button {
            position: relative;
            display: inline-block;
            padding: 12px 24px;
            font-size: 16px;
            font-weight: 600;
            text-align: center;
            color: white;
            background-color: #007BFF;
            border: none;
            border-radius: 50px;
            cursor: pointer;
            transition: background-color 0.3s ease, transform 0.2s ease;
            box-shadow: 0px 4px 6px rgba(0, 0, 0, 0.1);
            overflow: hidden;
        }
        .file-upload__button:hover {
            background-color: #0056b3;
            transform: translateY(-2px);
        }
        .file-upload__button:focus {
            outline: 2px solid #0056b3;
        }

        /* Styles for displaying uploaded file information */
        .file-info {
            font-size: 14px;
            color: #333;
            display: inline-flex;
        }

        /* Styles for the small delete button */
        .delete-button {
            background-color: transparent;
            color: #dc3545;
            font-size: 18px;
            border: none;
            margin-left: 10px;
            cursor: pointer;
            display: none; /* Initially hidden */
        }
        .delete-button:focus {
            outline: none;
        }

        .delete-button:hover {
            color: #c82333;
        }
    </style>

    <main>
        <section id="home">
            <div class="file-upload">
                <label for="file-upload-input" id="file-upload-label">Select a file</label>
                <button class="file-upload__button" aria-labelledby="file-upload-label" onclick="handleUploadClick(this)">
                    Press to upload
                    <input type="file" name="photo" id="file-upload-input" class="file-upload__input" onchange="handleFileChange(event)" aria-describedby="file-info" />
                </button>
                <div class="file-upload__uploaded">
                    <!-- Accessible description for file name -->
                    <div id="file-info" class="file-info" role="status" aria-live="polite">
                        No file selected
                    </div>
                    <!-- Delete button initially hidden -->
                    <button id="delete-button" class="delete-button" aria-label="delete uploaded file" onclick="deleteFile()">-</button>
                </div>
            </div>
        </section>
    </main>

    <script>
        // Function to simulate clicking on the hidden input
        function handleUploadClick(button) {
            const fileInput = button.querySelector('input[type="file"]');
            fileInput.click();
        }

        // Function to handle the file change event
        function handleFileChange(event) {
            const fileInfo = document.getElementById('file-info');
            const file = event.target.files[0];
            const deleteButton = document.getElementById('delete-button');

            // Check if a file is selected and update the accessible status
            if (file) {
                fileInfo.textContent = `Selected file: ${file.name}`;
                deleteButton.style.display = 'inline-block'; // Show the delete button
            } else {
                fileInfo.textContent = 'No file selected';
                deleteButton.style.display = 'none'; // Hide the delete button
            }
        }

        // Function to delete the uploaded file
        function deleteFile() {
            const fileInput = document.getElementById('file-upload-input');
            const fileInfo = document.getElementById('file-info');
            const deleteButton = document.getElementById('delete-button');

            // Reset file input
            fileInput.value = '';

            // Update file info and hide delete button
            fileInfo.textContent = 'No file selected';
            deleteButton.style.display = 'none'; // Hide the delete button
        }
    </script>
</body>
Important Details
- Use semantic HTML tags. This will help readers understand the job better;
- For uploaded files, use role="status" and aria-live="polite". This way, the file upload message is accessible to users;
- Adding a trash icon with an aria-label helps screen readers identify its purpose, making the button more accessible;
- Using aria-describedby lets screen readers read content from another element, providing extra details about the component.
Screenshot for new button

Conclusion
With the above implementation, you can create an accessible and customizable file upload button. The design ensures the button looks good while maintaining accessibility standards.
The code and explanation should now be easier to read with corrected spelling and syntax.
如有侵权请联系:admin#unsafe.sh