2019-11-21 05:37:54 Author: fuzzinglabs.com(查看原文) 阅读量:201 收藏
Just a bit of context first, so last month I was at the hack.lu conference to give a workshop about “Reversing WebAssembly module 101” and spend some amazing time with friends. Workshop goes well, attendees were really interested and even better I received the award of the best talk/workshop of hack.lu 🙂
At the bar during the conference, I was talking with Ange Albertini (@angealbertini) i.e. in my opinion, the “Polyglot Grand Master and File Format Ninja” ©. The result of this discussion is this short blogpost to share with you, Ange was right and creating polyglot file is not so complicated 😉
In this blogpost, I will first explain the WebAssembly binary format and its sections. Then, I’ll demonstrate how to create a valid polyglot wasm module that contain an html/js payload embedded using 2 different techniques. Finally, I’ll give you the link to the github repository if you want to try on your own and learn more about WebAssembly 😉
Just a quick reminder before we start, if you are interested about WebAssembly security, I decided to convert my 4-day live training into recorded courses.
More details about my courses here.

1. What's a polyglot file?
Let’s start by the definition of Wikipedia:
“a polyglot is a computer program or script written in a valid form of multiple programming languages, which performs the same operations or output independent of the programming language used to compile or interpret it”.
In my opinion, this definition is too restrictive and too specific to “Polyglot Programming”. A polyglot file, after being executed/parsed by different programs, will rarely lead to the same output. For example, Javascript/BMP polymorphic files has been used in the wild to hide malicious payload only if the file is interpreted as a JS file. If you want to discover more about polymorphic files, you should take a look at the following ressources:
2. WebAssembly binary format, in short.
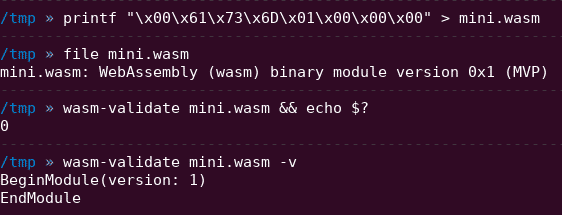
So, the first bytes of a valid WebAssembly module are the magic number ‘\0asm’ (i.e. null byte ASM). Following, there is a 4 bytes version number, fixed to the value 0x1 since the release of MVP 1.0.
This preamble of 2 fields is enough to create a valid WebAssembly module but if you change the value of this version field, some WebAssembly parsers and VMs will reject your module.

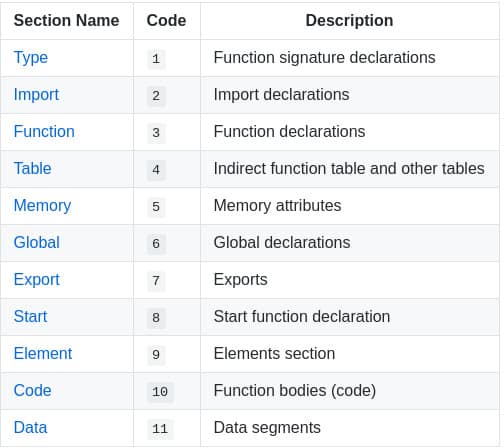
The module preamble is followed by a sequence of sections. Each section is identified by a 1-byte section code (0-11) that encodes either a known section or a custom section. Each known section is optional and may appear at most once.
I’ll not detailed more in this blogpost which king of information you will find in each known sections, but if you want to go deeper, start looking here:
3. HelloWorld & WebAssembly Data section
Let’s start with a basic “HelloWorld”. WebAssembly module can be compiled from C/C++/Rust/… source code or directly written using the WebAssembly text representation (wat/wast).
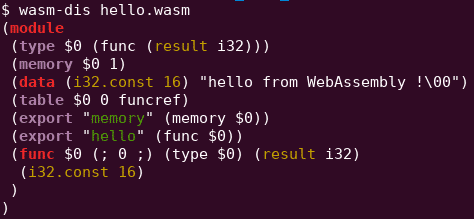
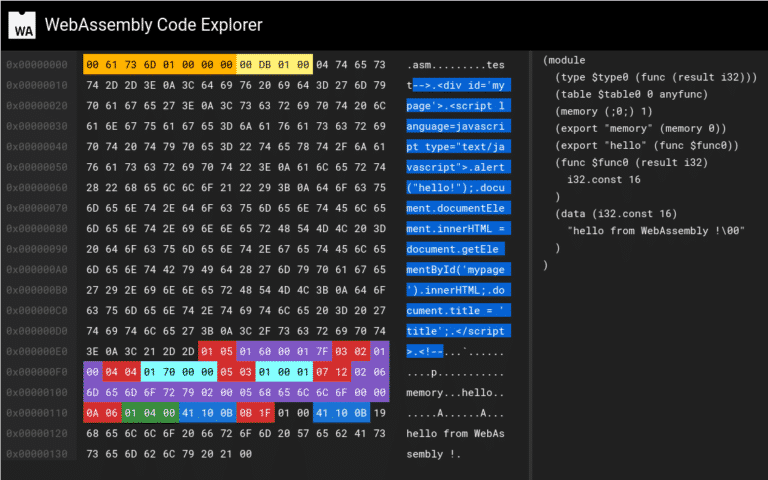
The following module (right-picture) will return the offset of the string “hello from WebAssembly !” when the function “hello” will be called by a VM. This offset is a pointer to the string stored in the linear memory, i.e. the memory shared by the wasm module and the WebAssembly VM.
As you can see, this data section allow us to store completely arbitrary strings inside a module, exactly what we need to inject some HTML/JS payloads.
4. WebAssembly Custom section
The data section is actually not the only section that can be used to store arbitrary strings. The custom section have been exactly designed with this goal in mind. For example, if a developer want to store DWARF debug information inside a module, during compilation of the module, a bunch of customs sections will be embedded in the wasm file itself with different DWARF section name for each (ex: .debug_info, .debug_line, etc.).
Injection of arbitrary strings/payload using this technique will only require to calculate correctly fields lengths to create a valid custom section.

5. Awesome HTML/JS payload needed!

Since I’m not an expert in polyglot file, I’ve asked @angealbertini and he kindly provided me this HTML/JS payload. In short, the payload use InnerHTML to prevent the browser to parse the totality of the file. It should be possible to create another valid payload without InnerHTML but no need to make your life more complicated 😉 More details about this payload and trick can be found here.
Finally, this payload needs to be embedded inside a WebAssembly module using either the data section or a custom section.
6. Data section injection (1st technique)
Let’s start with the easiest technique first. I choose to directly modify the WebAssembly text representation of the previous helloworld module and I’ve added an extra line to it:
(data (i32.const 42) "PAYLOAD_HERE")
This line will create a new “segment”, into the data section of the module, with my payload inside. Then, I’ve translate this wasm text file to a wasm module (named wasm_polyglot_data.wasm) using wat2wasm.

7. Custom section injection (2nd technique)
For this second technique, I just create a simple python script (available here) that take my payload and my helloworld module in order to concatenate them into one single binary file (named wasm_polyglot_custom.wasm). Only particularity, I’ve inject the custom section (with the html/js payload inside) at the beginning of the final wasm module i.e. just after the Webassembly header. This custom section becomes the first section of the module but it does not affect module validation.
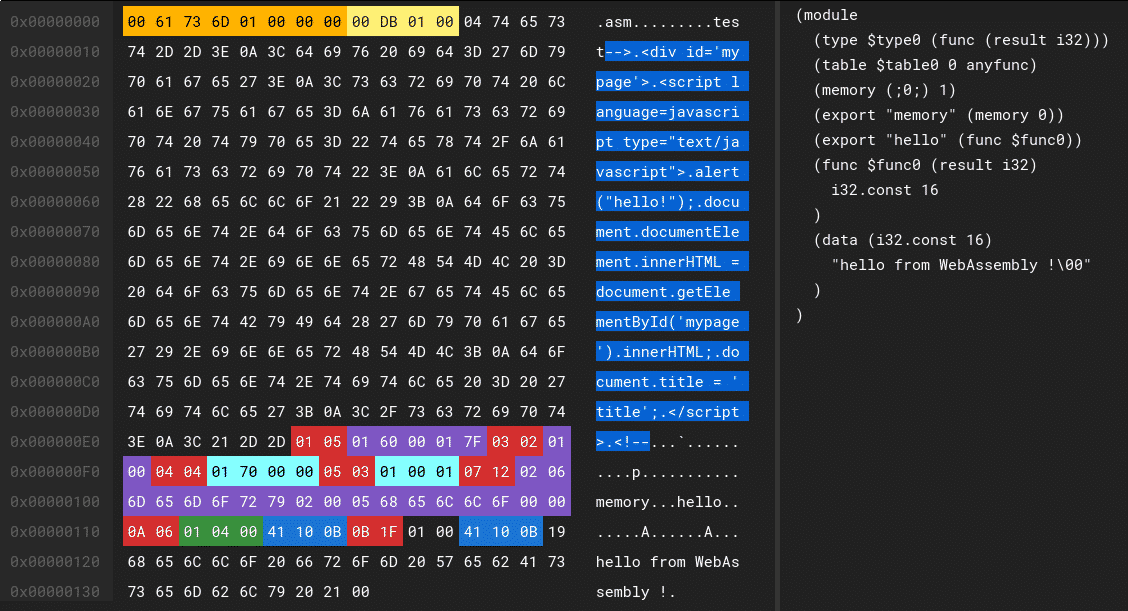
Finally, you can verify the internal structure of your module with wasmcodeexplorer and you should get something similar to the following screenshot.
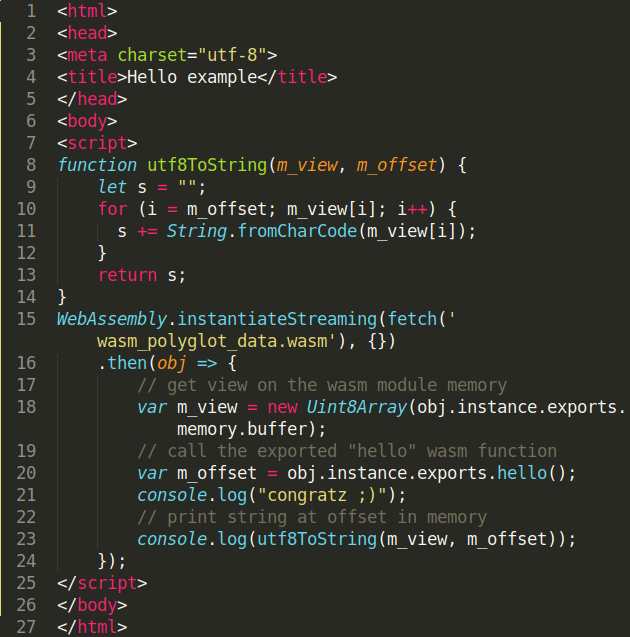
For your verification, run a web server locally and open this script (picture on the right – source here). You should get some messages logs in the developer JS console. In short, this script will fetch our polyglot wasm module, call the exported function hello() and finally print the helloworld string.

Now, rename the polyglot file extension from .wasm to .html, open the file in your browser and you should see the following alert message !

If you try to directly fetch the wasm_polyglot.html file using instantiateStreaming(), you will get this Javascript error message:
"Failed to execute 'compile' on 'WebAssembly': Incorrect response MIME type. Expected 'application/wasm'."
You can bypass this MIME verification by fetching the module, storing the buffer content and finally compile/instantiate the module using other WebAssembly APIs 😉
I hope that you have learn and discover some new WebAssembly tricks over this blogpost ;). Of course, if you want to go deeper after the reading, you can try to apply those techniques with the data & custom section to create PDF/GIF/… polyglot WebAssembly module.
Thanks again to Ange Albertini (@angealbertini) for the payload and advises regarding polyglot files in general !!
All the WebAssembly module, JS files and scripts shown in this blogpost are available in this github repository.
Final reminder, If you want to learn/discover more about WebAssembly security, I decided to convert my 4-day live training into recorded courses.
More details about my courses here.
Enter your email and we'll send you a bundle of awesome resources. 100% free - 100% awesome.
Any questions about our services and trainings ?
Get in touch today with any questions that you might have.
如有侵权请联系:admin#unsafe.sh