I am excited to share with you all (readers), how challenging and yet how amusing the CTF was. At certain point I was thinking that what am I doing wrong but as they say ‘No detail is too small.’ So here is my detailed CTF walkthrough of CloudSEK’s CTF EWYL Program.
CTF Difficulty Level:
· Medium
Penetration Testing Methodology:
· Web and Steganography based Penetration Testing
Reconnaissance:
· View-Source (Ctrl+U)
Exploitation:
· LFI Bug
Tools:
· Decoder (https://malwaredecoder.com)
· MD5 Hash Decoder (https://www.md5online.org/md5-decrypt.html)
· Base64 Encoder/Decoder (https://www.base64decode.org/)
· JWT.io/ POSTMAN (https://jwt.io/)
· Image Metadata Viewer (http://exif.regex.info/exif.cgi)
· Steghide
Results:
· Capturing the Flag
· Access the submission URL
Walkthrough
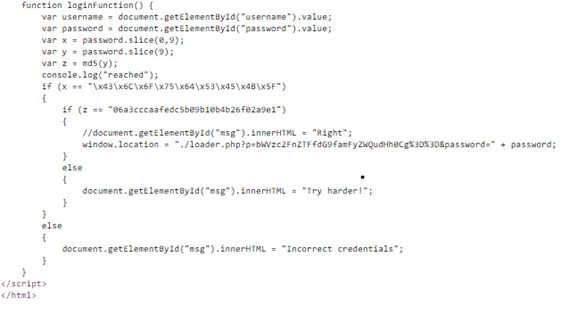
- view-source:http://54.244.19.42/ viewing the source code of the website for username and password to bypass the authentication.

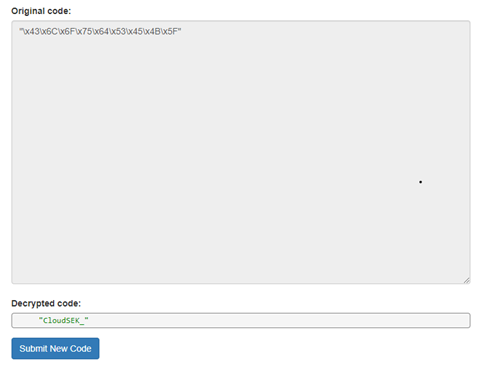
2. Here we can easily deduce that the username is encoded as a hidden script and to uncover its real functionality we have to decode it.
3. The password was encoded as md5 in the source code and we have decoded that too.
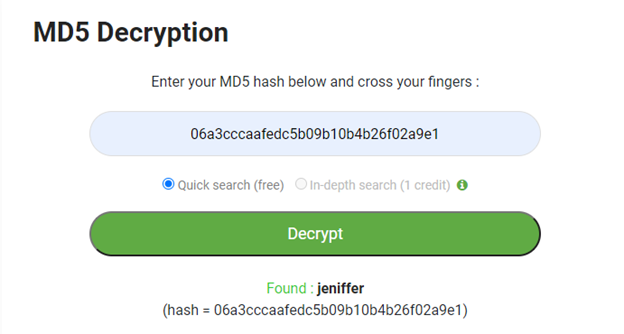
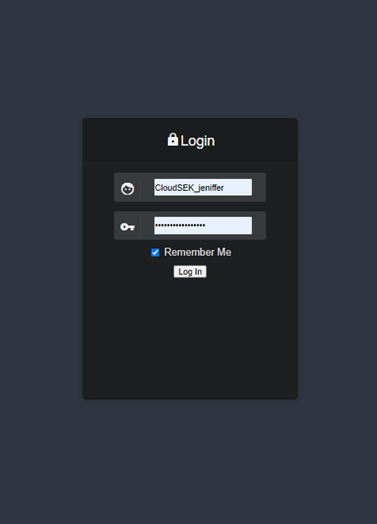
4. So, now we have the username and password, but wait there’s a catch. The username and password won’t work individually. They have to be concatenated and we get the username and password as = CloudSEK_jeniffer. This was tricky but as I said earlier ‘No detail is too small’.
The window location URL was the ultimate hint for the concatenation part.

5. So now the login window will look like this and hey, we have bypassed the authentication.
6. Now comes the tricky part where we have to retrieve a file from the user’s /home directory which is secret.txt and access the developer login token. But to be honest you have to look close enough to get access to the secret.txt file. Otherwise, one can be stuck at this stage for hours pulling their hair.
Trust me “Happy coding” is just a distraction.
The URL: http://54.244.19.42/loader.php?p=bWVzc2FnZTFfdG9famFyZWQudHh0Cg%3D%3D&password=CloudSEK_jeniffer
7. By looking at the URL closely, I knew that is it. I have my path.
Oh don’t get confused about putting this path (http://54.244.19.42/home/jared/secret.txt) in the URL, it’s not that easy and it won’t work.
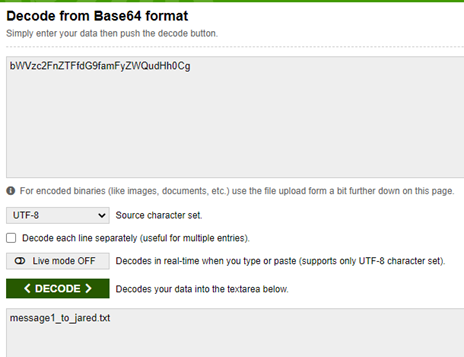
By looking at the URL you see (p=bWVzc2FnZTFfdG9famFyZWQudHh0C) which is actually the path for the secret.txt.
Let me show you.
8. By looking at the path it was obvious that it is Base64 encoded and we have to decode that and we get the message as = message1_to_jared.txt.
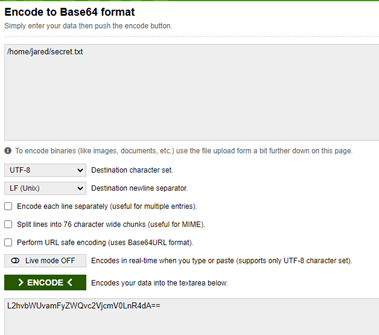
9. Now we encode our actual path where our access token is present. So we encode /home/jared/secret.txt and we have our actual path. We just have to copy and paste it in the URL.
Note: Do not copy the equal ‘=’ sign.
10. And we are on our next destination page with the access_token in our hand. Hurray!

11. Now, how do we pass the access_token?
For that, we will use the Post Data method and JWT with the help of a tool called POSTMAN, which will reduce our effort to half.
12. To use the POSTMAN we first have to download the local client so that we can pass the POST request to the non-secure (HTTP) website.
13. In the POSTMAN Launchpad we will pass the access_token and the TOKEN as KEY and VALUE respectively in the Body part as shown in the below figure and hit the SEND button and there we go, we have our next URL as the Response.
P.S.: This part is easy only if you have knowledge of Web Application Testing. You can use Burpsuite or cURL too to pass the token.
14. If you ask me that will it work?
My answer will be Ummm… NO!
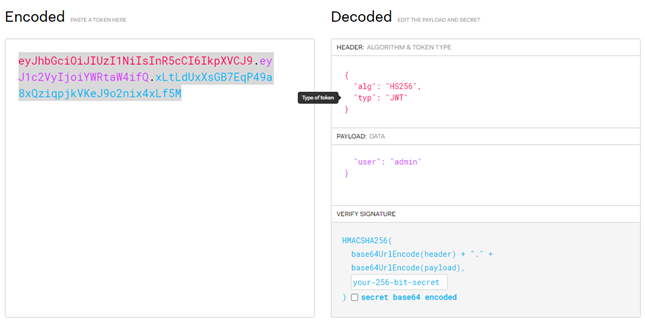
15. First we have to convert the token into an ‘admin’ token which is ‘jared’ token. For that, we will use JWT.io and we will have our new token like this followed by a POSTMAN POST request.
The new (admin) access_token = eyJhbGciOiJIUzI1NiIsInR5cCI6IkpXVCJ9.eyJ1c2VyIjoiYWRtaW4ifQ.xLtLdUxXsGB7EqP49a8xQziqpjkVKeJ9o2nix4xLf5M
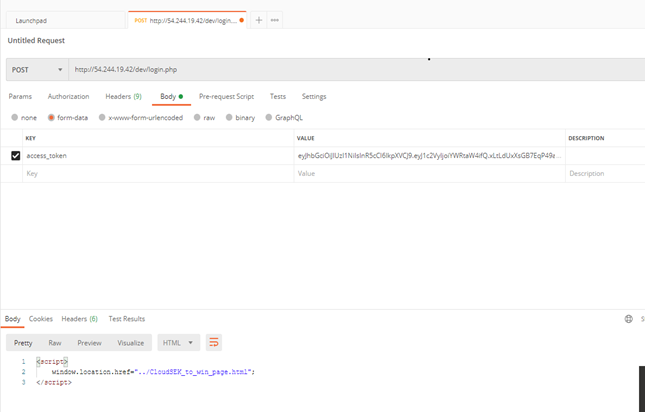
16. We have our new URL as http://54.244.19.42//CloudSEK_to_win_page.html
And here is our prize!
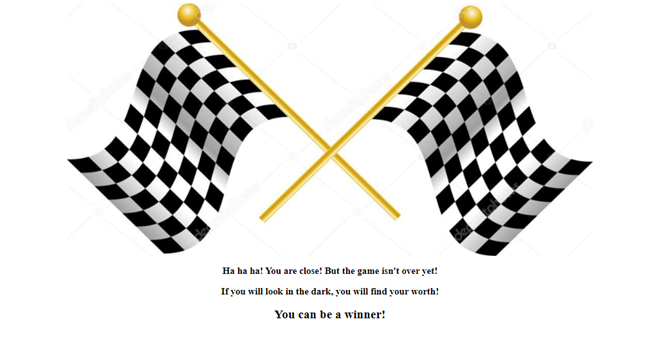
But you think you have captured the flag by seeing the flag?
Oh no no wait, the creator of this CTF is smarter than you thought.
17. Here we have to use steganography to get all the possible information about the image and as the image said, “If you will look in the dark, you will find your worth” and hence we already know that only the Metadata lives in the dark so we have to shed some light into it and see if we can find anything.
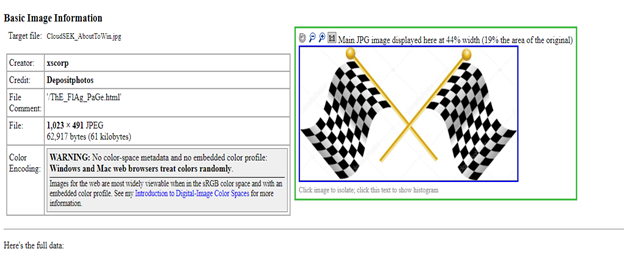
Yes, I am thinking the same thing which you are, ‘wasn’t that too easy as we have our next URL as the comment in the image’s metadata?’ Yes, it was indeed.
18. Now we have to head over to our final URL to capture our beloved flag and here it was as you can see below. http://54.244.19.42/ThE_FlAg_PaGe.html
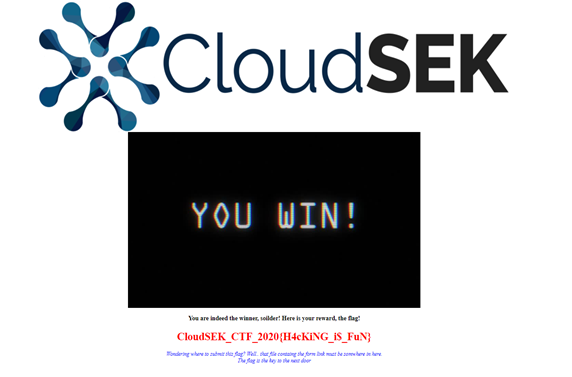
19. But wait, the actual hair-pulling stress is now. I faced difficulty in finding the submission URL, where is it? Show yourself!
To be honest, a single checkbox has ruined my confidence, you want to know what that is?
But let’s see what the problem I was getting from Steghide.
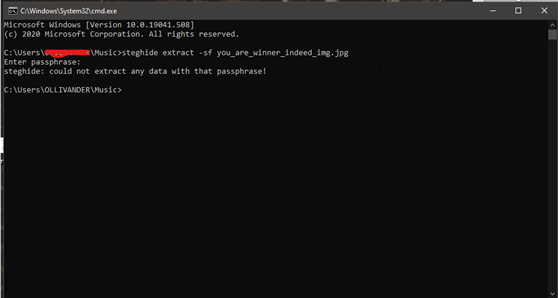
Excuse me? Why? Everything is correct and I even know for a fact that the passphrase is correct, then what is wrong?
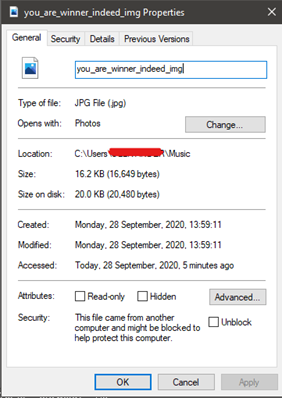
So after doing some digging ‘The Unblock’ checkbox in the properties which supposedly has to be tick before performing the extraction, otherwise it will be an endless loop of the wrong passphrase.

20. After double-checking everything, here we are with our final message and our link to the submission.
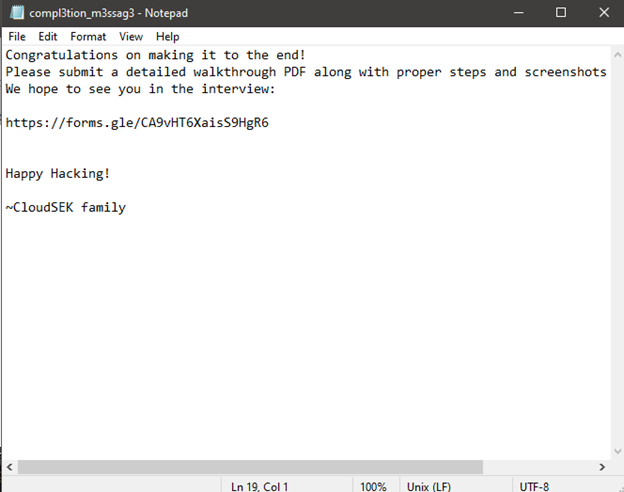
That is all to conclude the Walkthrough.
Thank you!
Wanna talk about tech and space?
Connect with me in LinkedIn: https://www.linkedin.com/in/amitnandi04/
如有侵权请联系:admin#unsafe.sh