一、概述
事实证明,在Fuzzing Webkit的过程中,使用Fuzzilli对JavaScriptCore(JSC)进行Fuzzing会非常成功,随着时间的推移,会产生大量崩溃。但是,一旦出现崩溃,由于不熟悉WebKit代码库,同时又缺少代码库相关的查询文档,要验证一处崩溃是否可以被漏洞利用,往往需要花费相当长的时间。正因如此,我们希望通过这一系列文章,深入研究JSC的内部原理,希望能扩展这部分知识。这一系列文章还针对安全研究人员,可以有助于引擎漏洞研究的过程。
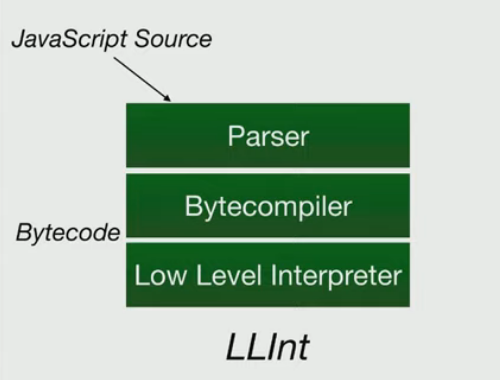
第一部分主要探讨如何将源代码进行解析,并转换为字节码,同时我们跟踪了整个代码库的过程。下面的图片是来源于JSC的演示文档,描述了管道的三个部分,这些也会在我们的系列文章中介绍到。

本文将介绍JSC中的源代码解析器,它实际上是一个字节码编译器,使用在解析阶段结束时生成的AST(抽象语法树)并从中生成字节码。字节码是引擎的真实源代码,并且是JSC中各种即时(Just-In-Time)编译器的关键输入之一。这篇文章将探讨生成的字节码,并帮助理解一些操作码和操作数。最后,文章以低级别解释器(LLInt)执行字节码为结尾。在这一系列的第二篇文章中,将深入研究低级别解释器(LLInt)和Baseline JIT。
二、先前研究
在这里,强烈推荐阅读Michael Saboff关于JSC架构和JIT的精彩演讲——《JavaScriptCore,多种编译器让这个引擎执行》。尽管这个演讲没有深入到每个JIT层的内部原理,但确实提供了概述,并说明引擎采用的各种优化技术和配置方法。
WebKit Wiki是在研究代码库时,可以参考的另一个非常有用的博客。其中提供了对引擎的概述,非常有用,但缺少足够的细节。
Saelo发表过一篇简短的论文《攻击JavaScript引擎:JavaScriptCore和CVE-2016-4622的案例研究》,可以帮助我们熟悉JSC运行时,他在研究的各个部分中都对此进行了讨论。
三、准备工作
在这一章,将演示如何设置调试环境,并编译JSC Shell实用程序的调试版本。一个有效的调试环境可以导航JSC代码库,并对运行时检查引擎执行的各个方面都至关重要。
3.1 生成调试版本
按照以下步骤,可以克隆GitHub上Webkit存储库的镜像,并为JSC Shell编译调试版本。
$ git clone https://github.com/WebKit/webkit && cd webkit
$ Tools/gtk/install-dependencies
$ Tools/Scripts/build-webkit --jsc-only --debug
$ cd WebKitBuild/Debug/bin/
$ ./jsc
3.2 设置调试环境
生成调试二进制文件后,需要配置IDE(集成开发环境)和调试器,以进行代码审计,并逐步执行引擎。这篇文章将使用包含ccls的VSCode进行代码审计,并且其中集成了gdb以进行交互式调试。各位读者可以自由使用最为熟悉的IDE和调试器。如果选择使用VSCode和ccls,则需要在VSCode的launch.json中添加以下启动任务。注意:请确保正确修改了以下代码段中列出的文件路径(即program和args),以符合目标调试环境。
{
    "version": "0.2.0",
    "configurations": [
        {
            "name": "(gdb) Launch",
            "type": "cppdbg",
            "request": "launch",
            "program": "/home/amar/WebKit/WebKitBuild/Debug/bin/jsc",
            "args": ["--dumpGeneratedBytecodes=true", "--useJIT=false","/home/amar/workspace/WebKit/WebKitBuild/Debug/bin/test.js"],
            "stopAtEntry": false,
            "cwd": "${workspaceFolder}",
            "environment": [],
            "externalConsole": false,
            "MIMode": "gdb",
            "setupCommands": [
                {
                    "description": "Enable pretty-printing for gdb",
                    "text": "-enable-pretty-printing",
                    "ignoreFailures": true
                }
            ],
            "preLaunchTask": "WebKit Debug Build"
        }
    ]
}
这里,添加了一个可选的编译任务来启动配置,该配置将在启动调试器之前编译JSC。这个步骤是可选的,但通常最好将代码库与正在生成的调试版本同步。下面列出了添加到task.json的编译任务:
{
    "version": "2.0.0",
    "tasks": [
        {
            "label": "WebKit Debug Build",
            "type": "shell",
            "command": "/home/amar/workspace/WebKit/Tools/Scripts/build-jsc --jsc-only --debug"
        }
    ]
}
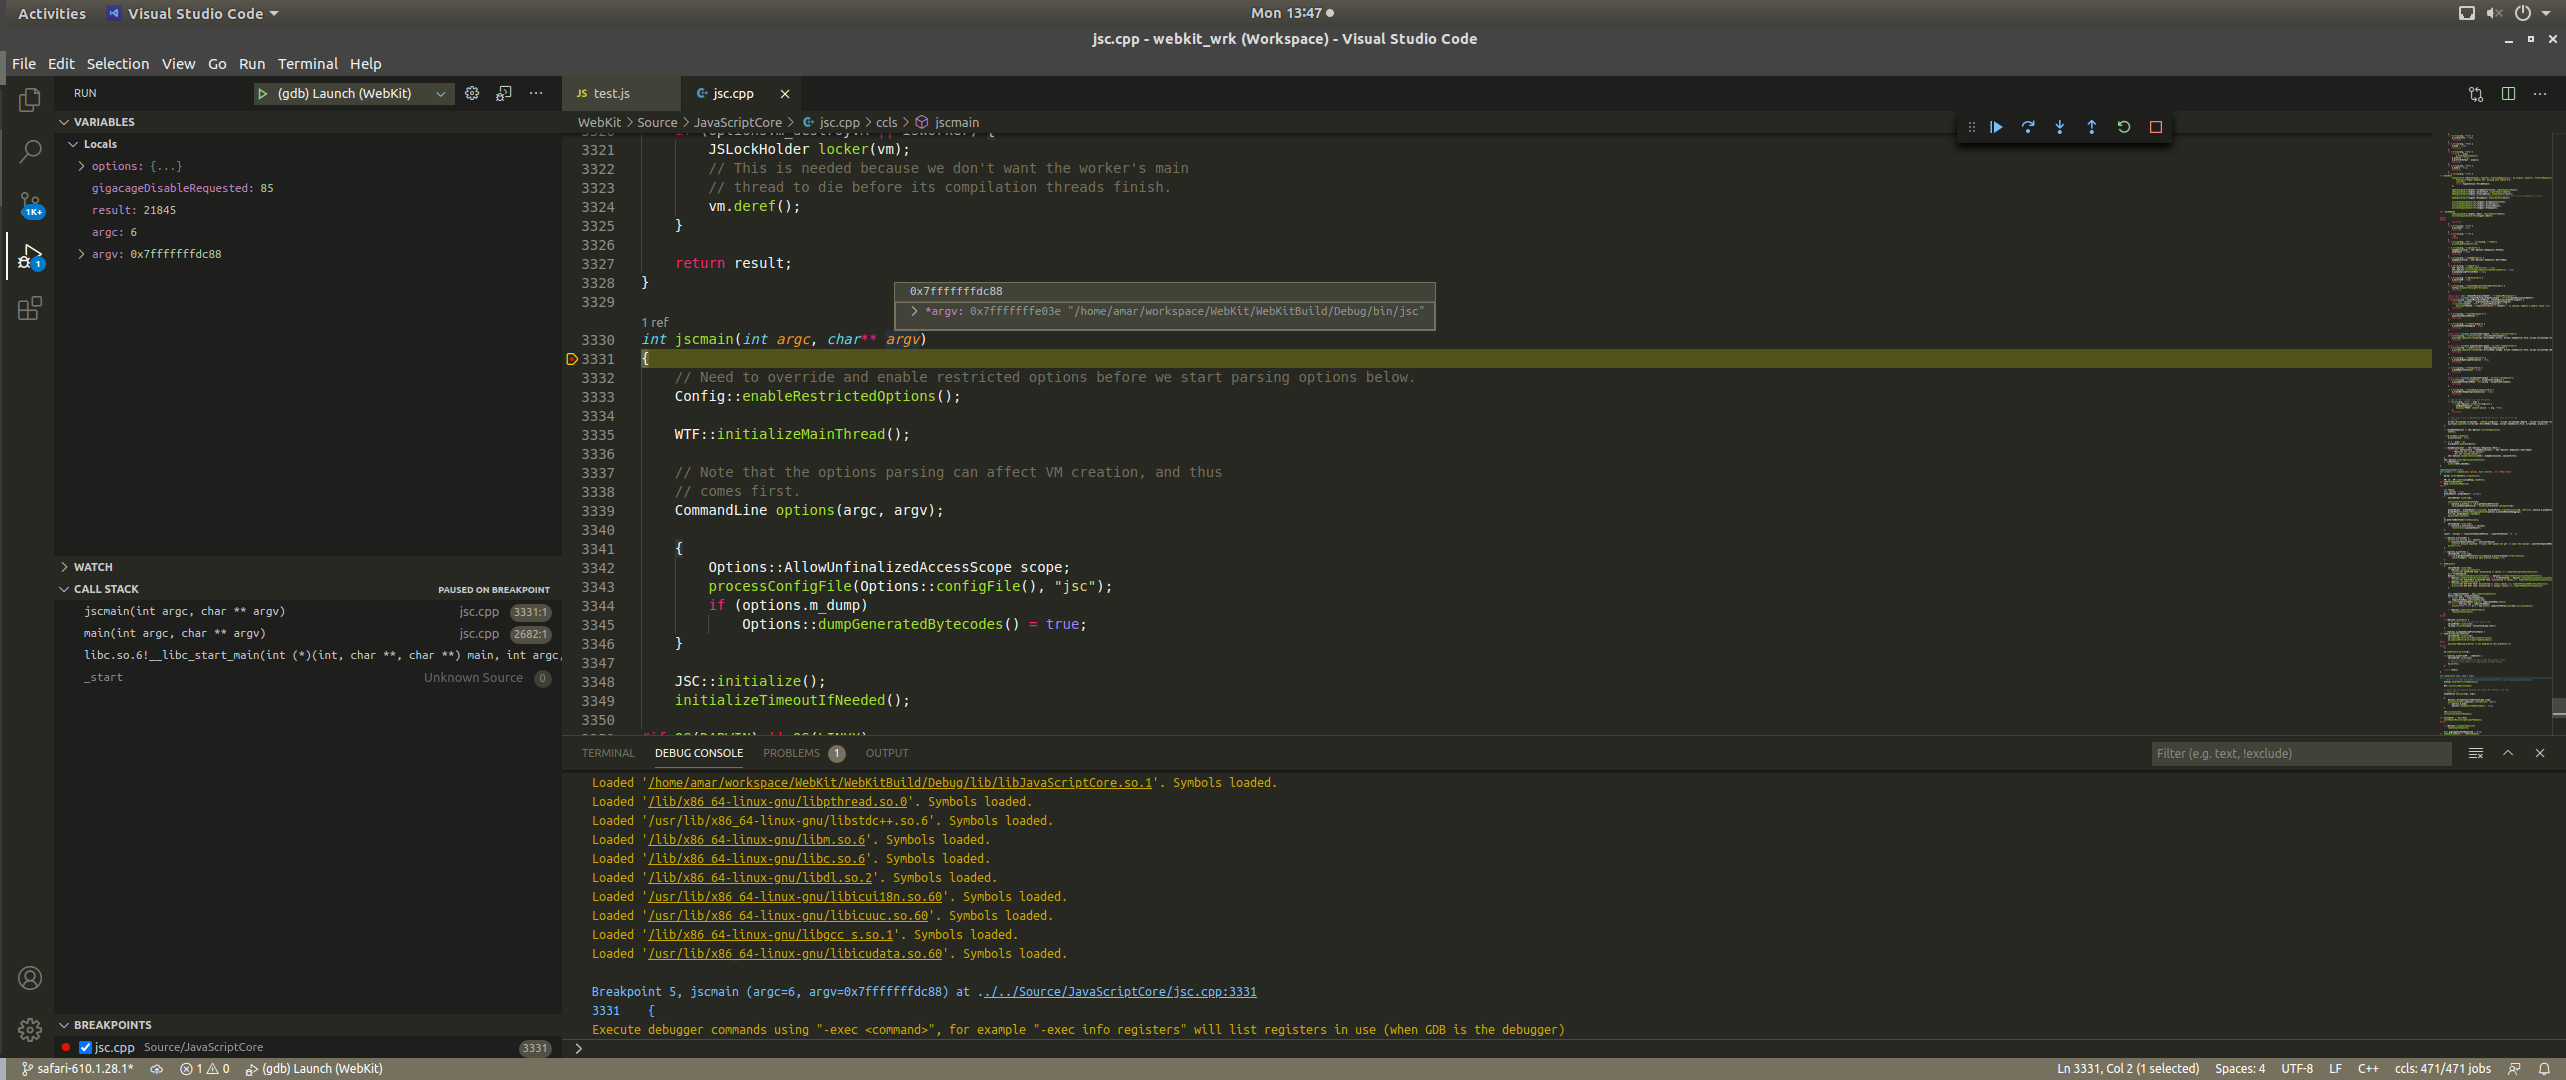
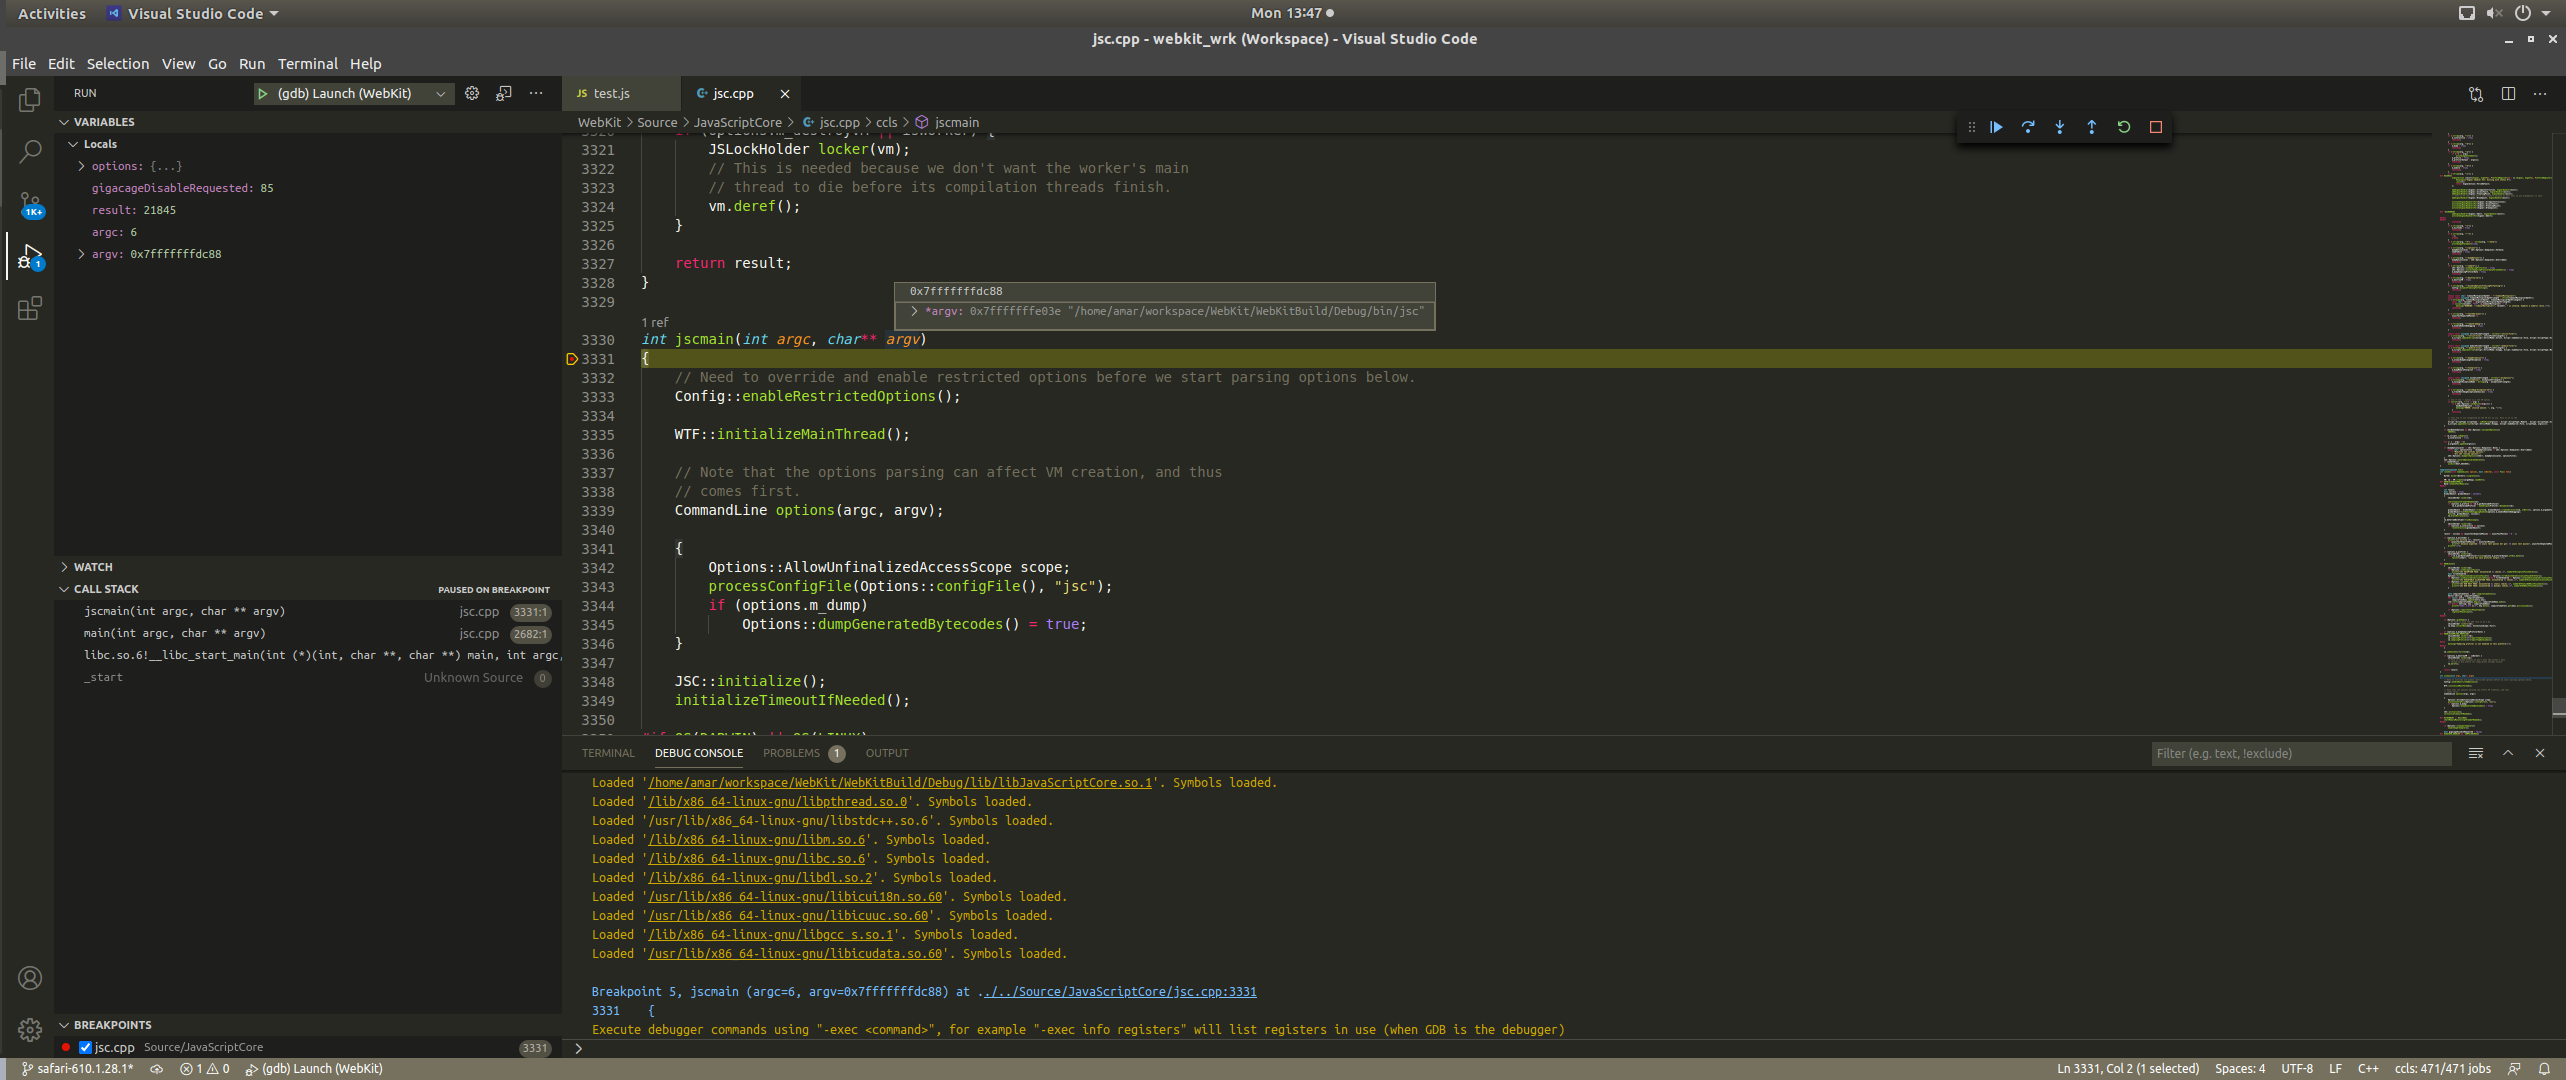
如果一切正常,调试环境现在应该允许启动gdb(VSCode中为F5)并命中已经设置的断点,如下图所示:

四、JSC Shell
这一章将讨论上一章中生成的JSC Shell,并展示它在理解引擎内部原理上的重要性。JSC Shell允许研究人员和开发人员将JavaScriptCore作为一个独立的库进行测试,而无需编译整个WebKit项目。JSC Shell为JavaScript引擎提供了Repeat-Eval-Print-Loop(REPL)环境。此外,它还允许通过命令行传递JS脚本,该脚本由JSC Shell读取,由引擎解析和执行。
Shell的源代码可以在jsc.cpp中找到。
Shell的入口点是jscmain。这个函数负责初始化Web模板框架(WTF),该模板是Webkit代码库中的一组常用功能,并在创建JSC vm之前解析选项。
JSC的初始化开始于对runJSC的调用,它在被调用时为VM对象分配内存,同时初始化并检索GlobalObject引用。
int runJSC(const CommandLine& options, bool isWorker, const Func& func)
{
    //... 为简化代码,此处省略一部分

    VM& vm = VM::create(LargeHeap).leakRef();
    //... 为简化代码,此处省略一部分

    GlobalObject* globalObject = nullptr;
    {
    //... 为简化代码,此处省略一部分
        globalObject = GlobalObject::create(vm, GlobalObject::createStructure(vm, jsNull()), options.m_arguments);
        globalObject->setRemoteDebuggingEnabled(options.m_enableRemoteDebugging);
        func(vm, globalObject, success);
        //... 为简化代码,此处省略一部分
    }
    //... 为简化代码,此处省略一部分
GlobalObject::create最终会调用JSGlobalObject::init(VM& ),后者负责使用所需的内置程序和其他运行时来设置活动,以此初始化VM。这篇文章不会详细介绍如何解析内置代码并将其链接到VM,有兴趣的读者可以阅读JavaScriptCore/builtins/,了解作为JSC运行时组成部分之一的所有内置对象/构造函数。另外,还可以选择设置断点并逐步执行JSGlobalObject::init的另一种方法。
在初始化VM和GlobalObject之后,将执行传递给runJSC的lambda函数。Lambda函数调用带有三个参数的runWithOptions,这三个参数分别是指向初始化的GlobalObject的指针、传递给JSC Shell的命令行选项以及一个状态变量。
runWithOptions的主要目标是创建必要的缓冲区,以存储提供给JSC Shell的原始JavaScript。就这篇文章而言,以下脚本文件(test.js)将作为命令行参数传递给JSC:
$ cat test.js
let x = 10;
let y = 20;
let z = x + y;

$ ./WebKitBuild/Debug/bin/jsc test.js
一旦设置完成,且填充了后备缓冲区之后,Shell现在将通过调用的方式评估和执行脚本:
NakedPtr < Exception> evaluationException;
JSValue returnValue = evaluate(globalObject, jscSource(scriptBuffer, sourceOrigin , fileName), JSValue(), evaluationException);
在上面的代码片段中,scriptBuffer存储了通过命令行传递的test.js的内容,sourceOrigin将URI存储到脚本,在我们的案例中传递的是脚本的绝对路径。jscSource是一个辅助函数,可以从scriptBuffer生成一个SourceCode对象。SourceCode对象封装原始脚本数据。
五、运行时部署
现在,已经通过JSC Shell,将源代码加载到了引擎中,下一步是将其转交给JSC引擎,并启动对已加载脚本的处理。在runtime/Completion.cpp中定义的评估函数调用了executeProgram,这是JSC引擎接管并开始处理的地方:
JSValue evaluate(JSGlobalObject* globalObject, const SourceCode& source, JSValue thisValue, NakedPtr < Exception>& returnedException)
{
    VM& vm = globalObject->vm();

    //... 为简化代码,此处省略一部分

    JSObject* thisObj = jsCast < JSObject*>(thisValue.toThis(globalObject, ECMAMode::sloppy()));
    JSValue result = vm.interpreter->executeProgram(source, globalObject, thisObj);

    //... 为简化代码,此处省略一部分

    return result;
}
函数Interpreter::executeProgram负责执行三个重要任务,而这些任务也是本文讨论的重点。主要任务包括:
1、启动词法分析和源代码解析;
2、生成字节码;
3、执行字节码。
在函数代码片段中,可以看到上述任务:
JSValue Interpreter::executeProgram(const SourceCode& source, JSGlobalObject*, JSObject* thisObj)
{
    JSScope* scope = thisObj->globalObject()->globalScope();
    VM& vm = scope->vm();

    //.. 省略部分代码

    ProgramExecutable* program = ProgramExecutable::create(globalObject, source);

    //... 为简化代码,此处省略一部分

    VMEntryScope entryScope(vm, globalObject);

    // Compile source to bytecode if necessary:
    JSObject* error = program->initializeGlobalProperties(vm, globalObject, scope);  < -- 1. Initiates Lexing and Parsing of the source code

//... 为简化代码,此处省略一部分

    ProgramCodeBlock* codeBlock;
    {
        CodeBlock* tempCodeBlock;
        Exception* error = program->prepareForExecution < ProgramExecutable>(vm, nullptr, scope, CodeForCall, tempCodeBlock);  < -- 2. Generation of bytecode
        //... 为简化代码,此处省略一部分
        codeBlock = jsCast < ProgramCodeBlock*>(tempCodeBlock);
    }

    RefPtr < JITCode> jitCode;
    ProtoCallFrame protoCallFrame;
    {
        DisallowGC disallowGC; // Ensure no GC happens. GC can replace CodeBlock in Executable.
        jitCode = program->generatedJITCode();
        protoCallFrame.init(codeBlock, globalObject, globalCallee, thisObj, 1);
    }

    // Execute the code:
    //... 为简化代码,此处省略一部分
    JSValue result = jitCode->execute(&vm, &protoCallFrame);  < -- 3. Execution of bytecode
    return checkedReturn(result);
}
1、executeProgram首先为ProgramExecutable对象分配内存,然后通过调用ProgramExecutable::create来调用ProgramExecutable构造函数。在调用过程中,依次调用具有以下签名的基本构造函数(即GlobalExecutable):
GlobalExecutable(Structure* structure, VM& vm, const SourceCode& sourceCode, bool isInStrictContext, DerivedContextType derivedContextType, bool isInArrowFunctionContext, bool isInsideOrdinaryFunction, EvalContextType evalContextType, Intrinsic intrinsic)
        : Base(structure, vm, sourceCode, isInStrictContext, derivedContextType, isInArrowFunctionContext, isInsideOrdinaryFunction, evalContextType, intrinsic)
    {
}
2、GlobalExecutable依次调用其基本构造函数ScriptExecutable。ScriptExecutable构造函数执行两个函数,它首先初始化ExecutableBase,然后初始化其他几个类成员。ExecutableBase调用JSCell构造函数,该构造函数可以有效地为ProgramExecutable生成JSCell。
ExecutableBase及其派生类(例如ProgramExecutable)在我们的讨论过程中非常重要,因为它存储了对JIT代码的引用,该引用会在后续阶段执行。
现在,让我们回到Interpreter::executeProgram,并继续对该函数的讨论。初始化ProgramExecutable对象程序之后,该函数将执行一系列验证检查,以评估所提供的脚本是否为JSON脚本。由于test.js不包含任何JSON,因此现在可以忽略这些检查,并且先前记录的代码段中已经将其截断。接下来,需要分析的指令是ProgramExecutable::initializeGlobalProperties:
// Compile source to bytecode if necessary:
JSObject* error = program->initializeGlobalProperties(vm, globalObject, scope);
函数ProgramExecutable::initializeGlobalProperties使用源对象来生成UnlinkedProgramCodeBlock:
UnlinkedProgramCodeBlock* unlinkedCodeBlock = vm.codeCache()->getUnlinkedProgramCodeBlock(vm, this, source(), strictMode, codeGenerationMode, error);
根据源代码中开发人员的评论,CodeCache是用于 < script>、window.eval()、new Function和JSEvaluateScript()之类顶级代码的缓存。在实例化VM对象时,将初始化CodeCache。函数调用getUnlinkedProgramCodeBlock,依次调用getUnlinkedGlobalCodeBlock:
template  < class UnlinkedCodeBlockType, class ExecutableType>
UnlinkedCodeBlockType* CodeCache::getUnlinkedGlobalCodeBlock(VM& vm, ExecutableType* executable, const SourceCode& source, JSParserStrictMode strictMode, JSParserScriptMode scriptMode, OptionSet < CodeGenerationMode> codeGenerationMode, ParserError& error, EvalContextType evalContextType)
{
    //... 为简化代码,此处省略一部分

    VariableEnvironment variablesUnderTDZ;
    unlinkedCodeBlock = generateUnlinkedCodeBlock < UnlinkedCodeBlockType, ExecutableType>(vm, executable, source, strictMode, scriptMode, codeGenerationMode, error, evalContextType, &variablesUnderTDZ);

    //... 为简化代码,此处省略一部分

    return unlinkedCodeBlock;
}
最终generateUnlinkedCodeBlock的调用指向对CodeCache::generateUnlinkedCodeBlockImpl的调用。该函数负责启动脚本的解析以及字节码的生成。到目前为止,执行中的调用堆栈类似于以下内容:
libJavaScriptCore.so.1!JSC::generateUnlinkedCodeBlockImpl < JSC::UnlinkedProgramCodeBlock, JSC::ProgramExecutable>(JSC::VM & vm, const JSC::SourceCode & source, JSC::JSParserStrictMode strictMode, JSC::JSParserScriptMode scriptMode, WTF::OptionSet < JSC::CodeGenerationMode> codeGenerationMode, JSC::ParserError & error, JSC::EvalContextType evalContextType, JSC::DerivedContextType derivedContextType, bool isArrowFunctionContext, const JSC::VariableEnvironment * variablesUnderTDZ, JSC::ProgramExecutable * executable) (/home/amar/workspace/WebKit/Source/JavaScriptCore/runtime/CodeCache.cpp:74)
libJavaScriptCore.so.1!JSC::generateUnlinkedCodeBlock < JSC::UnlinkedProgramCodeBlock, JSC::ProgramExecutable>(JSC::VM & vm, JSC::ProgramExecutable * executable, const JSC::SourceCode & source, JSC::JSParserStrictMode strictMode, JSC::JSParserScriptMode scriptMode, WTF::OptionSet < JSC::CodeGenerationMode> codeGenerationMode, JSC::ParserError & error, JSC::EvalContextType evalContextType, const JSC::VariableEnvironment * variablesUnderTDZ) (/home/amar/workspace/WebKit/Source/JavaScriptCore/runtime/CodeCache.cpp:117)
libJavaScriptCore.so.1!JSC::CodeCache::getUnlinkedGlobalCodeBlock < JSC::UnlinkedProgramCodeBlock, JSC::ProgramExecutable>(JSC::CodeCache * const this, JSC::VM & vm, JSC::ProgramExecutable * executable, const JSC::SourceCode & source, JSC::JSParserStrictMode strictMode, JSC::JSParserScriptMode scriptMode, WTF::OptionSet < JSC::CodeGenerationMode> codeGenerationMode, JSC::ParserError & error, JSC::EvalContextType evalContextType) (/home/amar/workspace/WebKit/Source/JavaScriptCore/runtime/CodeCache.cpp:172)
libJavaScriptCore.so.1!JSC::CodeCache::getUnlinkedProgramCodeBlock(JSC::CodeCache * const this, JSC::VM & vm, JSC::ProgramExecutable * executable, const JSC::SourceCode & source, JSC::JSParserStrictMode strictMode, WTF::OptionSet < JSC::CodeGenerationMode> codeGenerationMode, JSC::ParserError & error) (/home/amar/workspace/WebKit/Source/JavaScriptCore/runtime/CodeCache.cpp:187)
libJavaScriptCore.so.1!JSC::ProgramExecutable::initializeGlobalProperties(JSC::ProgramExecutable * const this, JSC::VM & vm, JSC::JSGlobalObject * globalObject, JSC::JSScope * scope) (/home/amar/workspace/WebKit/Source/JavaScriptCore/runtime/ProgramExecutable.cpp:77)
libJavaScriptCore.so.1!JSC::Interpreter::executeProgram(JSC::Interpreter * const this, const JSC::SourceCode & source, JSC::JSObject * thisObj) (/home/amar/workspace/WebKit/Source/JavaScriptCore/interpreter/Interpreter.cpp:799)
libJavaScriptCore.so.1!JSC::evaluate(JSC::JSGlobalObject * globalObject, const JSC::SourceCode & source, JSC::JSValue thisValue, WTF::NakedPtr < JSC::Exception> & returnedException) (/home/amar/workspace/WebKit/Source/JavaScriptCore/runtime/Completion.cpp:139)
runWithOptions(GlobalObject * globalObject, CommandLine & options, bool & success) (/home/amar/workspace/WebKit/Source/JavaScriptCore/jsc.cpp:2877)
operator()(const struct {...} * const __closure, JSC::VM & vm, GlobalObject * globalObject, bool & success) (/home/amar/workspace/WebKit/Source/JavaScriptCore/jsc.cpp:3414)
runJSC < jscmain(int, char**):: < lambda(JSC::VM&, GlobalObject*, bool&)> >(const CommandLine &, bool, const struct {...} &)(const CommandLine & options, bool isWorker, const struct {...} & func) (/home/amar/workspace/WebKit/Source/JavaScriptCore/jsc.cpp:3249)
jscmain(int argc, char ** argv) (/home/amar/workspace/WebKit/Source/JavaScriptCore/jsc.cpp:3407)
main(int argc, char ** argv) (/home/amar/workspace/WebKit/Source/JavaScriptCore/jsc.cpp:2682)
libc.so.6!__libc_start_main(int (*)(int, char **, char **) main, int argc, char ** argv, int (*)(int, char **, char **) init, void (*)(void) fini, void (*)(void) rtld_fini, void * stack_end) (/build/glibc-2ORdQG/glibc-2.27/csu/libc-start.c:310)
_start (Unknown Source:0)
六、词法分析和解析
在这一章,将探讨引擎如何对加载到引擎中的源代码进行分类和解析,以生成AST。词法分析和解析是一个原始源代码被标记化,然后对生成的标记进行解析,并编译AST的过程。通过对比ECMA规范验证脚本,这个处理过程还可以识别提供的JS脚本中可能存在的语法和语义错误。最开始是对函数CodeCache::generateUnlinkedCodeBlockImpl的调用,代码如下,其中不重要的代码已经被省略。
UnlinkedCodeBlockType* generateUnlinkedCodeBlockImpl(VM& vm, const SourceCode& source, JSParserStrictMode strictMode, JSParserScriptMode scriptMode, OptionSet < CodeGenerationMode> codeGenerationMode, ParserError& error, EvalContextType evalContextType, DerivedContextType derivedContextType, bool isArrowFunctionContext, const VariableEnvironment* variablesUnderTDZ, ExecutableType* executable = nullptr)
{
    typedef typename CacheTypes < UnlinkedCodeBlockType>::RootNode RootNode;
    bool isInsideOrdinaryFunction = executable && executable->isInsideOrdinaryFunction();
    std::unique_ptr < RootNode> rootNode = parse < RootNode>(
        vm, source, Identifier(), JSParserBuiltinMode::NotBuiltin, strictMode, scriptMode, CacheTypes < UnlinkedCodeBlockType>::parseMode, SuperBinding::NotNeeded, error, nullptr, ConstructorKind::None, derivedContextType, evalContextType, nullptr, variablesUnderTDZ, nullptr, isInsideOrdinaryFunction);        < -- AST generation

    //... 为简化代码,此处省略一部分

    ExecutableInfo executableInfo(usesEval, false, false, ConstructorKind::None, scriptMode, SuperBinding::NotNeeded, CacheTypes < UnlinkedCodeBlockType>::parseMode, derivedContextType, needsClassFieldInitializer, isArrowFunctionContext, false, evalContextType);

    UnlinkedCodeBlockType* unlinkedCodeBlock = UnlinkedCodeBlockType::create(vm, executableInfo, codeGenerationMode);
    unlinkedCodeBlock->recordParse(rootNode->features(), rootNode->hasCapturedVariables(), lineCount, unlinkedEndColumn);

    //... 为简化代码,此处省略一部分

    error = BytecodeGenerator::generate(vm, rootNode.get(), source, unlinkedCodeBlock, codeGenerationMode, variablesUnderTDZ, ecmaMode);  < -- Initiate bytecode generation

    if (error.isValid())
        return nullptr;

    return unlinkedCodeBlock;
}
解析是通过parser/Parser.h中定义的解析调用来启动的:
std::unique_ptr < RootNode> rootNode = parse < RootNode>(
        vm, source, Identifier(), JSParserBuiltinMode::NotBuiltin, strictMode, scriptMode, CacheTypes < UnlinkedCodeBlockType>::parseMode, SuperBinding::NotNeeded, error, nullptr, ConstructorKind::None, derivedContextType, evalContextType, nullptr, variablesUnderTDZ, nullptr, isInsideOrdinaryFunction);
解析函数中的以下代码行,负责设置解析器并分析源脚本:
Parser < Lexer < LChar>> parser(vm, source, builtinMode, strictMode, scriptMode, parseMode, superBinding, defaultConstructorKindForTopLevelFunction, derivedContextType, isEvalNode < ParsedNode>(), evalContextType, debuggerParseData, isInsideOrdinaryFunction);
result = parser.parse < ParsedNode>(error, name, parseMode, isEvalNode < ParsedNode>() ? ParsingContext::Eval : ParsingContext::Program, WTF::nullopt, variablesUnderTDZ, instanceFieldLocations);
第一行创建一个解析器对象,该解析器对象的构造函数以及其他活动使用未链接的源代码实例化lexer对象:
m_lexer = makeUnique < LexerType>(vm, builtinMode, scriptMode);
m_lexer->setCode(source, &m_parserArena);
此外,构造函数还设置第一个token位置的详细信息:
 m_token.m_location.line = source.firstLine().oneBasedInt();
 m_token.m_location.startOffset = source.startOffset();
 m_token.m_location.endOffset = source.startOffset();
 m_token.m_location.lineStartOffset = source.startOffset();
在这些参数都初始化之后,会进行接下来的调用:
ALWAYS_INLINE void next(OptionSet < LexerFlags> lexerFlags = { })
    {
        int lastLine = m_token.m_location.line;
        int lastTokenEnd = m_token.m_location.endOffset;
        int lastTokenLineStart = m_token.m_location.lineStartOffset;
        m_lastTokenEndPosition = JSTextPosition(lastLine, lastTokenEnd, lastTokenLineStart);
        m_lexer->setLastLineNumber(lastLine);
        m_token.m_type = m_lexer->lex(&m_token, lexerFlags, strictMode());
}
函数m_lexer->lex最终调用函数Lexer < T>::lexWithoutClearingLineTerminator。这个函数对源代码的下一个token进行词法化处理,并将JSToken对象返回给调用方。
JSTokenType Lexer < T>::lexWithoutClearingLineTerminator(JSToken* tokenRecord, OptionSet < LexerFlags> lexerFlags, bool strictMode)
如果对lexer工作方式感兴趣,可以查看Lexer.cpp中的函数。
解析器对象初始化后,将调用解析函数,即解析过程。解析函数parse调用parseInner:
auto parseResult = parseInner(calleeName, parseMode, parsingContext, functionConstructorParametersEndPosition, instanceFieldLocations);
函数parseInner首先为ASTBuilder设置一个称为context的上下文对象。上下文现在具有对源代码、parserArena和vm的引用。经过一系列检查后,parseInner最终调用parseSouceElements:
sourceElements = parseSourceElements(context, CheckForStrictMode);
该函数通过创建一个sourceElements对象来解析存在的元素,这个对象会存储已经解析的语句。
template  < typename LexerType>
template  < class TreeBuilder> TreeSourceElements Parser < LexerType>::parseSourceElements(TreeBuilder& context, SourceElementsMode mode)
{
    const unsigned lengthOfUseStrictLiteral = 12; // "use strict".length
    TreeSourceElements sourceElements = context.createSourceElements();

    //... 为简化代码,此处省略一部分

    while (TreeStatement statement = parseStatementListItem(context, directive, &directiveLiteralLength)) {
        if (shouldCheckForUseStrict) {
           //... 为简化代码,此处省略一部分
        }
        context.appendStatement(sourceElements, statement);
    }

    propagateError();
    return sourceElements;
}
然后,该函数遍历源代码中的语句,并通过调用parseStatementListItem来解析上下文引用的unlinkedSourceCode。
while (TreeStatement statement = parseStatementListItem(context, directive, &directiveLiteralLength)) {函数parseStatementListItem负责继续进行源代码的词法分析和语法分析,以编译AST。解析Token以生成TreeStatement节点,有兴趣的读者可以查看Parser.cpp中的函数进行进一步探索。我们可以在这里找到变量声明解析函数的示例。
template  < class TreeBuilder> TreeStatement Parser < LexerType>::parseVariableDeclaration(TreeBuilder& context, DeclarationType declarationType, ExportType exportType)
{
    ASSERT(match(VAR) || match(LET) || match(CONSTTOKEN));
    JSTokenLocation location(tokenLocation());
    int start = tokenLine();
    int end = 0;
    int scratch;
    TreeDestructuringPattern scratch1 = 0;
    TreeExpression scratch2 = 0;
    JSTextPosition scratch3;
    bool scratchBool;
    TreeExpression variableDecls = parseVariableDeclarationList(context, scratch, scratch1, scratch2, scratch3, scratch3, scratch3, VarDeclarationContext, declarationType, exportType, scratchBool);
    propagateError();
    failIfFalse(autoSemiColon(), "Expected ';' after variable declaration");

    return context.createDeclarationStatement(location, variableDecls, start, end);
}
随后,验证对parseStatementListItem的调用结束时返回的StatementNodes,并将其添加到sourceElements对象。
context.appendStatement(sourceElements, statement);
parseSourceElements通过创建一个ParsedNode元素的AST来返回。当解析返回,而此时没有任何语法或语义解析错误时,我们会得到一个有效的AST,其中rootNode指向树的根。在parser/NodeContructors.h和parser/Nodes.h中定义了构成AST的各种节点类型。
七、字节码
在这一章中,我们详细分析AST中字节码生成的详细信息。推荐大家花时间回顾一下关于Webkit的文章,以了解JSC中字节码格式的最新更改,以及为什么要进行这样的更改。字节码是引擎真实的源代码,本章之中的讨论对于我们理解这一系列文章而言是最为重要的。
7.1 生成
在生成AST后、生成字节码前,下一步是创建一个UnlikedCodeBlock对象。
UnlinkedCodeBlockType* unlinkedCodeBlock = UnlinkedCodeBlockType::create(vm, executableInfo, codeGenerationMode);
unlinkedCodeBlock->recordParse(rootNode->features(), rootNode->hasCapturedVariables(), lineCount, unlinkedEndColumn);
然后使用Unlinked的字节码填充生成的unlinkedCodeBlock,并调用BytecodeGenerator::generate。
error = BytecodeGenerator::generate(vm, rootNode.get(), source, unlinkedCodeBlock, codeGenerationMode, variablesUnderTDZ, ecmaMode);
BytecodeGenerator::generate initialises函数使用提供的AST(即根节点引用)初始化BytecodeGenerator对象,然后为AST生成字节码:
template < typename Node, typename UnlinkedCodeBlock>
static ParserError generate(VM& vm, Node* node, const SourceCode& sourceCode, UnlinkedCodeBlock* unlinkedCodeBlock, OptionSet < CodeGenerationMode> codeGenerationMode, const VariableEnvironment* environment, ECMAMode ecmaMode)
{
    //... 为简化代码,此处省略一部分

    DeferGC deferGC(vm.heap);
    auto bytecodeGenerator = makeUnique < BytecodeGenerator>(vm, node, unlinkedCodeBlock, codeGenerationMode, environment, ecmaMode);
    auto result = bytecodeGenerator->generate();

    //... 为简化代码,此处省略一部分

    return result;
}
首先,通过调用BytecodeGenerator构造函数来初始化BytecodeGenerator对象。该构造函数除了初始化生成器的几个部分之外,还为程序序言(例如程序入口点)发出字节码。
调用生成,在发出用于全局范围的字节码之前,生成各种函数初始化结构的字节码。
ParserError BytecodeGenerator::generate()
{
    //... 为简化代码,此处省略一部分

    m_codeBlock->setThisRegister(m_thisRegister.virtualRegister());

    //... 为简化代码,此处省略一部分

    if (m_restParameter)
        m_restParameter->emit(*this);

    {
        RefPtr < RegisterID> temp = newTemporary();
        RefPtr < RegisterID> tolLevelScope;
        for (auto functionPair : m_functionsToInitialize) {
            FunctionMetadataNode* metadata = functionPair.first;
            FunctionVariableType functionType = functionPair.second;
            emitNewFunction(temp.get(), metadata);

            //... 为简化代码,此处省略一部分
        }
    }

    bool callingClassConstructor = false;

    //... 为简化代码,此处省略一部分

    if (!callingClassConstructor)
        m_scopeNode->emitBytecode(*this);
    else {
        emitUnreachable();
    }

    for (auto& handler : m_exceptionHandlersToEmit) {
        Ref < Label> realCatchTarget = newLabel();
        TryData* tryData = handler.tryData;

        OpCatch::emit(this, handler.exceptionRegister, handler.thrownValueRegister);

        //... 为简化代码,此处省略一部分

        m_codeBlock->addJumpTarget(m_lastInstruction.offset());

        emitJump(tryData->target.get());
        tryData->target = WTFMove(realCatchTarget);
    }

    m_staticPropertyAnalyzer.kill();

    for (auto& range : m_tryRanges) {
        int start = range.start->bind();
        int end = range.end->bind();

        if (end  < = start)
            continue;

        UnlinkedHandlerInfo info(static_cast < uint32_t>(start), static_cast < uint32_t>(end),
            static_cast < uint32_t>(range.tryData->target->bind()), range.tryData->handlerType);
        m_codeBlock->addExceptionHandler(info);
    }

    //... 为简化代码,此处省略一部分

    m_codeBlock->finalize(m_writer.finalize());

    //... 为简化代码,此处省略一部分

    return ParserError(ParserError::ErrorNone);
}
由generate调用的emitBytecode函数最终会调用emitProgramNodeBytecode,顾名思义,该函数负责通过遍历AST为程序节点生成字节码。
static void emitProgramNodeBytecode(BytecodeGenerator& generator, ScopeNode& scopeNode)
{
    generator.emitDebugHook(WillExecuteProgram, scopeNode.startLine(), scopeNode.startStartOffset(), scopeNode.startLineStartOffset());

    RefPtr < RegisterID> dstRegister = generator.newTemporary();
    generator.emitLoad(dstRegister.get(), jsUndefined());
    generator.emitProfileControlFlow(scopeNode.startStartOffset());
    scopeNode.emitStatementsBytecode(generator, dstRegister.get());

    generator.emitDebugHook(DidExecuteProgram, scopeNode.lastLine(), scopeNode.startOffset(), scopeNode.lineStartOffset());
    generator.emitEnd(dstRegister.get());
}
各种操作码是在BytecodeList.rb中定义,在编译时用于生成BytecodeStructs.h,由BytecodeGenerator引用该代码以发出相关的操作码。各种操作码的结构还定义了几个辅助函数,其中之一允许将字节码转储为人类可读格式的stdout。BytecodeStruts.h通常位于 < build-directory>/Debug/DerivedSources/JavaScriptCore/BytecodeStructs.h下。OpAdd指令的示例如下所示:
struct OpAdd : public Instruction {
    static constexpr OpcodeID opcodeID = op_add;
    static constexpr size_t length = 6;

    template < typename BytecodeGenerator>
    static void emit(BytecodeGenerator* gen, VirtualRegister dst, VirtualRegister lhs, VirtualRegister rhs, OperandTypes operandTypes)
    {
        emitWithSmallestSizeRequirement < OpcodeSize::Narrow, BytecodeGenerator>(gen, dst, lhs, rhs, operandTypes);
    }

    //... 为简化代码,此处省略一部分

private:
    //... 为简化代码,此处省略一部分

    template < OpcodeSize __size, bool recordOpcode, typename BytecodeGenerator>
    static bool emitImpl(BytecodeGenerator* gen, VirtualRegister dst, VirtualRegister lhs, VirtualRegister rhs, OperandTypes operandTypes, unsigned __metadataID)
    {

        if (__size == OpcodeSize::Wide16)
            gen->alignWideOpcode16();
        else if (__size == OpcodeSize::Wide32)
            gen->alignWideOpcode32();
        if (checkImpl < __size>(gen, dst, lhs, rhs, operandTypes, __metadataID)) {
            if (recordOpcode)
                gen->recordOpcode(opcodeID);
            if (__size == OpcodeSize::Wide16)
                gen->write(Fits < OpcodeID, OpcodeSize::Narrow>::convert(op_wide16));
            else if (__size == OpcodeSize::Wide32)
                gen->write(Fits < OpcodeID, OpcodeSize::Narrow>::convert(op_wide32));
            gen->write(Fits < OpcodeID, OpcodeSize::Narrow>::convert(opcodeID));
            gen->write(Fits < VirtualRegister, __size>::convert(dst));
            gen->write(Fits < VirtualRegister, __size>::convert(lhs));
            gen->write(Fits < VirtualRegister, __size>::convert(rhs));
            gen->write(Fits < OperandTypes, __size>::convert(operandTypes));
            gen->write(Fits < unsigned, __size>::convert(__metadataID));
            return true;
        }
        return false;
    }

public:
    void dump(BytecodeDumperBase* dumper, InstructionStream::Offset __location, int __sizeShiftAmount)
    {
        //... 为简化代码,此处省略一部分
    }

    //... 为简化代码,此处省略一部分

    VirtualRegister m_dst;
    VirtualRegister m_lhs;
    VirtualRegister m_rhs;
    OperandTypes m_operandTypes;
    unsigned m_metadataID;
};
可以在JavaScriptCore/generator下找到用于定义BytecodeList.rb的域特定语言(DSL)。
除了函数初始化程序和为程序节点发出字节码之外,generate还为异常处理程序和try-catch节点发出字节码。
最后,调用finalize,从而完成将指令字节作为未链接的字节码写入分配的代码块的操作。
m_codeBlock->finalize(m_writer.finalize());
回到我们的调用函数Interpreter::executeProgram,在生成未链接的代码块之后,就可以链接并执行字节码了。未链接的字节码首先通过对prepareForExecution的调用来进行编码。
CodeBlock* tempCodeBlock;
Exception* error = program->prepareForExecution < ProgramExecutable>(vm, nullptr, scope, CodeForCall, tempCodeBlock);
通过一系列函数调用,prepareForExecution最终将调用CodeBlock::finishCreation。根据开发人员的注释,这个函数负责将未链接的字节码转换为已链接的字节码。
// The main purpose of this function is to generate linked bytecode from unlinked bytecode. The process
// of linking is taking an abstract representation of bytecode and tying it to a GlobalObject and scope
// chain. For example, this process allows us to cache the depth of lexical environment reads that reach
// outside of this CodeBlock's compilation unit. It also allows us to generate particular constants that
// we can't generate during unlinked bytecode generation. This process is not allowed to generate control
// flow or introduce new locals. The reason for this is we rely on liveness analysis to be the same for
// all the CodeBlocks of an UnlinkedCodeBlock. We rely on this fact by caching the liveness analysis
// inside UnlinkedCodeBlock.
bool CodeBlock::finishCreation(VM& vm, ScriptExecutable* ownerExecutable, UnlinkedCodeBlock* unlinkedCodeBlock,
    JSScope* scope)
{
该函数遍历代码块中的未链接指令,并根据检索到的操作码将其链接起来。
const InstructionStream& instructionStream = instructions();
    for (const auto& instruction : instructionStream) {
        OpcodeID opcodeID = instruction->opcodeID();
        m_bytecodeCost += opcodeLengths[opcodeID];
        switch (opcodeID) {
        LINK(OpHasIndexedProperty)

        LINK(OpCallVarargs, profile)
        LINK(OpTailCallVarargs, profile)
        //... 为简化代码,此处省略一部分
在Webkit文章中,以新的字节码格式描述了链接和更新元数据表的过程。将dumpGeneratedBytecodes或缩短版本的-d命令行选项添加到JSC Shell,可以将生成的字节码转储到stdout。
$ cat test.js
let x = 10;
let y = 20;
let z = x + y;

$ ./WebKitBuild/Debug/bin/jsc --dumpGeneratedBytecodes=true test.js
解析test.js生成的字节码如下:
 < global>#AccRYt:[0x7fffee4bc000->0x7fffeeecb848, NoneGlobal, 96]: 18 instructions (0 16-bit instructions, 0 32-bit instructions, 11 instructions with metadata); 216 bytes (120 metadata bytes); 1 parameter(s); 12 callee register(s); 6 variable(s); scope at loc4

bb#1
[   0] enter
[   1] get_scope          loc4
[   3] mov                loc5, loc4
[   6] check_traps
[   7] mov                loc6, Undefined(const0)
[  10] resolve_scope      loc7, loc4, 0, GlobalProperty, 0
[  17] put_to_scope       loc7, 0, Int32: 10(const1), 1048576 < DoNotThrowIfNotFound|GlobalProperty|Initialization|NotStrictMode>, 0, 0
[  25] resolve_scope      loc7, loc4, 1, GlobalProperty, 0
[  32] put_to_scope       loc7, 1, Int32: 20(const2), 1048576 < DoNotThrowIfNotFound|GlobalProperty|Initialization|NotStrictMode>, 0, 0
[  40] resolve_scope      loc7, loc4, 2, GlobalProperty, 0
[  47] resolve_scope      loc8, loc4, 0, GlobalProperty, 0
[  54] get_from_scope     loc9, loc8, 0, 2048 < ThrowIfNotFound|GlobalProperty|NotInitialization|NotStrictMode>, 0, 0
[  62] mov                loc8, loc9
[  65] resolve_scope      loc9, loc4, 1, GlobalProperty, 0
[  72] get_from_scope     loc10, loc9, 1, 2048 < ThrowIfNotFound|GlobalProperty|NotInitialization|NotStrictMode>, 0, 0
[  80] add                loc8, loc8, loc10, OperandTypes(126, 126)
[  86] put_to_scope       loc7, 2, loc8, 1048576 < DoNotThrowIfNotFound|GlobalProperty|Initialization|NotStrictMode>, 0, 0
[  94] end                loc6
Successors: [ ]


Identifiers:
  id0 = x
  id1 = y
  id2 = z

Constants:
   k0 = Undefined
   k1 = Int32: 10: in source as integer
   k2 = Int32: 20: in source as integer
7.2 操作码
在上一节,提供了有关如何生成字节码以及如何在调试器中跟踪字节码发出过程的说明。它还在方便的命令行标志处引入,该标志允许将生成的字节码转储到stdout。在这一节,我们将讨论如何读取和理解转储的字节码。
每个程序都有生成器发出的序言和结尾字节码。可以通过创建一个空的JavaScript文件,并将其传递给JSC Shell以进行测试。产生的字节码如下:
$ touch empty.js && ./jsc -d empty.js

 < global >#EW7Aoi:[0x7f42d2bc4000->0x7f43135cb768, NoneGlobal, 12]: 6 instructions (0 16-bit instructions, 0 32-bit instructions, 0 instructions with metadata); 12 bytes (0 metadata bytes); 1 parameter(s); 8 callee register(s); 6 variable(s); scope at loc4

bb#1
[   0] enter
[   1] get_scope          loc4
[   3] mov                loc5, loc4
[   6] check_traps
[   7] mov                loc6, Undefined(const0)
[  10] end                loc6
Successors: [ ]


Constants:
   k0 = Undefined

End: undefined
输出的第一行包含有关代码块的信息。转储函数CodeBlock::dumpAssumingJITType打印与生成的字节码关联的CodeBlock的详细信息:
< global >#EW7Aoi:[0x7f42d2bc4000->0x7f43135cb768, NoneGlobal, 12]: 6 instructions (0 16-bit instructions, 0 32-bit instructions, 0 instructions with metadata); 12 bytes (0 metadata bytes); 1 parameter(s); 8 callee register(s); 6 variable(s); scope at loc4
< global >这里是codeType,在这里是指全局程序。用户定义函数的字节码应该具有函数名称,而不是 < global >。#EW7Aoi是为其创建代码块的源代码字符串的哈希。后面的两个内存地址(即0x7f42d2bc4000和0x7f43135cb768)代表可执行文件的目标和目标偏移量。没有描述JITType的全局代码类型。数字12表示代码块中的指令数。标头的其余部分显示有关生成的字节码的统计信息,例如指令数、参数、被调用方寄存器、变量以及最后到寄存器的位置。
标头之后是字节图的转储。这实际上是一个for循环,它会遍历图中的基本块,并在基本块中打印出指令。
bb#1
[   0] enter
[   1] get_scope          loc4
[   3] mov                loc5, loc4
[   6] check_traps
[   7] mov                loc6, Undefined(const0)
[  10] end                loc6
Successors: [ ]
在上面的代码段中,bb#标识出了图中的基本块。第一列标识指令在指令流中的偏移量。下一列列出了各种操作码,最后一列是操作数传递给操作码的信息。使用以下mov操作码片段:
[ 3] mov loc5, loc4
这里,loc5表示目标寄存器,loc4表示源寄存器。通过查找DerivedSources/JavaScriptCore/BytecodeStructs.h中定义的OpMov::dump function函数,可以推断出这一点。
void dump(BytecodeDumperBase* dumper, InstructionStream::Offset __location, int __sizeShiftAmount)
    {
        dumper->printLocationAndOp(__location, &"**mov"[2 - __sizeShiftAmount]);
        dumper->dumpOperand(m_dst, true);
        dumper->dumpOperand(m_src, false);
}
基本块的末尾是可以从当前基本块访问到的后续块的列表。在上面的转储中,我们没有任何后继块,因为empty.js中没有控制流。
字节码转储的最后是页脚,其中通常包含标识符、常量、ExceptionHandlers和JumpTables的信息。在转储代码段中,存在一个常量,该常量是程序执行结束后返回的值。
Constants:
   k0 = Undefined
我们可以尝试使用更有趣的程序探索字节码。在这里,我们使用了斐波那契序列生成器:
function fibonacci(num) {
  if (num  < = 1) return 1;

  return fibonacci(num - 1) + fibonacci(num - 2);
}

let fib = fibonacci(5)

print(fib)
转储的字节码如下:
 < global>#BDIvjt:[0x7fffee4bc000->0x7fffeeecb848, NoneGlobal, 115]: 23 instructions (0 16-bit instructions, 0 32-bit instructions, 12 instructions with metadata); 235 bytes (120 metadata bytes); 1 parameter(s); 18 callee register(s); 6 variable(s); scope at loc4

bb#1
[   0] enter
[   1] get_scope          loc4
[   3] mov                loc5, loc4
[   6] check_traps
[   7] new_func           loc6, loc4, 0
[  11] resolve_scope      loc7, loc4, 0, GlobalProperty, 0
[  18] mov                loc8, loc7
[  21] put_to_scope       loc8, 0, loc6, 2048 < ThrowIfNotFound|GlobalProperty|NotInitialization|NotStrictMode>, 0, 0
[  29] mov                loc6, Undefined(const0)
[  32] resolve_scope      loc7, loc4, 1, GlobalProperty, 0
[  39] resolve_scope      loc12, loc4, 0, GlobalProperty, 0
[  46] get_from_scope     loc8, loc12, 0, 2048 < ThrowIfNotFound|GlobalProperty|NotInitialization|NotStrictMode>, 0, 0
[  54] mov                loc11, Int32: 5(const1)
[  57] call               loc8, loc8, 2, 18
[  63] put_to_scope       loc7, 1, loc8, 1048576 < DoNotThrowIfNotFound|GlobalProperty|Initialization|NotStrictMode>, 0, 0
[  71] mov                loc6, Undefined(const0)
[  74] resolve_scope      loc10, loc4, 2, GlobalProperty, 0
[  81] get_from_scope     loc7, loc10, 2, 2048 < ThrowIfNotFound|GlobalProperty|NotInitialization|NotStrictMode>, 0, 0
[  89] resolve_scope      loc9, loc4, 1, GlobalProperty, 0
[  96] get_from_scope     loc11, loc9, 1, 2048 < ThrowIfNotFound|GlobalProperty|NotInitialization|NotStrictMode>, 0, 0
[ 104] mov                loc9, loc11
[ 107] call               loc6, loc7, 2, 16
[ 113] end                loc6
Successors: [ ]


Identifiers:
  id0 = fibonacci
  id1 = fib
  id2 = print

Constants:
   k0 = Undefined
   k1 = Int32: 5: in source as integer

fibonacci#AcXBvC:[0x7fffee4bc130->0x7fffee4e5100, NoneFunctionCall, 75]: 16 instructions (0 16-bit instructions, 0 32-bit instructions, 9 instructions with metadata); 195 bytes (120 metadata bytes); 2 parameter(s); 16 callee register(s); 6 variable(s); scope at loc4

bb#1
[   0] enter
[   1] get_scope          loc4
[   3] mov                loc5, loc4
[   6] check_traps
[   7] jnlesseq           arg1, Int32: 1(const0), 6(->13)
Successors: [ #3 #2 ]

bb#2
[  11] ret                Int32: 1(const0)
Successors: [ ]

bb#3
[  13] resolve_scope      loc10, loc4, 0, GlobalProperty, 0
[  20] get_from_scope     loc6, loc10, 0, 2048 < ThrowIfNotFound|GlobalProperty|NotInitialization|NotStrictMode>, 0, 0
[  28] sub                loc9, arg1, Int32: 1(const0), OperandTypes(126, 3)
[  34] call               loc6, loc6, 2, 16
[  40] resolve_scope      loc10, loc4, 0, GlobalProperty, 0
[  47] get_from_scope     loc7, loc10, 0, 2048 < ThrowIfNotFound|GlobalProperty|NotInitialization|NotStrictMode>, 0, 0
[  55] sub                loc9, arg1, Int32: 2(const1), OperandTypes(126, 3)
[  61] call               loc7, loc7, 2, 16
[  67] add                loc6, loc6, loc7, OperandTypes(126, 126)
[  73] ret                loc6
Successors: [ ]


Identifiers:
  id0 = fibonacci

Constants:
   k0 = Int32: 1: in source as integer
   k1 = Int32: 2: in source as integer

8
转储的输出包括包含主程序的字节码,以及脚本中定义的函数fibonacci。字节码生成器已经发出了几条新指令,例如new_func表示函数声明,call和ret表示正在调用函数,函数返回时jnlesseq是条件跳转指令(如果lhs小于等于rhs),以及算术操作码例如add和sub等等。
要了解有关操作码和操作数的更多信息,一种方法是在BytecodeStructs.h中添加断点和转储函数,并在调试时检查操作数并跟踪其来源。
函数fibonacci由三个基本块组成,分别是bb#1、bb#2和bb#3。基本块bb#1有两个后续块,分别是bb#3和bb#2。这说明bb#1具有两个控制流边界,一个指向bb#2,另一个指向bb#3。
两个代码块 < global>和fibonacci的转储页脚列出了字节码引用的各种标识符和常量。例如,主程序的页脚如下:
Identifiers:
  id0 = fibonacci
  id1 = fib
  id2 = print

Constants:
   k0 = Undefined
   k1 = Int32: 5: in source as integer
大家如果熟悉x86或arm汇编,会发现操作码语法与之非常相似,所以我们可以对操作码执行的动作进行有根据的猜测。例如,mov操作码可能类似于x86 mov,其格式为mov < dst> < src>。但是,有些操作码就不太直观了,如果想确定操作码的含义,可能需要跟踪LLInt中操作码的执行,或者评估LLInt程序集,以了解其操作。
7.3 执行
现在,链接的codeBlock已经准备好由解释器使用和执行。这个过程发生在将codeBlock从调用堆栈向上传递回ScriptExecutable::prepareForExecutionImpl的时候。
Exception* ScriptExecutable::prepareForExecutionImpl(VM& vm, JSFunction* function, JSScope* scope, CodeSpecializationKind kind, CodeBlock*& resultCodeBlock)
{
    //... code truncated for brevity

    Exception* exception = nullptr;
    CodeBlock* codeBlock = newCodeBlockFor(kind, function, scope, exception);
    resultCodeBlock = codeBlock;
    //... code truncated for brevity

    if (Options::useLLInt())
        setupLLInt(codeBlock);
    else
        setupJIT(vm, codeBlock);

    installCode(vm, codeBlock, codeBlock->codeType(), codeBlock->specializationKind());
    return nullptr;
}

Within this function, the codeBlock is passed to setupLLInt which eventually calls LLInt::setProgramEntrypoint which sets up the entry point to the program for the LLInt to being executing from:

static void setProgramEntrypoint(CodeBlock* codeBlock)
{
    //... code truncated for brevity

    static NativeJITCode* jitCode;
    static std::once_flag onceKey;
    std::call_once(onceKey, [&] {
        jitCode = new NativeJITCode(getCodeRef < JSEntryPtrTag>(llint_program_prologue), JITType::InterpreterThunk, Intrinsic::NoIntrinsic, JITCode::ShareAttribute::Shared);
    });
    codeBlock->setJITCode(makeRef(*jitCode));
}
对program->generatedJITCode()的调用将获取指向自身已解释代码的引用指针,然后将其用于初始化ProtoCallFrame。最后,对jitCode->execute的调用将执行解释后的字节码。下面的代码片段显示了Interpreter::executeProgram中的相关部分。
RefPtr < JITCode> jitCode;
ProtoCallFrame protoCallFrame;
{
   DisallowGC disallowGC; // Ensure no GC happens. GC can replace CodeBlock in Executable.
   jitCode = program->generatedJITCode();
   protoCallFrame.init(codeBlock, globalObject, globalCallee, thisObj, 1);
}

// Execute the code:
throwScope.release();
ASSERT(jitCode == program->generatedJITCode().ptr());
JSValue result = jitCode->execute(&vm, &protoCallFrame);
return checkedReturn(result);
八、结论
在本文中,我们探讨了JSC如何将JavaScript源代码转换为字节码,在这个漫长的过程中,我们跟踪并记录了引擎在解析和发出字节码时的执行情况。我们还检查了生成的字节码,并分析了字节码转储。在最后,简要描述了如何在LLInt中加载字节码,并简要说明了解释程序是如何执行字节码的。在系列文章的第二部分中,我们将详细介绍LLInt和Baseline JIT如何解释字节码。
九、附录
[1] https://www.youtube.com/watch?v=mtVBAcy7AKA
[2] https://webkit.org/blog/9329/a-new-bytecode-format-for-javascriptcore/
本文翻译自:https://zon8.re/posts/jsc-internals-part1-tracing-js-source-to-bytecode/如若转载,请注明原文地址:
如有侵权请联系:admin#unsafe.sh