2020-12-21 05:58:13 Author: derflounder.wordpress.com(查看原文) 阅读量:341 收藏
One of the outcomes of the recent Amazon Web Service’s Insight conference was AWS’s announcement that, as of November 30th, macOS EC2 instances were going to be available as on-demand instances or as part of one of AWS’s reduced cost plans for those who needed them long-term.
There are a few differences about AWS’s macOS offerings, as opposed to their Linux and Windows offerings. macOS EC2 instances are set up to run on actual Apple hardware, as opposed to being completely virtualized. This means that there are the following dependencies to be aware of:
- macOS EC2 instances must run on dedicated hosts (AWS has stated these are Mac Minis)
- One macOS EC2 instance can be provisioned per dedicated host.
AWS has also stipulated that that dedicated hosts for macOS EC2 instances have a minimum billing duration of 24 hours. That means that even if your dedicated host was only up and running for one hour, you will be billed as if it was running for 24 hours.
For now, only certain AWS regions have EC2 Mac instances available. As of December 20th, 2020, macOS EC2 instances are available in the following AWS Regions:
- US-East-1 (Northern Virginia)
- US-East-2 (Ohio)
- US-West-2 (Oregon)
- EU-West-1 (Ireland)
- AP-Southeast-1 (Singapore)
The macOS EC2 instances at this time support two versions of macOS:
macOS Big Sur is not yet supported as of December 20th, 2020, but AWS has stated that Big Sur support will be coming shortly.
By default, macOS EC2 instances will include the following pre-installed software:
- ENA drivers
- EC2 macOS Init
- EC2 System Monitoring for macOS
- Systems Manager SSM Agent for macOS
- AWS Command Line Interface (AWS CLI) version 2
- Xcode Command Line Tools
- Homebrew
For folks looking to build services or do continuous integration testing on macOS, it’s clear that AWS went to considerable lengths to have macOS EC2 instances be as fully-featured as their other EC2 offerings. Amazon has also either made it possible to install the tools you need or just went ahead and installed them for you. They’ve also included drivers for their faster networking options and made it possible to manage and monitor Mac EC2 instances using AWS’s tools just like their Linux and Windows EC2 instances.
That said, all of this comes with a price tag. Here’s how it works out (all figures expressed in US dollars):
mac1 Dedicated Hosts (on-demand pricing):
$1.083/hour (currently with a 24 hour minimum charge, after which billing is by the second.)
$25.99/day
$181.93/week
$9493.58/year
Now, you can sign up for an AWS Savings Plan and save some money by paying up-front for one year or three years. Paying for three years, all cash up front is naturally the cheapest option:
$0.764/hour
$18.33/day
$128.31/week
$6697.22/year
Now some folks are going to look at that and have a heart attack, while others are going to shrug because the money involved amounts to a rounding error on their existing AWS bill. I’m mainly going through this just to point out that hosting Mac services on AWS is going to come with costs. None of AWS’s existing Mac offerings are part of AWS’s Free Tier.
OK, so we’ve discussed a lot of the background but let’s get to the point: How do you set up AutoPkg to run in the AWS cloud? For more details, please see below the jump.
If you’ve worked with Amazon Web Service’s EC2 service previously, getting AutoPkg up and running in AWS should be fairly straightforward. That said, if you haven’t worked with either AWS or EC2 before, there may be a bit of a learning curve. For folks in this situation, I gave a talk on Amazon Web Services which should help get you started:
Getting Started with Amazon Web Services: http://docs.macsysadmin.se/2018/video/Day4Session4.mp4
In this example, I’m going to setting up a macOS EC2 instance with the following:
- git
- AutoPkg
- AutoPkgr
- JSSImporter
Pre-requisites:
- An Amazon Web Services account
- Money (at least $25.99)
Setting up a dedicated host
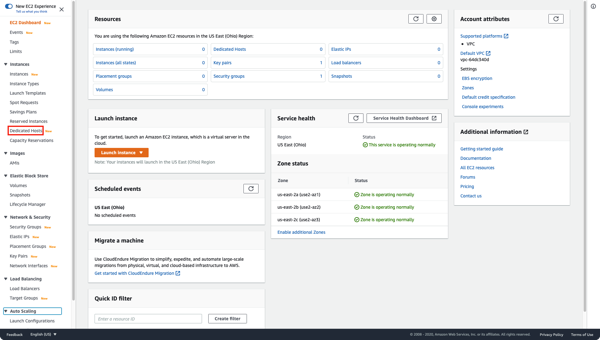
To run a macOS instance in EC2, you need to first choose an actual Mac Mini to run that instance on. Amazon refers to this as a dedicated host and the process looks like this:
1. Open the Amazon EC2 web console at https://console.aws.amazon.com/ec2/.
2. In the navigation pane, choose Dedicated Hosts.

3. Choose Allocate Dedicated Host and then do the following:

For Name Tag:, give it an appropriate name.

For Instance family, choose mac1.

For Support multiple instance types, uncheck the Enable checkbox.
For Instance type, select mac1.metal.

For Availability Zone, choose the Availability Zone for the Dedicated Host. (For this example, I’m in US-East-2 and I’m choosing us-east-2b.)
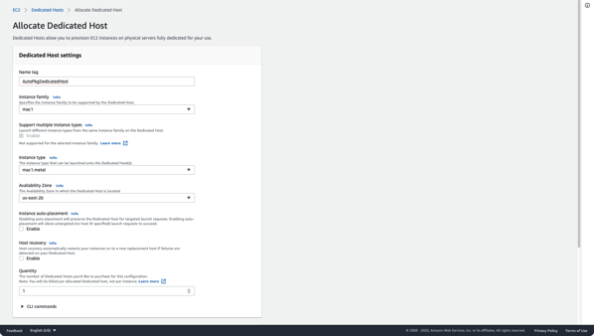
For Instance auto-placement, do not check anything.
For Host recovery, do not check anything.
For Quantity, keep 1.

Click the Allocate button. (This is the part where Amazon charges you $25.99)

At this point, the Dedicated Host should be created.

Setting up a macOS EC2 instance
If you haven’t previously done so, set up an AWS SSH key pair for use with EC2 instances:
https://docs.aws.amazon.com/cli/latest/userguide/cli-services-ec2-keypairs.html
Once your keypair has been created, select the Dedicated Host that you created and then do the following:
Choose Actions, Launch instances onto host.

Select a macOS AMI. For this example, I’m selecting macOS Catalina 10.15.7.

Select the mac1.metal instance type.

Click the Next: Configure Instance Details button.

On the Configure Instance Details page, verify the following:
Tenancy: Set as dedicated host.

Host is set as the Dedicated Host you created.

Update Affinity as needed. Mine is set to Off.
In User Data, I have a script that the Mac EC2 instance can run at boot.
This user data script does the following:
Configures Mac EC2 instance with the following:
- Account password for the default ec2-user account
- Set the Mac to auto-login as the default ec2-user account
- git
- AutoPkg
- AutoPkgr
- JSSImporter
Once these tools and modules are installed, the script configures AutoPkg to use the recipe repos defined in the AutoPkg repos section.
If you want to use this user data script, it’s available from the following address on GitHub:
https://github.com/rtrouton/aws_scripts/tree/master/setup_mac_ec2_instance_for_autopkg
Before adding the user data script to the instance build process, check the variables in the script and verify that they are set up the way you want. There is also an upper limit of 15K in size for this script.

From there, either copy and paste the script into the available user data blank or select the user data script as a file.

Double-check your Tenancy, Host and User Data settings to make sure everything is set as desired, then click the Next: Add Storage button.

Set how much storage you want. For this example, I’m setting it at 60 GBs of storage.

Note: Depending on how many AutoPkg recipes you’re running and the size of the installers, you may want to double or even triple the amount of storage I’m setting. Another thing to be aware of is that, the instance’s boot volume will need to be resized to recognize the additional space. If using the user data script linked above, boot volume resizing is included as part of the script’s run.
Once storage is set, click the Next:Add Tags button.
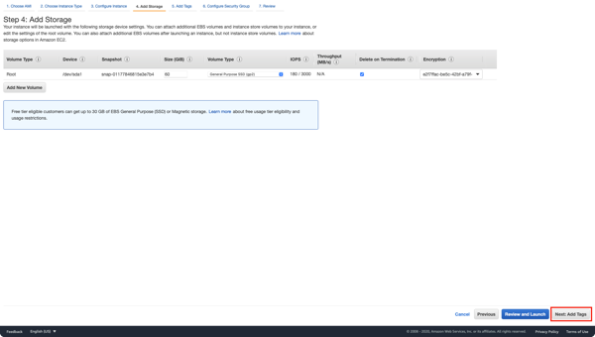
Set tags as desired, then click the Next: Security Group button.
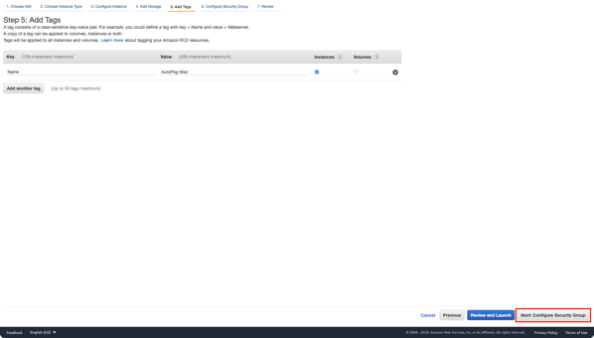
Choose the options to set a security group as desired.

If you don’t have a security group available, I recommend creating one and setting it to allow SSH from only your IP address, then click the Review and Launch button.

Review your instance’s settings and make sure everything is OK. Once you’re sure, click the Launch button.
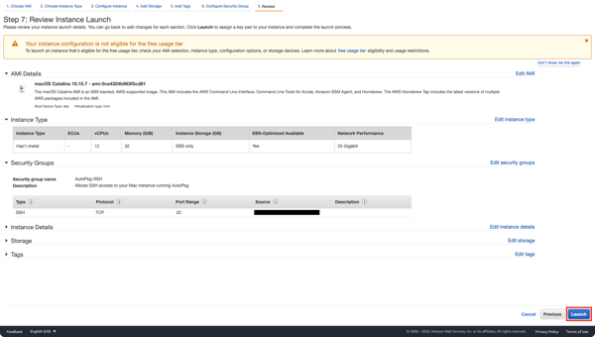
When prompted, select your SSH keypair, then click the Launch instances button.

Your Mac instance will now launch on the dedicated host. To see if it in the Instances list, click the View instances on host button.

To find out its public DNS address and other useful information, click on the instance ID.

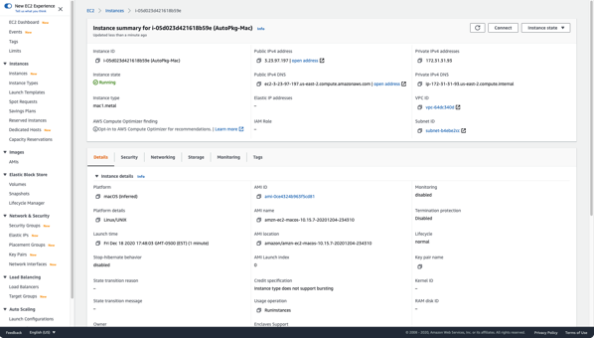
Wait about fifteen minutes for your instance to finish setting itself up. After that you should be able to connect to it via SSH and (assuming you configured the right variables for VNC access) also via remote screen sharing.
Connecting to the macOS EC2 instance following setup
Following setup, you can connect to the newly-built EC2 instance via SSH. To do so, open Terminal and use the following SSH command:
ssh -i /path/my-key-pair.pem ec2-user@my-instance-public-dns-name
For example, if your SSH keypair was stored in ~/.ssh and named AutoPkg_SSH_Keypair.pem, you would use the following command to connect to a macOS EC2 instance whose address is ec2-3-23-97-197.us-east-2.compute.amazonaws.com:
ssh -i ~/.ssh/AutoPkg_SSH_Keypair.pem [email protected]
No password is needed in this case, as you are using your SSH keypair to authenticate the SSH session.

To connect via VNC, I recommend setting up VNC to run over an SSH tunnel. The reason for this is that VNC by default does not encrypt its traffic so all network communication between you and the instance (including any passwords) would be sent in the clear. Using an SSH tunnel will allow you to wrap this unencrypted traffic inside SSH’s encryption, which should secure it against third parties.
To set up VNC to run inside an SSH tunnel, you will need to first set up a password for the ec2-user account if you haven’t done so already. You can do this by connecting to the instance via SSH and running the following passwd command:
sudo passwd ec2-user

Once the command has been run, follow the prompts to change the password. Once the password is set up, run the following SSH command on your end:
ssh -L 5900:localhost:5900 -i /path/my-key-pair.pem ec2-user@my-instance-public-dns-name
For example, if your SSH keypair was stored in ~/.ssh on your Mac and named AutoPkg_SSH_Keypair.pem, you would use the following command to set up an SSH tunnel for VNC between your Mac and a macOS EC2 instance whose address is ec2-3-23-97-197.us-east-2.compute.amazonaws.com:
ssh -L 5900:localhost:5900 -i ~/.ssh/AutoPkg_SSH_Keypair.pem [email protected]
Once that’s done, do the following:
1. Under the Go menu, select Connect to Server.
2. In the Connect to Server window, enter the following:
vnc://localhost:5900
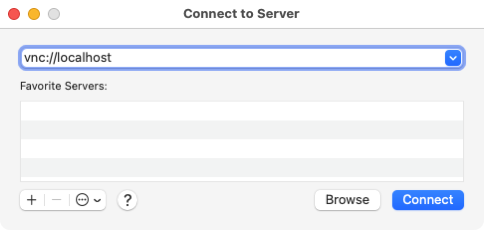
When prompted, use the following username and password:
Username: ec2-user
Password: Whatever password you defined in the script for the ec2-user account to use.

Once connected, you’ll be able to work with the Mac instance like you would any other remotely-accessible Mac.


In the case of a AutoPkg server built using the user data script I linked to above, you could open AutoPkgr and start setting up your recipes to begin scheduled runs.

如有侵权请联系:admin#unsafe.sh