In this post, I will discuss a few tricks for creating Burp extensions in Python that deal with cryptography. Our example is a Burp extension that adds a new tab to decode and decrypt an application's traffic. This allows us to modify payloads on the fly and take advantage of Repeater (and other tabs). I have used similar extensions when testing mobile and thickclient applications.
The code is at:
I have created a simple client/server application in Go. The client encrypts a sample text with a hardcoded key/IV using AES-CFB. AES-CFB converts AES to a stream cipher. Every five seconds, the ciphertext is encoded to base64 and sent to the server in the body of a POST request via a proxy at localhost:8080.
The echo server is listening on localhost:9090 by default (you can change via serverAddr and serverPort). It will attempt to decode and decrypt the payload. If decryption is successful, server returns the payload in response and an error message otherwise.
main.go is at:
I am inside a Windows 10 VM. But the Go application should be good for any supported platform.
- Run Burp and set a proxy listener at
localhost:8080. This is Burp's default listener. - Reset the filter to
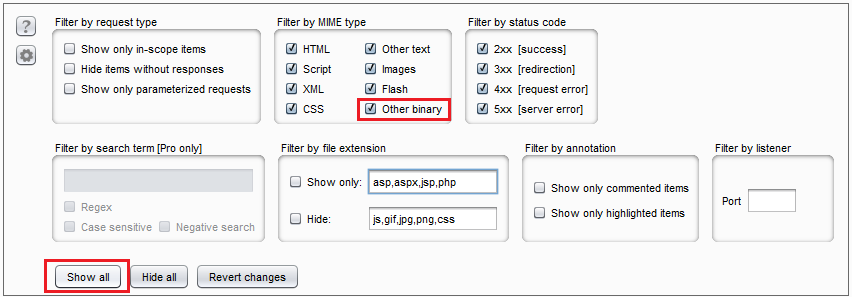
Show Allin Burp listener to see the traffic.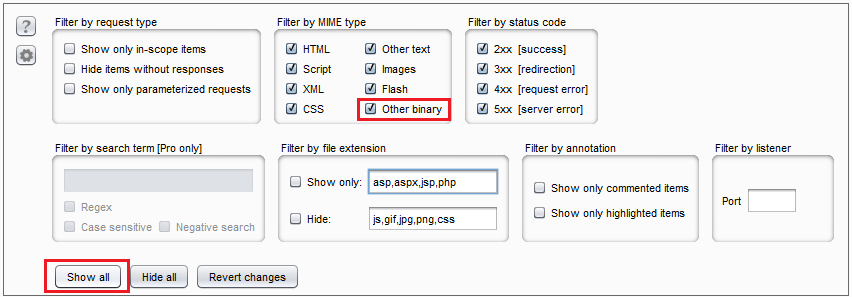 "Show All" filter
 - Copy
main.goto a path underGOPATHand run it withgo run main.go.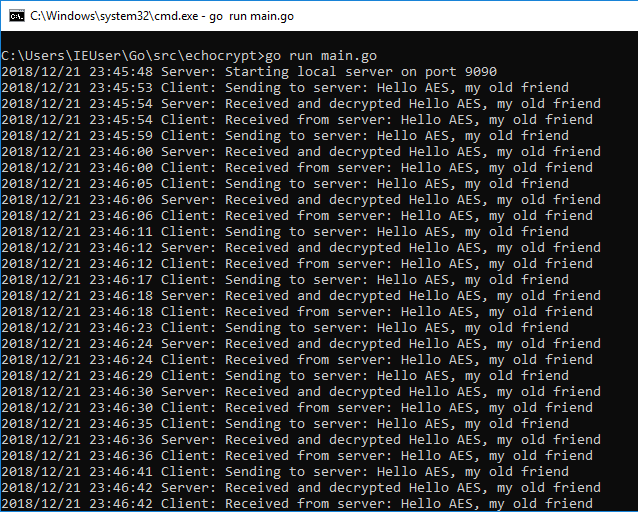 Running main.go
 - Switch to Burp to see the traffic.
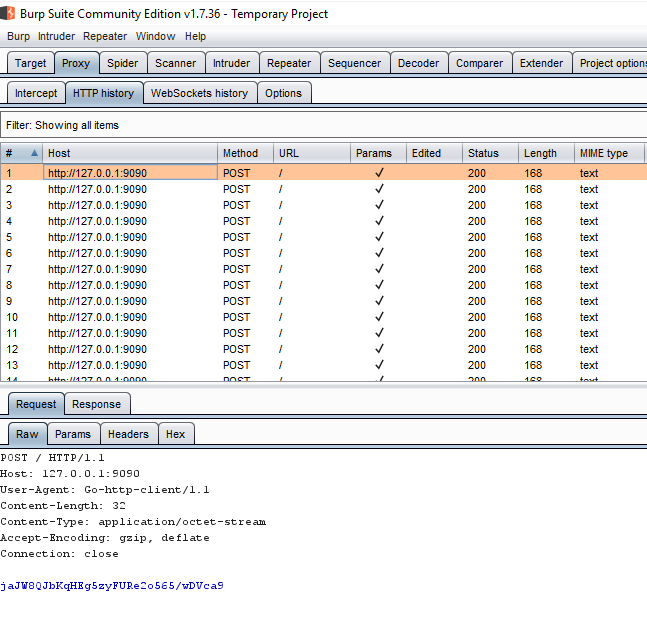 Traffic in Burp
 - Burp Repeater works too.
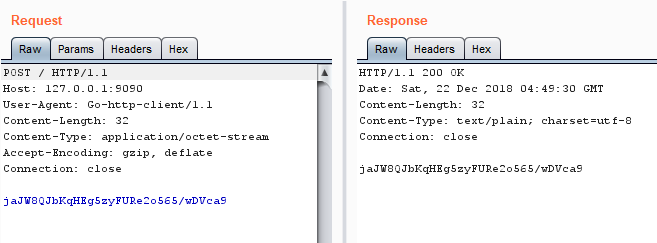 Sample request response in Burp Repeater
I am using the infamous Burp example https://github.com/PortSwigger/example-custom-editor-tab as my starting point. This extension looks for requests with a parameter named data, base64 decodes the value and displays it in a new tab. We are going to do the same but add AES encryption/decryption.
I have created several versions of the extension and helper module based on the level of progress and the technique used in the extension. Start with 0-decoder and then go up as I progress through the sections. My modifications are marked with Parsia:.
Notes:
- Every time you modify the extension, unload and reload it by using the
Loadedcheckbox. There's no need to remove and add the extension. - When switching to an extension in a different step, you have to unload the previous one.
Let's start with a modified custom editor tab that will act as our template. This code just base64 decodes the content and stores it in a new tab named Decrypted. Find these files inside the 0-decoder directory.
library.py
I am going to create some helper modules. I explained them in a previous blog post named Python Utility Modules for Burp Extensions. Burp Exceptions is loaded in Folder for loading modules in Burp (Extender > Options). While you are there, set the path to Jython too.
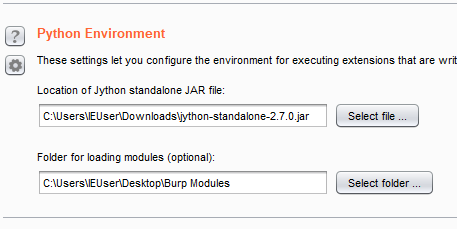 Extender setup
The helper functions are short but useful:
# 0-decoder/library.py

# getInfo processes the request/response and returns info
def getInfo(content, isRequest, helpers):
    if isRequest:
        return helpers.analyzeRequest(content)
    else:
        return helpers.analyzeResponse(content)

# getBody returns the body of a request/response
def getBody(content, isRequest, helpers):
    info = getInfo(content, isRequest, helpers)
    return content[info.getBodyOffset():]

# setBody replaces the body of request/response with newBody and returns the result
# should I check for sizes or does Python automatically increase the array size?
def setBody(newBody, content, isRequest, helpers):
    info = getInfo(content, isRequest, helpers)
    content[info.getBodyOffset():] = newBody
    return content

# decode64 decodes a base64 encoded byte array and returns another byte array
def decode64(encoded, helpers):
    return helpers.base64Decode(encoded)

# encode64 encodes a byte array and returns a base64 encoded byte array
def encode64(plaintext, helpers):
    return helpers.base64Encode(plaintext)
I am passing helpers as a parameter. This is explained in modules blog post that I linked above. The only way to get a Burp helper object is through getHelpers().
Take a moment to read getBody and setBody. They manipulate the complete body of a POST request. To interact with specific parameters use addParameter, removeParameter and other methods in IExtensionHelpers.
extension.py
The extension has only been modified a little it. It uses https://github.com/securityMB/burp-exceptions for debugging and I have removed the code that deals with the data parameter.
Imports
The original four imports are from the template. Then there's support for Burp-Exceptions and finally, I am importing the helper library.
Note: Our code runs inside Jython (not quite sure this is the correct verb but you know what I mean) so we can also import Java classes. More on that later.
# 0-decoder/extension.py
from burp import IBurpExtender
from burp import IMessageEditorTabFactory
from burp import IMessageEditorTab
from burp import IParameter

# Parsia: modified "custom editor tab" https://github.com/PortSwigger/example-custom-editor-tab/.

# Parsia: for burp-exceptions - see https://github.com/securityMB/burp-exceptions
from exceptions_fix import FixBurpExceptions
import sys

# Parsia: import helpers from library
from library import *
BurpExtender
Here I am creating a BurpExtender class.
class BurpExtender(IBurpExtender, IMessageEditorTabFactory):

    #
    # implement IBurpExtender
    #

    def	registerExtenderCallbacks(self, callbacks):
        # keep a reference to our callbacks object
        self._callbacks = callbacks

        # Parsia: obtain an extension helpers object
        self._helpers = callbacks.getHelpers()

        # set our extension name
        # Parsia: changed the extension name
        callbacks.setExtensionName("Example Crypto(graphy)")

        # register ourselves as a message editor tab factory
        callbacks.registerMessageEditorTabFactory(self)

        # Parsia: for burp-exceptions
        sys.stdout = callbacks.getStdout()

    #
    # implement IMessageEditorTabFactory
    #

    def createNewInstance(self, controller, editable):
        # create a new instance of our custom editor tab
        return CryptoTab(self, controller, editable)
Changes are:
- Extension name:
callbacks.setExtensionName("Example Crypto(graphy)") - Extension class name:
CryptoTab - Extension helper:
self._helpers = callbacks.getHelpers() - Burp exceptions support:
sys.stdout = callbacks.getStdout()
CryptoTab
The new tab is created in the CryptoTab class.
def __init__(self, extender, controller, editable):
    self._extender = extender
    self._editable = editable
    # Parsia: Burp helpers object
    self.helpers = extender._helpers

    # create an instance of Burp's text editor to display our decrypted data
    self._txtInput = extender._callbacks.createTextEditor()
    self._txtInput.setEditable(editable)
I have only created a copy of the helper object and added it as a field to the tab: self.helpers = extender._helpers. This is only a matter of convenience because it can also be accessed through self._extender._helpers.
def getTabCaption(self):
    # Parsia: tab title
    return "Decrypted"

def getUiComponent(self):
    return self._txtInput.getComponent()

def isEnabled(self, content, isRequest):
    return True

def isModified(self):
    return self._txtInput.isTextModified()

def getSelectedData(self):
    return self._txtInput.getSelectedText()
This is mostly unmodified boilerplate. The only modification is tab title.
setMessage
setMessage is the callback for setting the text in the Decrypted tab.
def setMessage(self, content, isRequest):
    if content is None:
        # clear our display
        self._txtInput.setText(None)
        self._txtInput.setEditable(False)

    # Parsia: if tab has content
    else:
        # get the body
        body = getBody(content, isRequest, self.helpers)
        # base64 decode the body
        decodedBody = decode64(body, self.helpers)
        # set the body as text of message box
        self._txtInput.setText(decodedBody)
        # this keeps the message box edit value to whatever it was
        self._txtInput.setEditable(self._editable)

    # remember the displayed content
    self._currentMessage = content
content is a byte array containing the request or response. If there's no request/response (e.g. empty Repeater tab), content is None, the tab will be empty and not editable.
If the tab has a request/response:
- Extract the body. I am using my
getBodyfunction (I am passingself.helpersto it). - Decode the body using another function from the module (
decode64). - Set the decoded text in the message box.
- Decide if the message box is editable or not. Here, we are deferring to the value of
self._editable. This means, it will not be editable inProxy > HTTP Historybut will be in places like Repeater. - Store the contents of the tab in
self._currentMessage. This is used later when we want to update request with modifications done in the tab (e.g. in Repeater).
getMessage
When the tab is editable (e.g. Repeater), setMessage is used to update the request. If you modify something in the Decrypted tab and switch back to the Raw tab, it will be updated with this method.
def getMessage(self):
    # determine whether the user modified the data
    if self._txtInput.isTextModified():
        # Parsia: if text has changed, encode it and make it the new body of the message
        modified = self._txtInput.getText()
        encodedModified = encode64(modified, self.helpers)

        # Parsia: create a new message with the new body and return that
        info = getInfo(self._currentMessage, True, self.helpers)
        headers = info.getHeaders()
        return self.helpers.buildHttpMessage(headers, encodedModified)
    else:
        # Parsia: if nothing is modified, return the current message so nothing gets updated
        return self._currentMessage
If the text of the tab has been modified, isTextModified() returns true. After that:
- Get the modified contents of the tab:
modified = self._txtInput.getText(). - Base64 decode it:
encodedModified = encode64(modified, self.helpers).
Next, I create a message with the modified body. self._currentMessage = content is used now. I have the original message in this field so I can get the headers and add them to the new message.
- Get the message info:
info = getInfo(self._currentMessage, True, self.helpers).- We do not know whether we are in a request or not so we assume we are always in a request. Here it does not really matter because our requests and responses look the same (there are no named parameters and the payload is in the body).
- Get the message headers:
headers = info.getHeaders(). - Build a new message with the old headers and new content:
self.helpers.buildHttpMessage(headers, encodedModified).
Finally, if nothing has changed, return the unmodified message.
Decoder in Action
The extension decodes base64. The payload is encrypted so we will see gibberish.
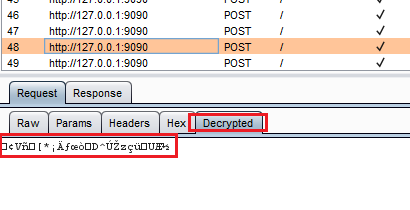 "Decrypted" in HTTP History
It also works in Repeater:
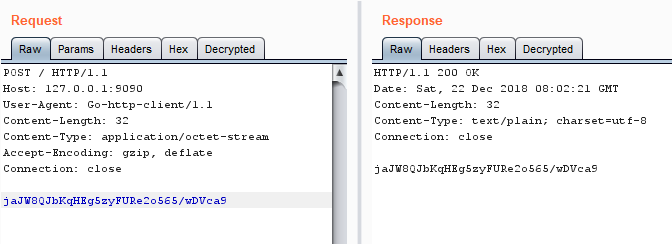 "Decrypted" in Repeater
And if we modify something in the tab, it updates the original message:
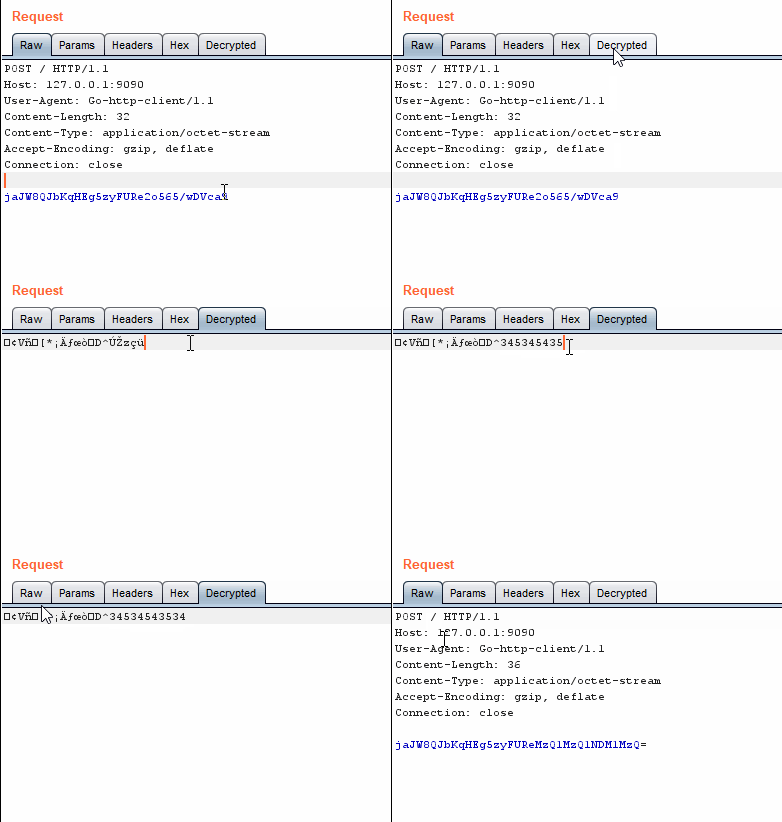 Base64 decoding/encoding in action
Looks good. Let's move on to decryption.
In a typical assessment, I usually make a prototype to decrypt sample messages. In this example, I will create a Python prototype instead of Go because we already have seen the Go code. Look for the file in 1-prototype.
Python does not support AES out of the box. You can use any number of libraries out there but most of them seem to be based on OpenSSL or some other C library. This is key, more about this later.
In the last blog, post I used PyCrypto. A visitor mentioned that I should be using an updated library. While this is a fair suggestion, it does not fix the main issue. I should not have to install a 3rd party library to get something as fundamental as AES support. I am going to use Cryptography.io. We can install it with pip w/o hassle which is nice.
If you are interested in how AES-CFB and its different segment sizes work, please read:
The Python prototype is very similar to what I created in the post linked above.
 Encryption and decryption using the Python prototype
Our prototype works and it's time to convert it to a Burp extension. You convert the code to a Burp extension and suddenly your code doesn't work. Burp says it cannot find cryptography. Why?
Most libraries that depend on OpenSSL or C extensions are not supported in Jython (think of it as being dependent on cgo). For example, cryptography is based on CFFI according to this Github issue. PyCrypto has a similar problem.
While dealing with this problem, I learned a couple of tricks. I learned the first one from Burp extensions that depend on external executables/programs. We will execute our prototype from inside Burp and pass the payloads to it via the command line. Think of it as mini-CGI (CGI == Common Gateway Interface). For a very similar example, please see the following links:
- https://github.com/externalist/aes-encrypt-decrypt-burp-extender-plugin-example
- https://externalist.blogspot.com/2015/11/decrypting-modifying-encrypted-web-data.html
Look for the files in the 2-external directory.
library.py
I have added three new functions to the library:
# runExternal executes an external python script with two arguments and returns the output
def runExternal(script, arg1, arg2):
    proc = Popen(["python", script, arg1, arg2], stdout=PIPE, stderr=PIPE)
    output = proc.stdout.read()
    proc.stdout.close()
    err = proc.stderr.read()
    proc.stderr.close()
    sys.stdout.write(err)
    return output

# encrypt uses the external prototype to encrypt the payload
def encrypt(payload):
    return runExternal("crypto.py", "encrypt", payload.tostring())

# decrypt uses the external prototype to decrypt the payload
def decrypt(payload):
    return runExternal("crypto.py", "decrypt", payload.tostring())
The only complication was passing the payload coming from getBody to Popen as string. getBody returns an array.array of b (signed char). It's converted tostring() before being passed to runExternal and eventually Popen.
You might ask why I have kept the base64 encoding and decoding in crypto.py. It's just easier to pass base64 encoded values to a command line executable. Less chance of special characters screwing something up1.
extension.py
This version of the extension is a bit different. I am only calling encrypt and decrypt from library.py to do the heavy lifting for me.
- In
setMessage:decryptedBody = decrypt(body) In
getMessage:encryptedModified = encrypt(modified)def setMessage(self, content, isRequest): if content is None: # clear our display self._txtInput.setText(None) self._txtInput.setEditable(False) # Parsia: if tab has content else: # get the body body = getBody(content, isRequest, self.helpers) # decrypt does the base64 decoding so the extension does not have to decryptedBody = decrypt(body) # set the body as text of message box self._txtInput.setText(decryptedBody) # this keeps the message box edit value to whatever it was self._txtInput.setEditable(self._editable) # remember the displayed content self._currentMessage = content def getMessage(self): # determine whether the user modified the data if self._txtInput.isTextModified(): # Parsia: if text has changed, encode it and make it the new body of the message modified = self._txtInput.getText() # encrypt and decrypt do the base64 transformation encryptedModified = encrypt(modified) # Parsia: create a new message with the new body and return that info = getInfo(self._currentMessage, True, self.helpers) headers = info.getHeaders() return self.helpers.buildHttpMessage(headers, encryptedModified) else: # Parsia: if nothing is modified, return the current message so nothing gets updated return self._currentMessage
crypto.py in Action
If you already have more than a dozen request in history, loading the extension takes a few seconds. Burp calling an external Python script for every request twice. We could probably speed things up a bit by using a native code executable.
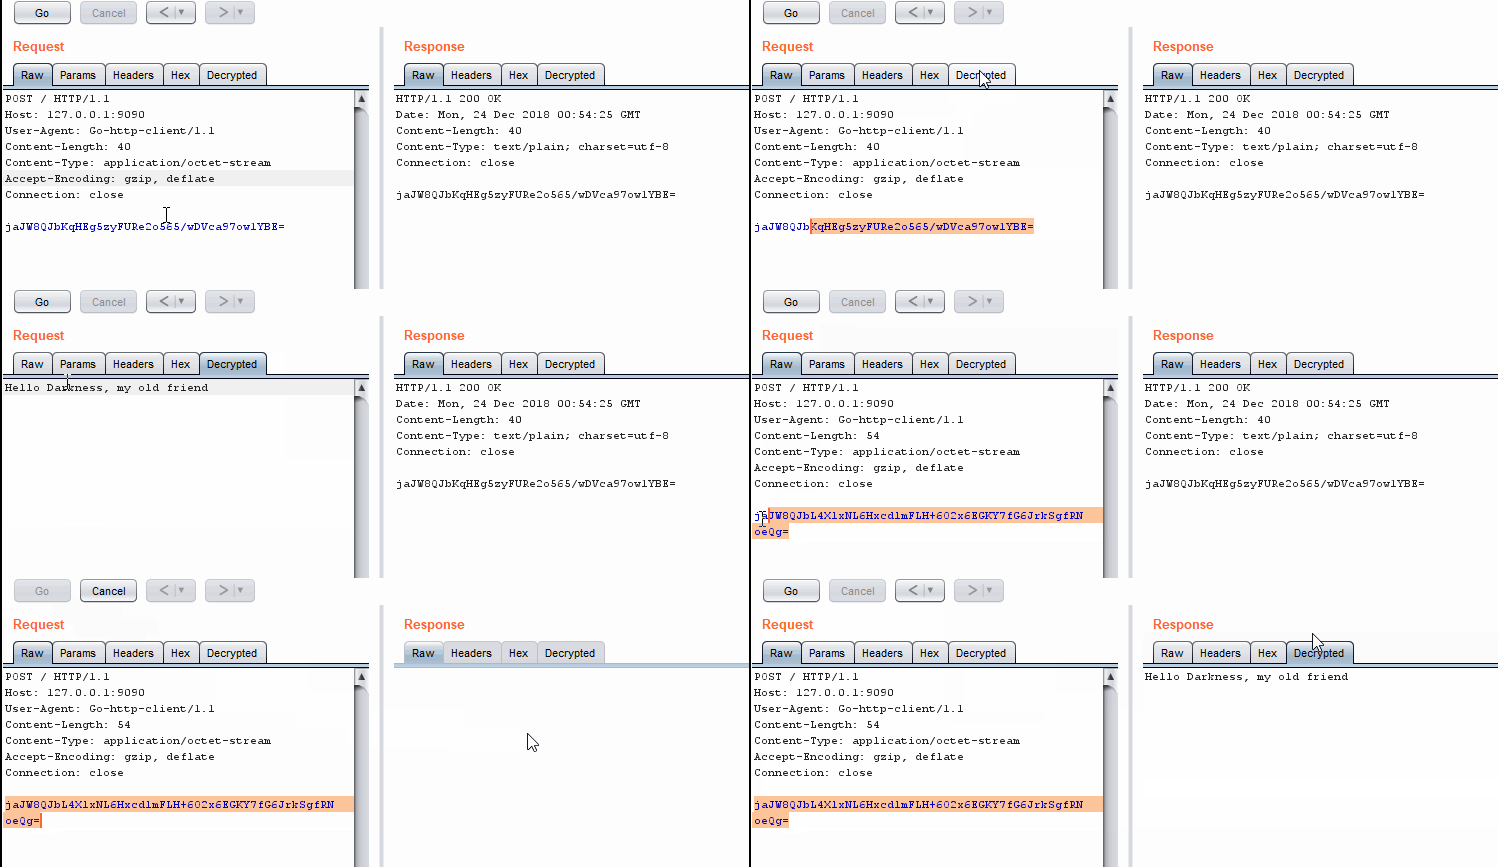 Encrypting and decrypting in Repeater
When Should We Use The External Program Technique?
To be honest, any time you feel like it. I have used it in the following circumstances:
- The extension relies on an external source. E.g., remote web service or local file/database.
- It's easier to use an external executable. E.g., someone has already created a utility that does the decoding/decrypting/parsing. Deserialization is a good example.
- You just want to get the job done and use your prototype. This is especially true in my day job, which is consulting. The Burp extension is a means and not the end. Having a nice extension in the report is nice but findings are more important.
The previous technique was slow. We can do better using Jython. Most people write encryption-related extensions in Java. However, we can just import and use Java classes that are available to any Java extension. Look for files in the 3-jython directory.
I used Chapter 10: Jython and Java Integration learn about Jython and Java:
library.py
I am adding a few new functions to the library. These do encryption/decryption using Java classes.
Base64
Base64 encoding and decoding was added in Java 8 in java.util.Base64:
from java.util import Base64

encoded = Base64.getEncoder().encode(text)
decoded = Base64.getDecoder().decode(encoded)
AES/CFB/NOPADDING
To perform encryption/decryption we need to create the following objects:
- java.crypto.Cipher creates the cipher (e.g. AES)
- javax.crypto.spec.IvParameterSpec creates the Initialization Vector (IV)
- javax.crypto.spec.SecretKeySpec creates the key
| |
extension.py
In this version of the extension, I just swapped the old encrypt/decrypt functions with the functions.
This version is much faster. mild shock
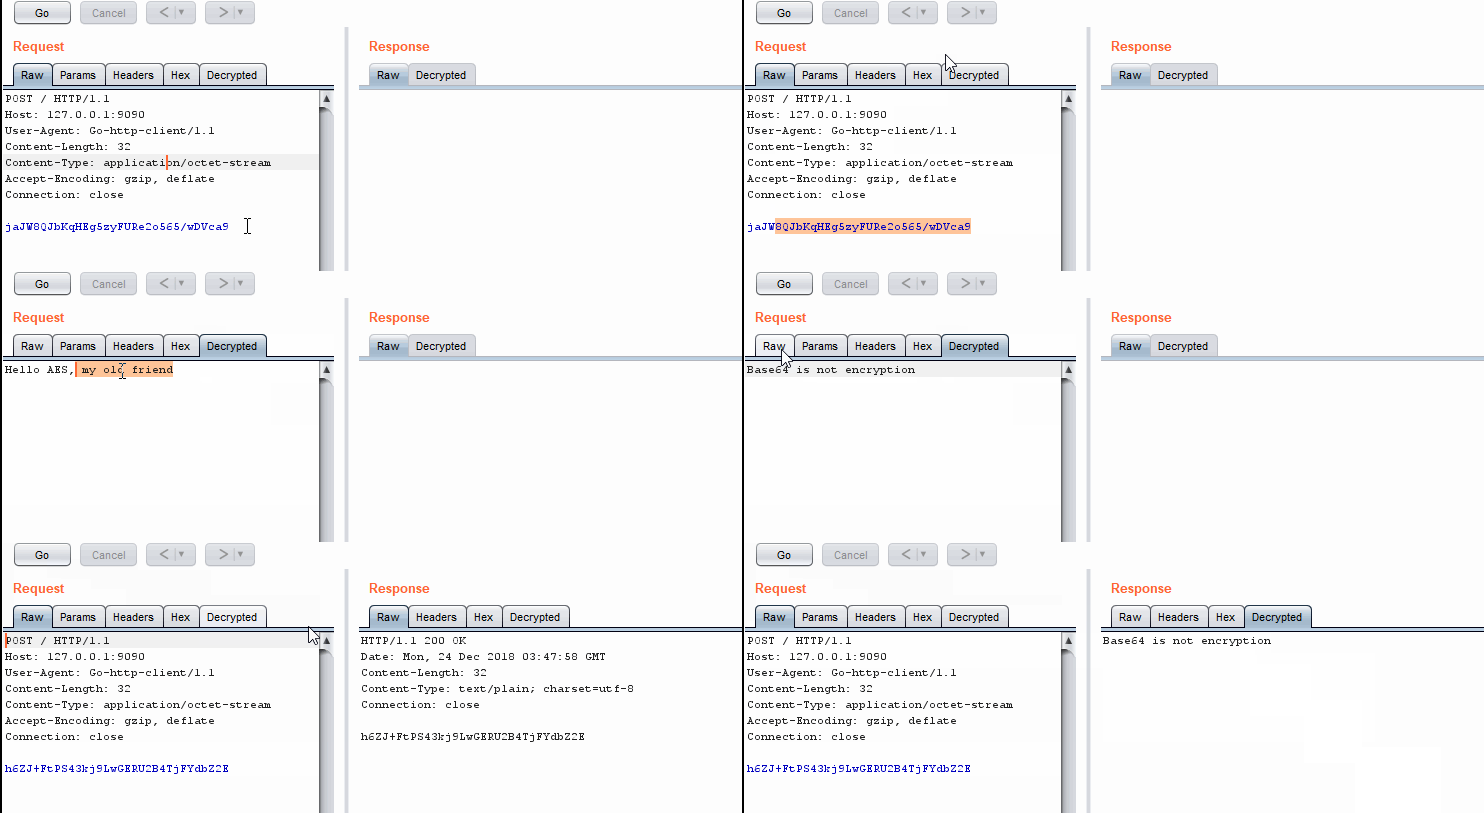 Jython version is much faster
Next time you do not have to write your extension in Java. You're welcome.
- You can use external programs/utilities/services in your Burp extension but you will sacrifice some speed.
- Burp extensions allow you to test encrypted/encoded traffic like a "normal" web service.
- You can use all available Java classes on top of Jython's standard library.
- Libraries/Modules do not have to be in the Extender module path, they can be stored beside the original extension.
- If your extension involves cryptography, you do not have to write it in Java.
如有侵权请联系:admin#unsafe.sh