一、目标
我们之前介绍过 IOS 某电商App签名算法解析(二) Frida RPC调用 和 IOS Theos Tweak 之 HelloWorld 。 那么他们搭配起来能解决什么问题呢?
在Android联真机签名方案中,我们提到过Frida rpc方案的缺点:
- frida不是很稳定,偶尔会崩溃出退
- frida启动需要连PC (不过这个缺点已经被 Xcube frida脚本持久化 给解决了)
那么在Ios下有没有类似Xposed的东东?
是的,就是 Tweak。
二、步骤
GCDWebServer
GCDWebServer 是一个基于 GCD 的轻量级服务器框架,用于内嵌到 MacOS或者iOS 系统的应用中,提供 HTTP 的服务。
他的代码在这里 https://github.com/swisspol/GCDWebServer
我们先创建一个 Tweak工程
fenfeiNewMac:ldqtweakrpc fenfei$ nic.pl
NIC 2.0 - New Instance Creator
------------------------------
  [1.] iphone/activator_event
  [2.] iphone/activator_listener
  [3.] iphone/application_modern
  [4.] iphone/application_swift
  [5.] iphone/cydget
  [6.] iphone/flipswitch_switch
  [7.] iphone/framework
  [8.] iphone/library
  [9.] iphone/notification_center_widget
  [10.] iphone/notification_center_widget-7up
  [11.] iphone/preference_bundle_modern
  [12.] iphone/theme
  [13.] iphone/tool
  [14.] iphone/tool_swift
  [15.] iphone/tweak
  [16.] iphone/tweak_with_simple_preferences
  [17.] iphone/xpc_service
Choose a Template (required): 15
Project Name (required): ldqsign
Package Name [com.yourcompany.ldqsign]:
Author/Maintainer Name [fenfei]: fenfei
[iphone/tweak] MobileSubstrate Bundle filter [com.apple.springboard]: XX4iPhone
Instantiating iphone/tweak in ldqsign/...
Done.
然后把github上下载的代码复制到工程目录

编辑下MakeFile文件,把GCDWebServer的代码加进去
ARCHS = armv7 arm64
TARGET := iphone:clang:latest:7.0
INSTALL_TARGET_PROCESSES = JD4iPhone

ADDITIONAL_OBJCFLAGS = -fobjc-arc
include $(THEOS)/makefiles/common.mk

TWEAK_NAME = ldqsign

ldqsign_FILES = Tweak.x $(wildcard ./GCDWebServer/Core/*.m) $(wildcard ./GCDWebServer/Requests/*.m) $(wildcard ./GCDWebServer/Responses/*.m)
ldqsign_CFLAGS += -I./GCDWebServer/Core -I./GCDWebServer/Requests -I./GCDWebServer/Responses
ldqsign_LDFLAGS += -lz.1.2.5 -lc++ -framework CFNetwork -framework Security -framework MobileCoreServices -weak_framework UIKit

include $(THEOS_MAKE_PATH)/tweak.mk
然后编辑 Tweak.x 文件,创建一个基本框架,启动web服务
void RunWebServer()
{
    NSLog(@"zytc: ======================== Run MyServerXX");
    GCDWebServer* _webServer;
    _webServer = [[GCDWebServer alloc] init];

    NSLog(@"zytc: ======================== Run MyServerXX 2");
    // Add a handler to respond to GET requests on any URL
    [_webServer addDefaultHandlerForMethod:@"GET"
                              requestClass:[GCDWebServerRequest class]
                              processBlock:^GCDWebServerResponse *(GCDWebServerRequest* request) {

                                  return [GCDWebServerDataResponse responseWithHTML:@"<html><body><p>Hello World</p></body></html>"];

                              }];

    // Start server on port 8181
    [_webServer startWithPort:8181 bonjourName:nil];
    NSLog(@"zytc: xx Visit %@ in your web browser", _webServer.serverURL);

}


%ctor {
        NSLog(@"zytc: xxDev !!!");
        RunWebServer();
        %init(_ungrouped);
}
编译下
我的mac是 10.14.6 Xcode是 11.3.1 编译时会遇到
ld: warning: building for iOS, but linking in .tbd file (/opt/theos/vendor/lib/CydiaSubstrate.framework/CydiaSubstrate.tbd) built for iOS Simulator这时候 把/opt/env/theos/vendor/lib/CydiaSubstrate.framework/CydiaSubstrate.tbd文件用文本打开,删除 两处 archs后面的i386, x86_64,就可以编译成功了。
运行
先启动 控制台
再启动某电商App
从 控制台的消息里面可以看到
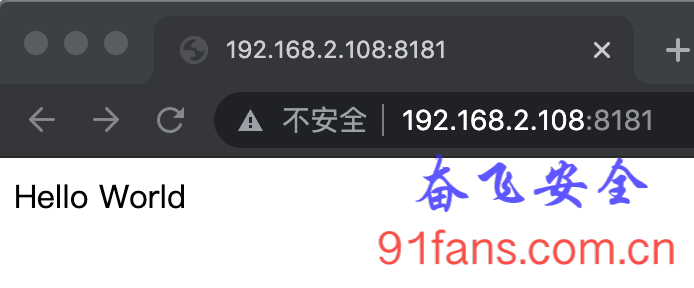
zytc: xx Visit http://192.168.2.108:8181/ in your web browser的日志输出,说明web服务启动成功。从浏览器里面访问下 http://192.168.2.108:8181/

熟悉的HelloWorld出现了,没问题
主动调用 getSignWithDic
先申明要调用的类和函数
@interface XXSignService : NSObject
{

}

+ (id)getSignWithDic:(NSDictionary*)arg1 keys:(NSArray*)arg2;
@end
然后创建一个sign接口来调用他,(正常应该是创建POST接口,把参数post进来,这里为了方便Demo还是用GET)
具体参数分析可以参照 IOS 某电商App签名算法解析(二) Frida RPC调用
    // @"POST"
[_webServer addHandlerForMethod:@"GET"
                           path:@"/sign"
                   requestClass:[GCDWebServerURLEncodedFormRequest class]
                   processBlock:^GCDWebServerResponse *(GCDWebServerRequest* request) {

        // NSString* body = [[(GCDWebServerURLEncodedFormRequest*)request arguments] objectForKey:@"body"];
        // NSString* functionId = [[(GCDWebServerURLEncodedFormRequest*)request arguments] objectForKey:@"functionId"];

        NSString* body = @"{\"api-version\":\"1.1.0\"}";
        NSString* client = @"apple";
        NSString* clientVersion = @"10.0.1";
        NSString* functionId = @"xview2Config";
        NSString* openudid = @"078593ee2fda3d54aae5879cb841b2faa62a4985";

        NSMutableDictionary *dict = [NSMutableDictionary dictionary];
        [dict setObject:body forKey:@"body"];
        [dict setObject:client forKey:@"client"];
        [dict setObject:clientVersion forKey:@"clientVersion"];
        [dict setObject:functionId forKey:@"functionId"];
        [dict setObject:openudid forKey:@"openudid"];

        NSMutableArray * array =[[NSMutableArray alloc] initWithObjects:@"body",@"client",@"clientVersion",@"functionId" ,@"openudid",nil];

        NSString* strRc =  [%c(XXSignService) getSignWithDic: dict keys:array];

        NSLog(@"zytc: xx sign %@",strRc);

        NSString* html = [NSString stringWithFormat:@"{\"rc\":\"0\",\"sign\":\"%@\"}", strRc];
        return [GCDWebServerDataResponse responseWithHTML:html];

        // return [GCDWebServerDataResponse responseWithHTML:@"<html><body><p>error!!!</p></body></html>"];

    }];
好了,继续编译安装下
然后访问一下我们的新接口

完美收工。
三、总结
勿在浮沙筑高台,我们之前介绍的基础知识都是有用的,叠加一下就可以搞定复杂的项目了。
原理都是有相通性的,Frida、xposed、Tweak的开发都可以相互印证。
跨平台的开发,不如原生开发上手快,之前搞Frida的 NSDictionary NSArray等ObjectC对象的构造和使用,搞了老半天,其实ObjectC的代码也就几行而已。

人们总觉得自己生活在骗局中,他们关心的不是真相,他们只是需要一个与他们从前所见不同,而又合情合理的解释。

关注微信公众号,最新技术干货实时推送

文章作者 奋飞
上次更新 2021-07-02
许可协议 奋飞安全原创,转载请注明出处。
