2021-09-20 22:06:12 Author: blog.elcomsoft.com(查看原文) 阅读量:120 收藏

Switching the iPhone into DFU mode is frequently required during the investigation, especially for older devices that are susceptible to checkm8 exploit. For newer devices that are locked with an unknown passcode or disabled one can still learn something about the device through DFU (in particular, the bootloader version, which points to the version of iOS installed on the device). However, switching to DFU requires a sequence of key presses on the device with precise timings. If the device is damaged and one or more keys are not working correctly, entering DFU may be difficult or impossible. In this guide, we offer an alternative.
Why you may need DFU mode
Putting the device in DFU mode is required when performing checkm8 or checkra1n extraction of an iPhone 5 or newer, up to and including the iPhone X, or using limera1n for the same purpose. The checkm8 exploit and the checkra1n jailbreak are based on bootloader-level vulnerabilities, and must be installed through DFU. You also need DFU when performing passcode unlocks (currently, our software supports the iPhone 4, 5 and 5c unlocks only). You can also use DFU for limited “Before First Unlock” (BFU) extractions. Finally, DFU can be used to reset a locked phone (although you’ll be facing iCloud lock when setting it up, and all the data will be irreversibly gone). For all these purposes, use Elcomsoft iOS Forensic Toolkit.
When DFU fails
The regular way for entering DFU requires a sequence of key presses with precise timings. The sequences may differ across devices. We compiled all known combinations into the DFU Mode Cheat Sheet published in our blog.
Notably, the DFU sequence involves pressing and holding several physical keys on the device for precise amounts of time. If one or more of these keys malfunctions (even an oxidized contact can break the timings), the DFU mode may fail after multiple attempts. Since you cannot force older iOS devices into DFU via software commands, you’ll have to disassemble the device and short some pins to trigger DFU. The procedure is described below.
There are three things that cause the BootROM to enter DFU mode on iOS.
- A sequence of button presses
- Failure to load LLB
- Grounding the DFU pin on mainboard
We will jump straight to the third option, since the first option is well known and the second one is not viable for most forensic use cases.
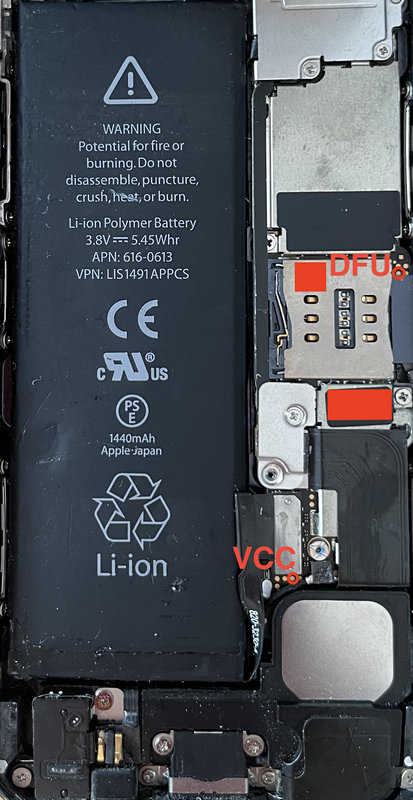
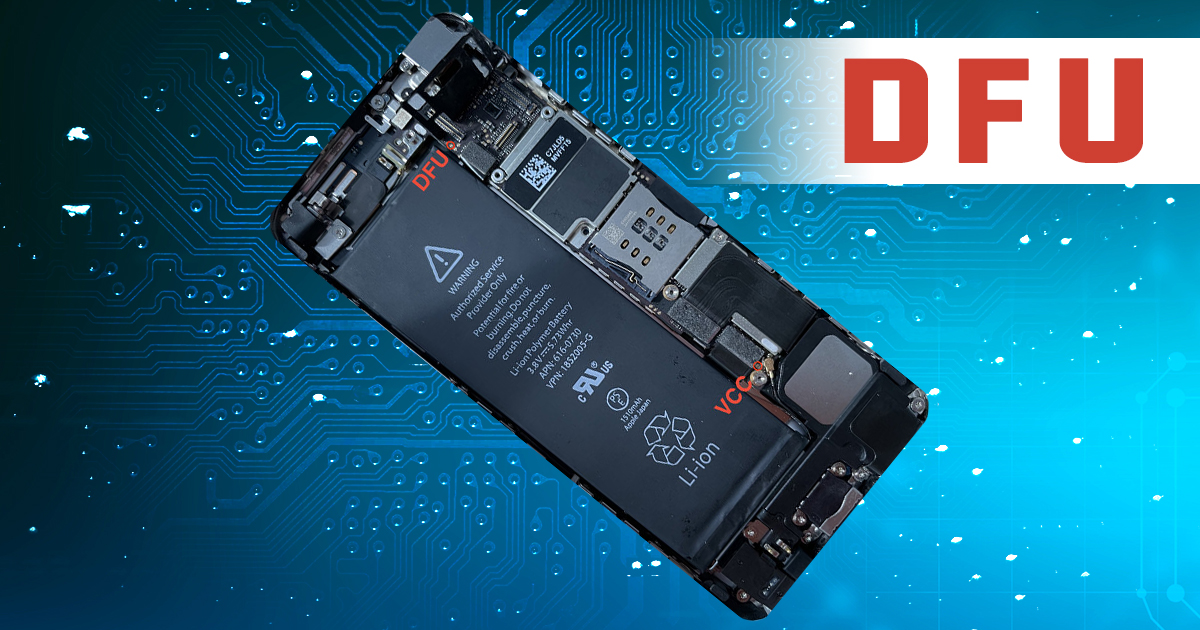
For diagnostic purposes the mainboard of iOS devices has some test pins exposed. One of them is a pin called FORCE_DFU. At boot the pin is probed by the bootloader and if a voltage of 3.3V is applied, DFU mode is entered. We will explain the procedure in detail using the iPhone5 as an example device.
We will use a wire to connect to PINs on the mainboard in order to enter DFU mode. For other devices the procedure only differs in which particular pin need to be connected with the wire.
You will need the following tools:
- An iPhone device (an iPhone5 in this example)
- Screwdrivers and tools to disassemble the device
- A wire
- A USB cable
I suggest to have someone help you. If you need to perform the procedure alone, the following tools are also recommended:
- A standard charging adapter plugged into a power outlet
- A power outlet with an on/off switch
Instructions:
- Make sure the device is sufficiently charged, then power it off.
- Disassemble the device so that you can access the mainboard. Note: It may be required to remove some metal shielding. We recommend to look at iFixit disassemblies.
- Connect the USB cable to the device. (Do not plug the other side in yet!)
- Use the wire to connect the following PINs. Then, while holding the wire to the PINs, have a second person plug in the other end of the USB cable to the computer. Hold the wire connected for a few seconds.
- The screen should stay black and the computer should recognise the device in DFU mode.
If you are performing the procedure alone:
4.1) Plug the other end of the USB cable to the charger.
4.2) Plug the charger to the power outlet with a switch. (Do not turn on the switch yet!)
4.3) Connect the two PINs with the wire.
4.4) With your foot enable the power switch, so that the device is charging now. Hold the wire to the test PINs with your hands for a few seconds.
5.1) The screen should stay black. Note: If the device boots normally, just turn it off and try again.
5.2) If the screen stays black, you can release the wire.
Unplug the USB cable from the charger and plug it into the computer.
The computer should recognize the device in DFU mode.
These pins need to be connected with the wire for the iPhone5.
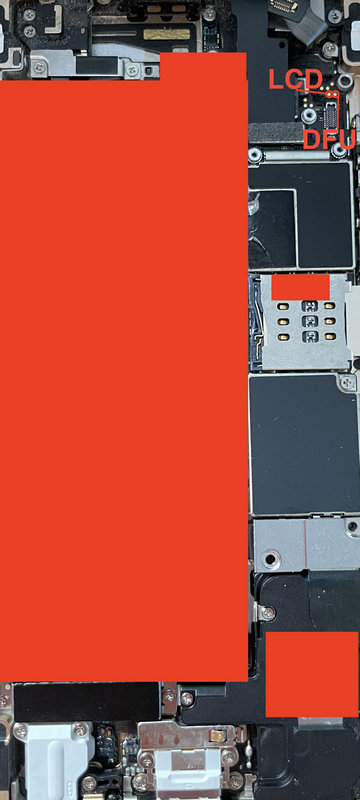
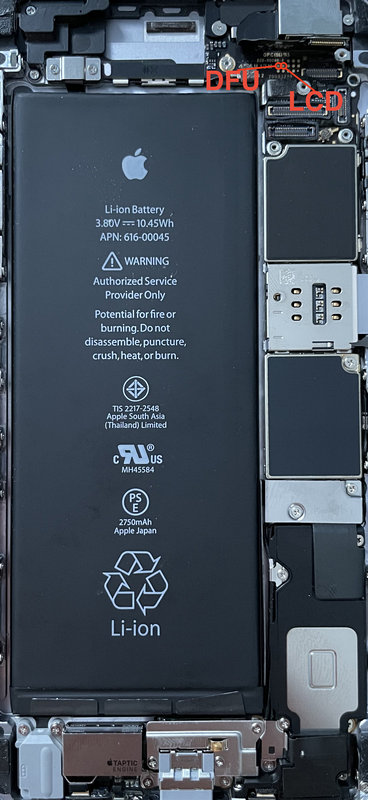
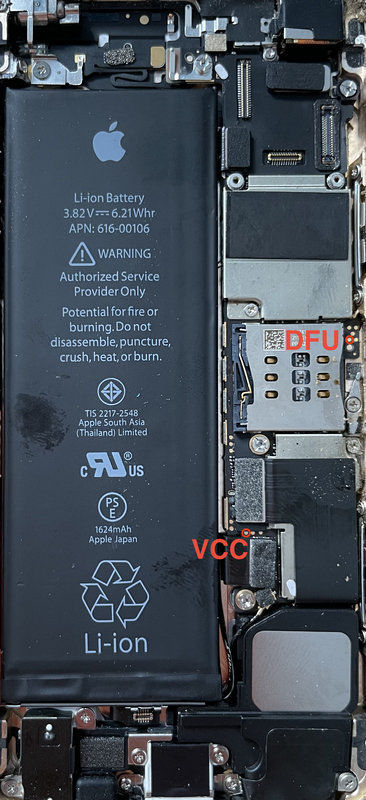
For other iPhone models, the locations of the DFU pins are marked below.
iPhone 5c
iPhone 5s
iPhone 6
iPhone 6s Plus
iPhone SE (1st generation)
Conclusion
In iOS, DFU mode is akin to EDL (Emergency Download) in Android. Forensic specialists can use both modes for similar purposes: performing bootloader-level extractions and limited DFU analysis if the device is locked. Apple has a relatively small number of models, which allowed us to complete this research.
REFERENCES:
![]()
Elcomsoft iOS Forensic Toolkit
Extract critical evidence from Apple iOS devices in real time. Gain access to phone secrets including passwords and encryption keys, and decrypt the file system image with or without the original passcode. Physical and logical acquisition options for all 64-bit devices running all versions of iOS.
Elcomsoft iOS Forensic Toolkit official web page & downloads »
如有侵权请联系:admin#unsafe.sh

