2021-10-15 07:43:33 Author: derflounder.wordpress.com(查看原文) 阅读量:61 收藏
I’ve previously posted guides on how to manually package SAP GUI:
- Building an SAP GUI installer for macOS
- Packaging SAP GUI for macOS with Java 11 support
- Packaging a SAP GUI installer application for macOS
However it’s also possible to automate creating a SAP GUI installer package using AutoPkg. To do this, you’ll need the following:
- AutoPkg
- The SAP GUI recipes from the rtrouton-recipes repo
- The latest SAP GUI installer application’s disk image
- A SAP GUI templates.jar file (optional)
For more details, please see below the jump.
The AutoPkg recipes I’ve written will need the following information provided:
- SAP GUI’s numeric information
- SAP GUI’s alphanumeric information
- SAP GUI’s application bundle identifier information
None of this information is available from the installer application, so you’ll need to provide it to AutoPkg using a com.sapgui.identifier.plist file which will be included along with the latest SAP GUI installer application’s disk image. Please see below for how to gather this information.
Preparing SAP GUI for AutoPkg
1. Copy the latest SAP GUI installer application’s disk image to a test Mac or virtual machine.
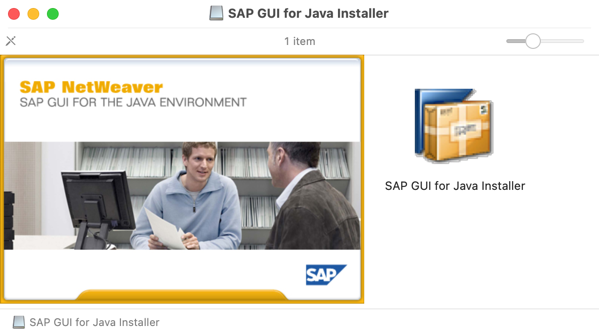
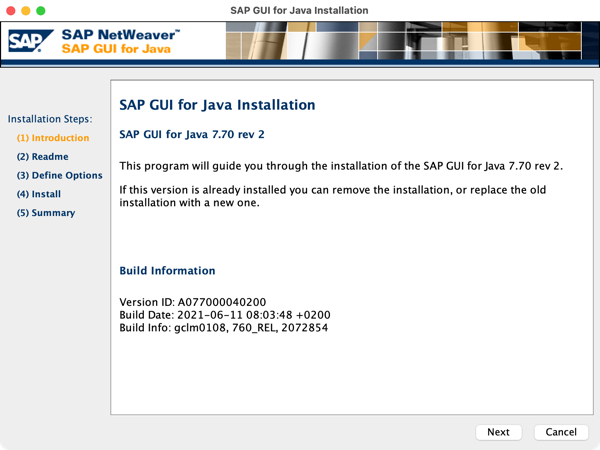
2. Mount the disk image and launch the SAP GUI for Java Installer installer application on the test Mac or virtual machine.
3. Follow the prompts to install.


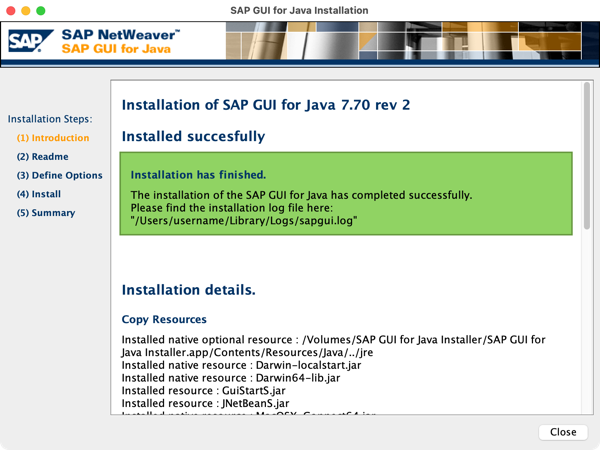
4. Once installed, run the following command to get SAP GUI’s alphanumeric version.
defaults read "/Applications/SAP Clients/SAPGUI $version/SAPGUI $version.app/Contents/Info.plist" NSHumanReadableCopyright | awk '{print $2$3$4}'
For example, if this is SAPGUI 7.70rev2, use the following command:
defaults read "/Applications/SAP Clients/SAPGUI 7.70rev2/SAPGUI 7.70rev2.app/Contents/Info.plist" NSHumanReadableCopyright| awk '{print $2$3$4}'
![]()
5. Once you have the alphanumeric version, run the following command to get SAP GUI’s numeric version.
defaults read "/Applications/SAP Clients/SAPGUI $version/SAPGUI $version.app/Contents/Info.plist" CFBundleShortVersionString
For example, if this is SAPGUI 7.70rev2, use the following command:
defaults read "/Applications/SAP Clients/SAPGUI 7.70rev2/SAPGUI 7.70rev2.app/Contents/Info.plist" CFBundleShortVersionString

6. Once you have both versions, run the following command to get SAP GUI’s bundle identifier:
defaults read "/Applications/SAP Clients/SAPGUI $version/SAPGUI $version.app/Contents/Info.plist" CFBundleIdentifier
For example, if this is SAPGUI 7.70rev2, use the following command:
defaults read "/Applications/SAP Clients/SAPGUI 7.70rev2/SAPGUI 7.70rev2.app/Contents/Info.plist" CFBundleIdentifier

7. Open Terminal and run the following command to create a com.sapgui.identifier.plist file with the alphanumeric version information for SAP GUI:
defaults write /path/to/com.sapgui.identifier AlphanumericVersionString version_info_goes_here
For example, if the SAP GUI alphanumeric version is 7.70rev2, run the following command to create a com.sapgui.identifier.plist file on the Desktop:
defaults write $HOME/Desktop/com.sapgui.identifier AlphanumericVersionString 7.70rev2

8. Run the following command to add the numeric version information for SAP GUI to the com.sapgui.identifier.plist file:
defaults write /path/to/com.sapgui.identifier CFBundleShortVersionString version_info_goes_here
For example, if the SAP GUI numeric version is 770.4.200, run the following command
defaults write $HOME/Desktop/com.sapgui.identifier CFBundleShortVersionString 770.4.200

9. Run the following command to add the bundle identifier information for SAP GUI to the com.sapgui.identifier.plist file:
defaults write /path/to/com.sapgui.identifier CFBundleIdentifier bundle_identifier_info_goes_here
For example, if the SAP GUI bundle identifier is com.sap.platin, run the following command
defaults write $HOME/Desktop/com.sapgui.identifier CFBundleIdentifier com.sap.platin

10. Once the com.sapgui.identifier.plist file is created and populated with the version and bundle identifier information, copy it to a convenient location along with the latest SAP GUI installer application’s disk image.
11. If you’re planning to include a templates.jar file with the SAP GUI installer, copy the templates.jar file to the same location.

12. Create a .zip file of the following files:
- corp.sap.sapgui.identifier.plist
- Latest SAP GUI installer application’s disk image
- templates.jar (if applicable)
For this example, I’m going to use the following filename for the .zip file:
latestsapgui.zip
This .zip file will be what’s used by AutoPkg to create the SAP GUI installer package.

Using the AutoPkg recipes
To accomodate the fact that some folks will have a templates.jar file which they want to include and some folks won’t, I’ve written two sets of .pkg recipes:
- SAPGUIWithTemplate.pkg – Use when you’re using a templates.jar file
- SAPGUIWithoutTemplate.pkg – Use when you’re not using a templates.jar file
Both sets of recipes share a common SAPGUI.download recipe.
SAP GUI does not have a publicly accessible download link, so there are two options available for adding the .zip file you created earlier to your AutoPkg workflow:
1. Posting the .zip file to a web server for download.
You can upload the .zip file to a web server or other online storage location which AutoPkg can download files from. This is my preferred method because you can set the download URL in an AutoPkg override. Once that’s done, you just need to replace the .zip file on the web server when a new version of SAP GUI comes out. The next time it’s run, AutoPkg will download the new .zip file and handle the rest automatically.
2. Using AutoPkg’s -p option.
AutoPkg includes an -p option for specifying a file for input, in place of downloading from a URL.
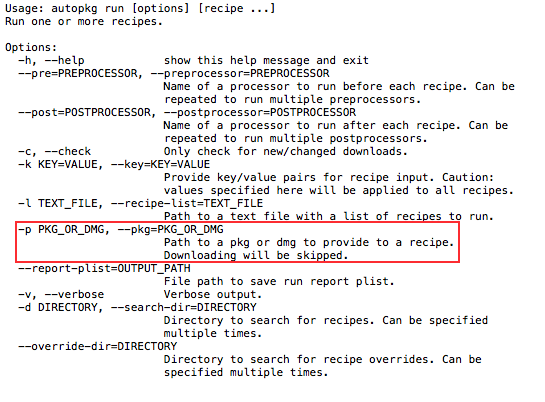
For example, if you wanted to run the SAPGUIWithTemplate.pkg recipe and use a .zip file stored locally on your Mac, you would use the following command to run an AutoPkg override of the SAPGUIWithTemplate.pkg recipe and specify a .zip file named latestsapgui.zip:
autopkg run local.pkg.SAPGUIWithTemplate -p /path/to/latestsapgui.zip
Once you’ve sorted out how you’re adding the .zip file you created to your AutoPkg workflow, you should be able to use these recipes to create SAP GUI installer packages for use in your own environment.
For those who want to use code signing to sign the SAP GUI installers created by AutoPkg, I’ve also created the following .sign recipes:
SAPGUIWithTemplate.sign – Use when you’re using a templates.jar file
SAPGUIWithoutTemplate.sign – Use when you’re not using a templates.jar file
Each .sign recipe uses the appropriate .pkg recipe as a parent recipe.
如有侵权请联系:admin#unsafe.sh